⚙️ 실습 환경 구성
1. Kind K8s 클러스터 생성
1
2
3
4
5
6
7
8
9
10
11
12
13
14
15
16
17
18
19
20
21
22
23
24
25
26
27
28
29
| kind create cluster --name myk8s --image kindest/node:v1.32.8 --config - <<EOF
kind: Cluster
apiVersion: kind.x-k8s.io/v1alpha4
nodes:
- role: control-plane
extraPortMappings:
- containerPort: 30000 # Vault UI
hostPort: 30000
- containerPort: 30001 # Jenkins UI
hostPort: 30001
- containerPort: 30002 # DB 배포(PostgreSQL 또는 MySQL)
hostPort: 30002
- containerPort: 30003 # # Sample App
hostPort: 30003
EOF
Creating cluster "myk8s" ...
✓ Ensuring node image (kindest/node:v1.32.8) 🖼
✓ Preparing nodes 📦
✓ Writing configuration 📜
✓ Starting control-plane 🕹️
✓ Installing CNI 🔌
✓ Installing StorageClass 💾
Set kubectl context to "kind-myk8s"
You can now use your cluster with:
kubectl cluster-info --context kind-myk8s
Have a question, bug, or feature request? Let us know! https://kind.sigs.k8s.io/#community 🙂
|
2. Kubernetes에 Vault 설치 (Helm 사용)
(1) Vault 네임스페이스 생성
1
2
3
| kubectl create namespace vault
namespace/vault created
|
(2) HashiCorp Helm Repo 등록 및 차트 확인
1
2
3
| helm repo add hashicorp https://helm.releases.hashicorp.com
"hashicorp" has been added to your repositories
|
1
2
3
4
5
6
| helm search repo hashicorp/vault
NAME CHART VERSION APP VERSION DESCRIPTION
hashicorp/vault 0.31.0 1.20.4 Official HashiCorp Vault Chart
hashicorp/vault-secrets-gateway 0.0.2 0.1.0 A Helm chart for Kubernetes
hashicorp/vault-secrets-operator 1.0.1 1.0.1 Official Vault Secrets Operator Chart
|
(3) Vault Helm values 정의 (Dev 모드, NodePort UI)
1
2
3
4
5
6
7
8
9
10
11
12
13
14
15
16
17
18
19
20
21
22
23
24
25
26
27
| # vault-values-dev.yaml 생성
cat <<EOF > vault-values-dev.yaml
global:
enabled: true
tlsDisable: true
injector:
enabled: true
# Sidecar Injection을 위해 필요한 설정
server:
dev:
enabled: true
devRootToken: "root" # 학습 편의를 위해 Root Token을 'root'로 고정
# 데이터 영구 저장이 필요 없으므로 비활성화 (Dev모드는 메모리 사용)
dataStorage:
enabled: false
# UI 활성화 및 NodePort 노출
service:
type: "NodePort"
nodePort: 30000
ui:
enabled: true
EOF
|
- Dev 모드로 동작하도록 설정하여 학습 편의성 우선
- Root Token을
root로 고정해서 CLI와 UI에서 동일하게 사용 가능하게 구성함 - 스토리지는 in-memory 사용으로 간단히 실습 환경만 구성함
- Vault UI를 NodePort 30000으로 노출하여 로컬 브라우저에서 접근 가능하게 설정함
(4) Helm으로 Vault 배포
1
2
3
4
5
6
7
8
9
10
11
12
13
14
15
16
17
18
19
20
| helm upgrade vault hashicorp/vault -n vault -f vault-values-dev.yaml --install
Release "vault" does not exist. Installing it now.
NAME: vault
LAST DEPLOYED: Sat Nov 29 16:09:12 2025
NAMESPACE: vault
STATUS: deployed
REVISION: 1
NOTES:
Thank you for installing HashiCorp Vault!
Now that you have deployed Vault, you should look over the docs on using
Vault with Kubernetes available here:
https://developer.hashicorp.com/vault/docs
Your release is named vault. To learn more about the release, try:
$ helm status vault
$ helm get manifest vault
|
(5) Vault 네임스페이스로 컨텍스트 전환 및 배포 상태 확인
1
2
3
| kubens vault
✔ Active namespace is "vault"
|
1
2
3
4
5
6
7
8
9
10
| kubectl get pods,svc,pvc
NAME READY STATUS RESTARTS AGE
pod/vault-0 1/1 Running 0 41s
pod/vault-agent-injector-556c5dd8fb-7qbjt 1/1 Running 0 41s
NAME TYPE CLUSTER-IP EXTERNAL-IP PORT(S) AGE
service/vault NodePort 10.96.194.160 <none> 8200:30000/TCP,8201:32116/TCP 41s
service/vault-agent-injector-svc ClusterIP 10.96.32.214 <none> 443/TCP 41s
service/vault-internal ClusterIP None <none> 8200/TCP,8201/TCP 41s
|
3. Vault 상태 확인 및 초기화 상태 점검
1
2
3
4
5
6
7
8
9
10
11
12
13
14
15
| kubectl exec -ti vault-0 -- vault status
Key Value
--- -----
Seal Type shamir
Initialized true
Sealed false
Total Shares 1
Threshold 1
Version 1.20.4
Build Date 2025-09-23T13:22:38Z
Storage Type inmem
Cluster Name vault-cluster-1597f923
Cluster ID ead5b677-accb-a319-bc9b-9997309c7712
HA Enabled false
|
4. Arch Linux에서 Vault CLI 설치 및 설정
(1) 필수 패키지 설치
1
| sudo pacman -Syu --needed gnupg curl
|
(2) Vault 설치
1
2
| vault --version
Vault v1.21.0, built 2024-11-29T07:11:16Z (cgo)
|
(3) VAULT_ADDR 환경변수 설정
1
| export VAULT_ADDR='http://localhost:30000'
|
(4) CLI에서 Vault 상태 확인
1
2
3
4
5
6
7
8
9
10
11
12
13
14
15
| vault status
Key Value
--- -----
Seal Type shamir
Initialized true
Sealed false
Total Shares 1
Threshold 1
Version 1.20.4
Build Date 2025-09-23T13:22:38Z
Storage Type inmem
Cluster Name vault-cluster-1597f923
Cluster ID ead5b677-accb-a319-bc9b-9997309c7712
HA Enabled false
|
(5) Root Token 로그인 및 인증 확인
1
2
3
4
5
6
7
8
9
10
11
12
13
14
15
16
| vault login
Token (will be hidden): root
Success! You are now authenticated. The token information displayed below
is already stored in the token helper. You do NOT need to run "vault login"
again. Future Vault requests will automatically use this token.
Key Value
--- -----
token root
token_accessor jCymZER4nmCfHD20cjWgnFhf
token_duration ∞
token_renewable false
token_policies ["root"]
identity_policies []
policies ["root"]
|
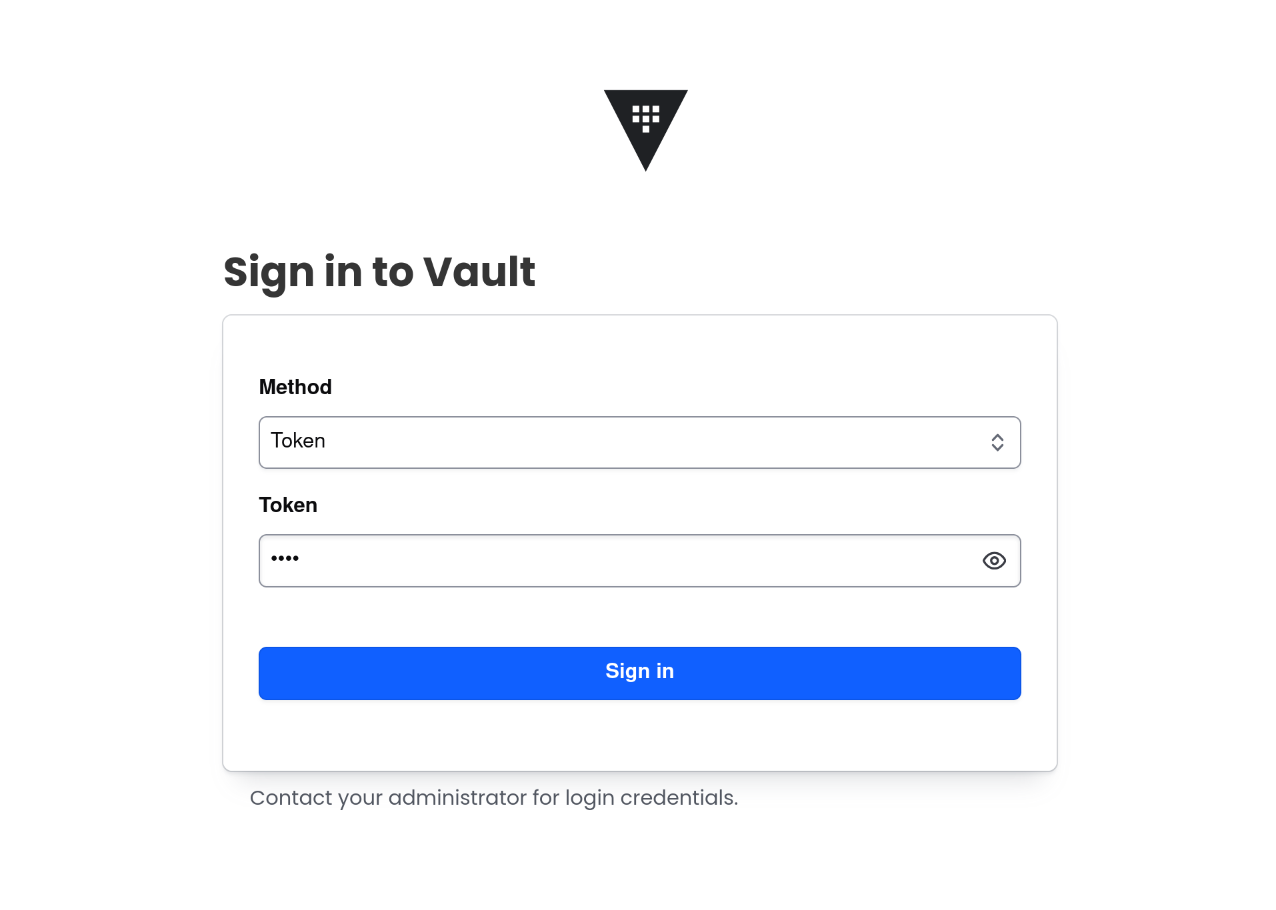
5. Vault UI 접속 확인
1
2
| http://localhost:30000
root
|
🔑 Vault KV 시크릿 엔진으로 정적 시크릿 저장 및 조회
1. KV 시크릿 엔진 상태 확인
1
2
3
4
5
6
7
8
| vault secrets list
Path Type Accessor Description
---- ---- -------- -----------
cubbyhole/ cubbyhole cubbyhole_94020688 per-token private secret storage
identity/ identity identity_d6877608 identity store
secret/ kv kv_050b6113 key/value secret storage
sys/ system system_428d6c50 system endpoints used for control, policy and debugging
|
secret/ 경로에 KV 타입 시크릿 엔진이 이미 활성화되어 있음- 초기 상태에서는
secret/ 아래에 키가 없는 상태임
2. KV 시크릿 엔진에 정적 시크릿 저장
애플리케이션 설정을 위한 샘플 시크릿을 secret/sampleapp/config 경로에 저장함
1
2
3
4
5
6
7
8
9
10
11
12
13
14
15
16
| vault kv put secret/sampleapp/config \
username="demo" \
password="p@ssw0rd"
# 결과
======== Secret Path ========
secret/data/sampleapp/config
======= Metadata =======
Key Value
--- -----
created_time 2025-11-29T07:15:22.793730231Z
custom_metadata <nil>
deletion_time n/a
destroyed false
version 1
|
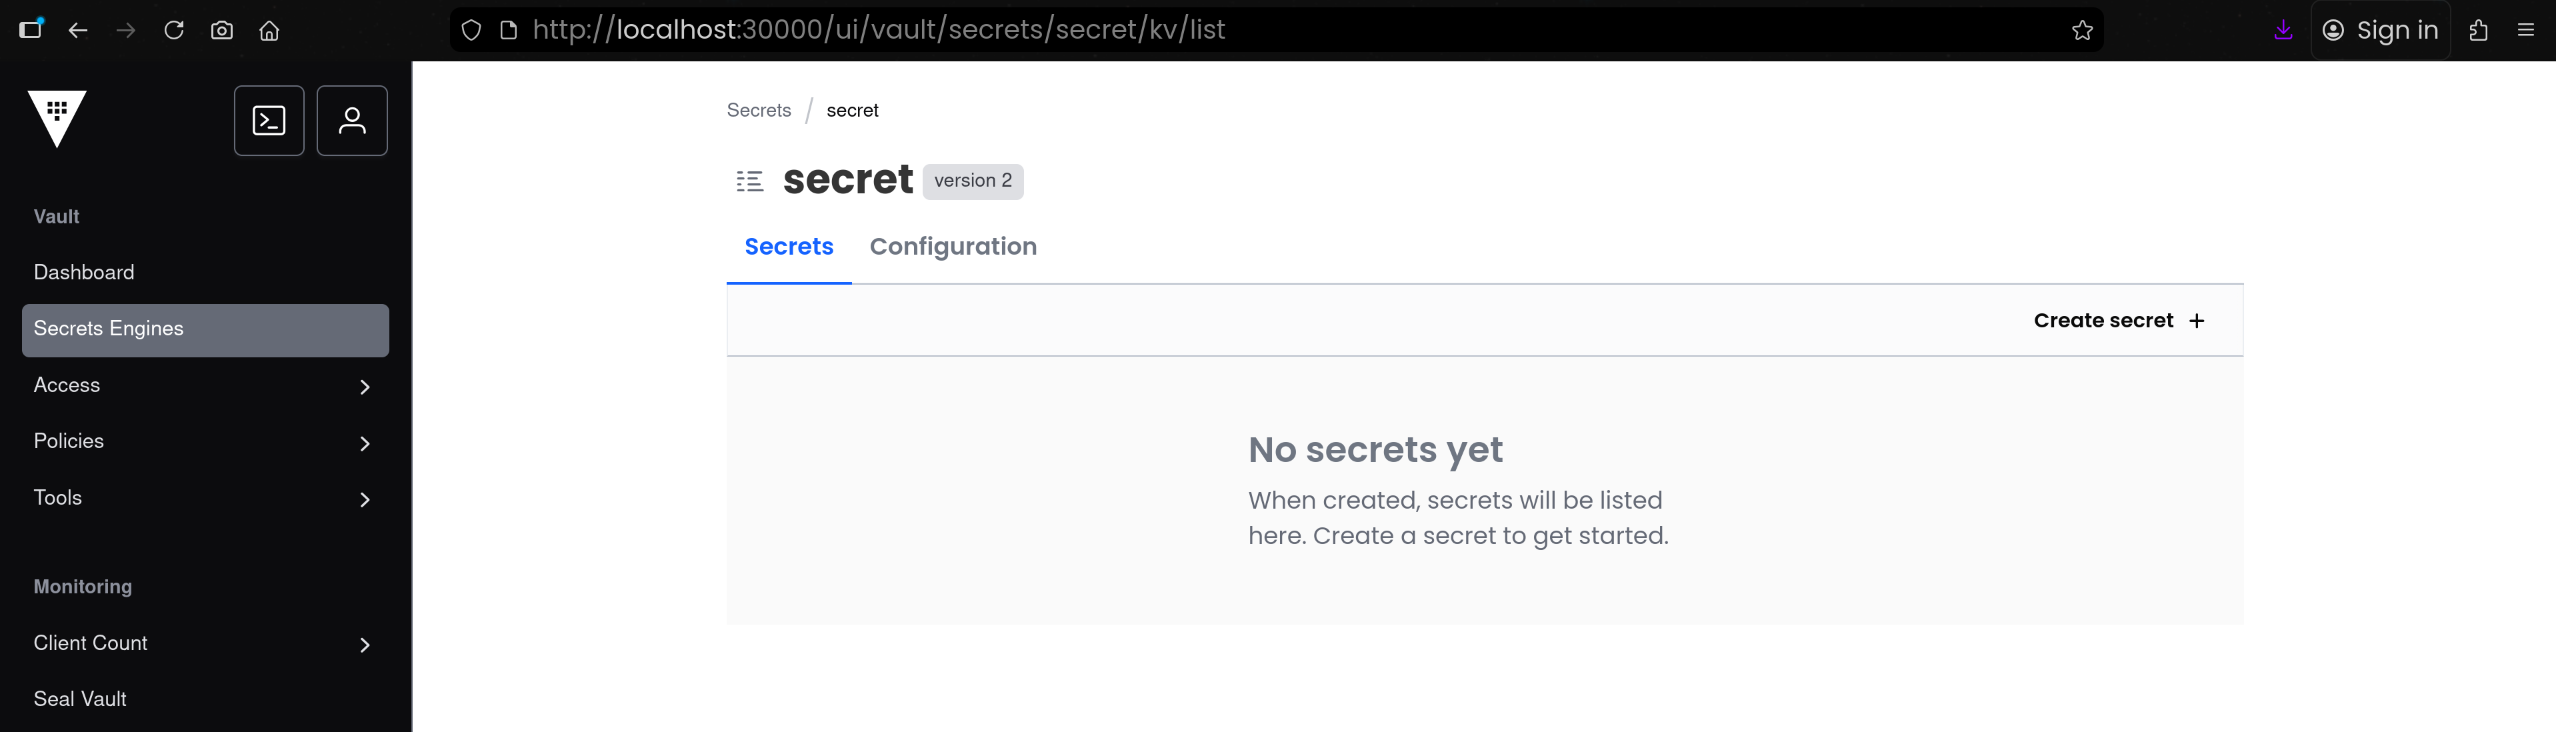
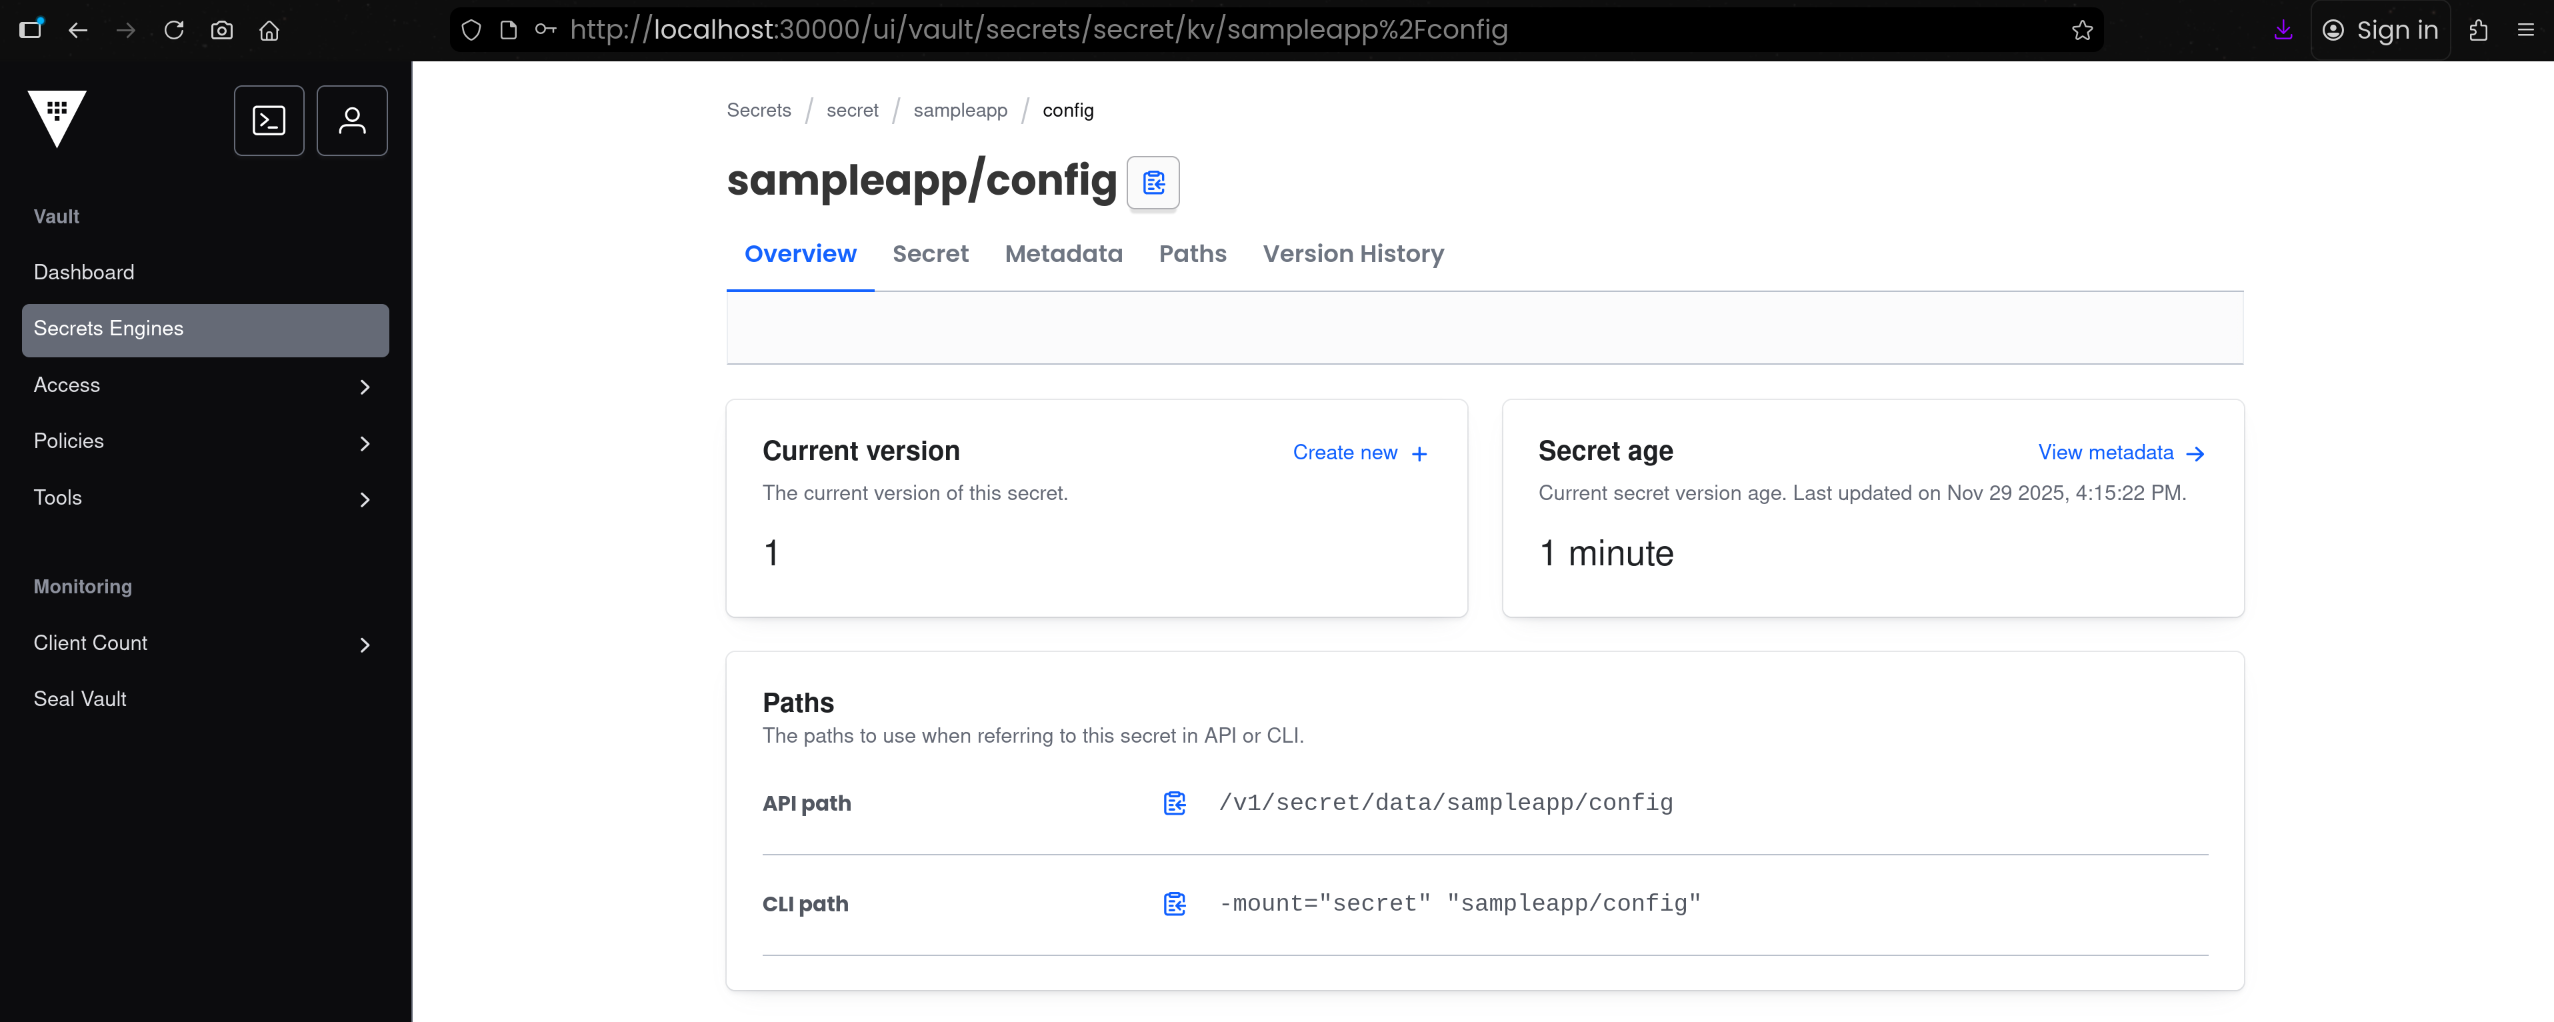
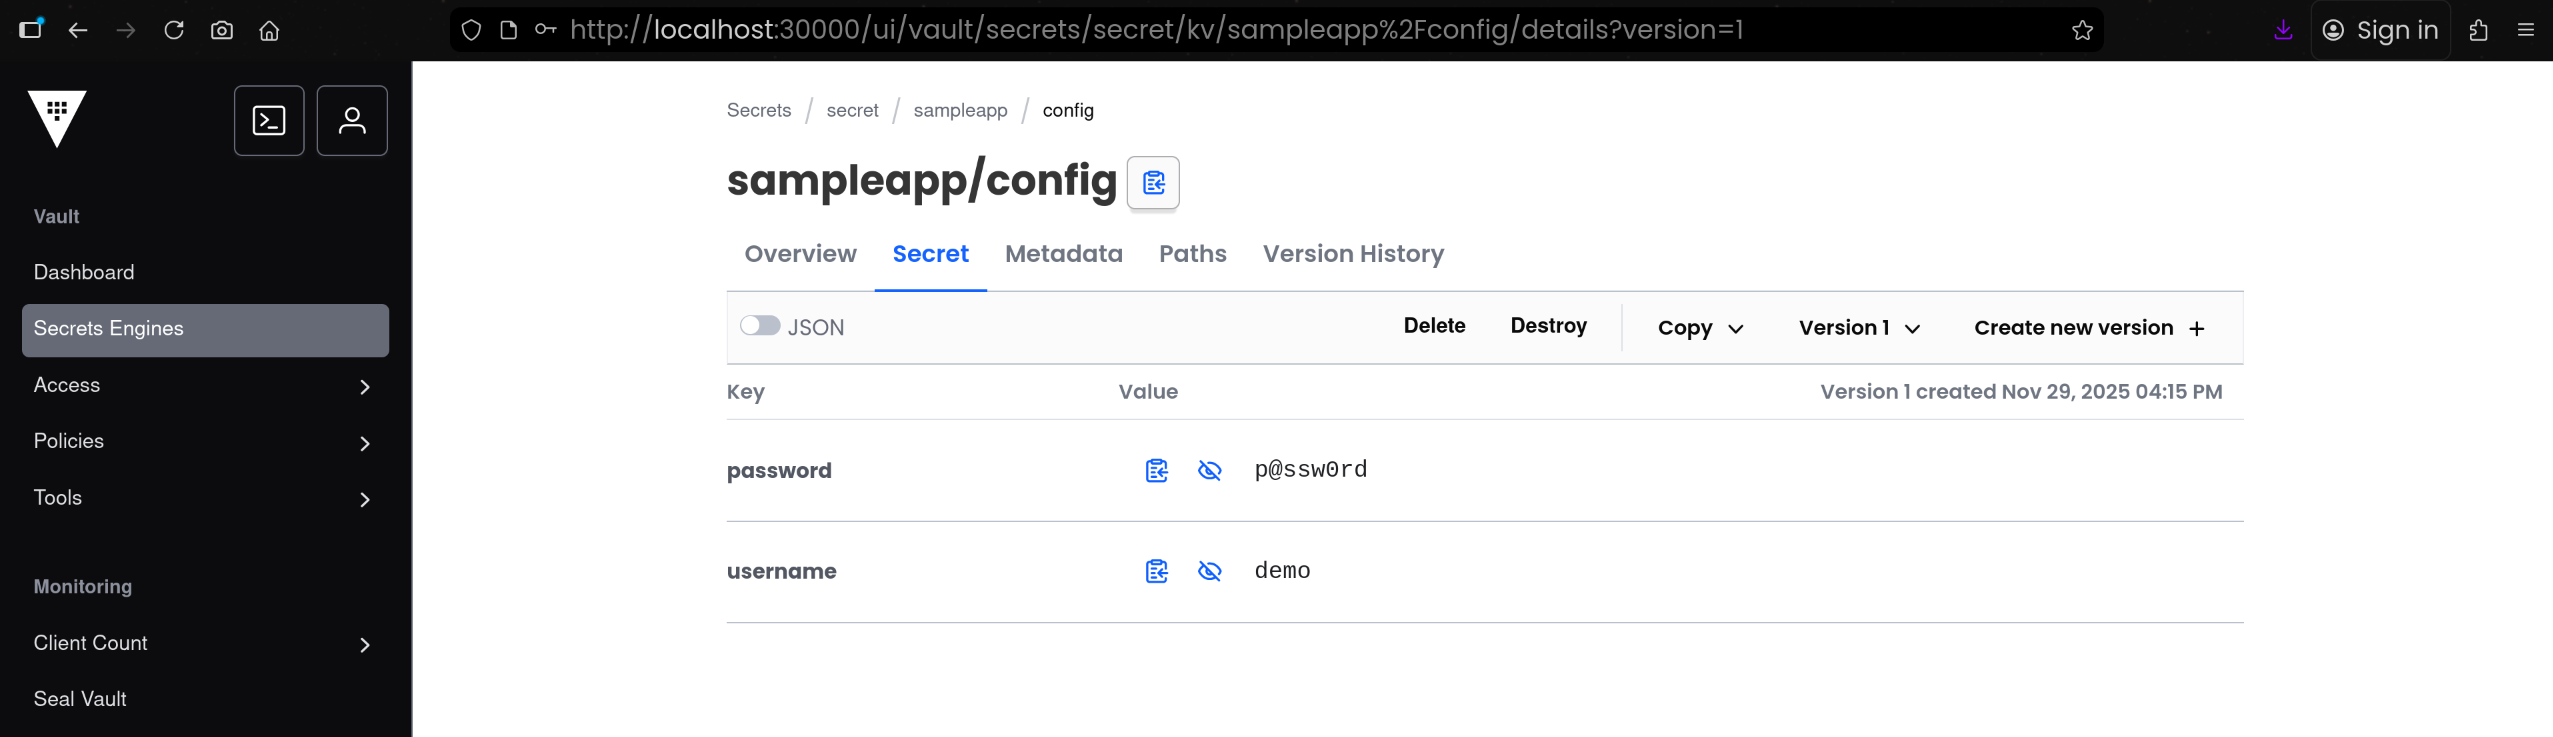
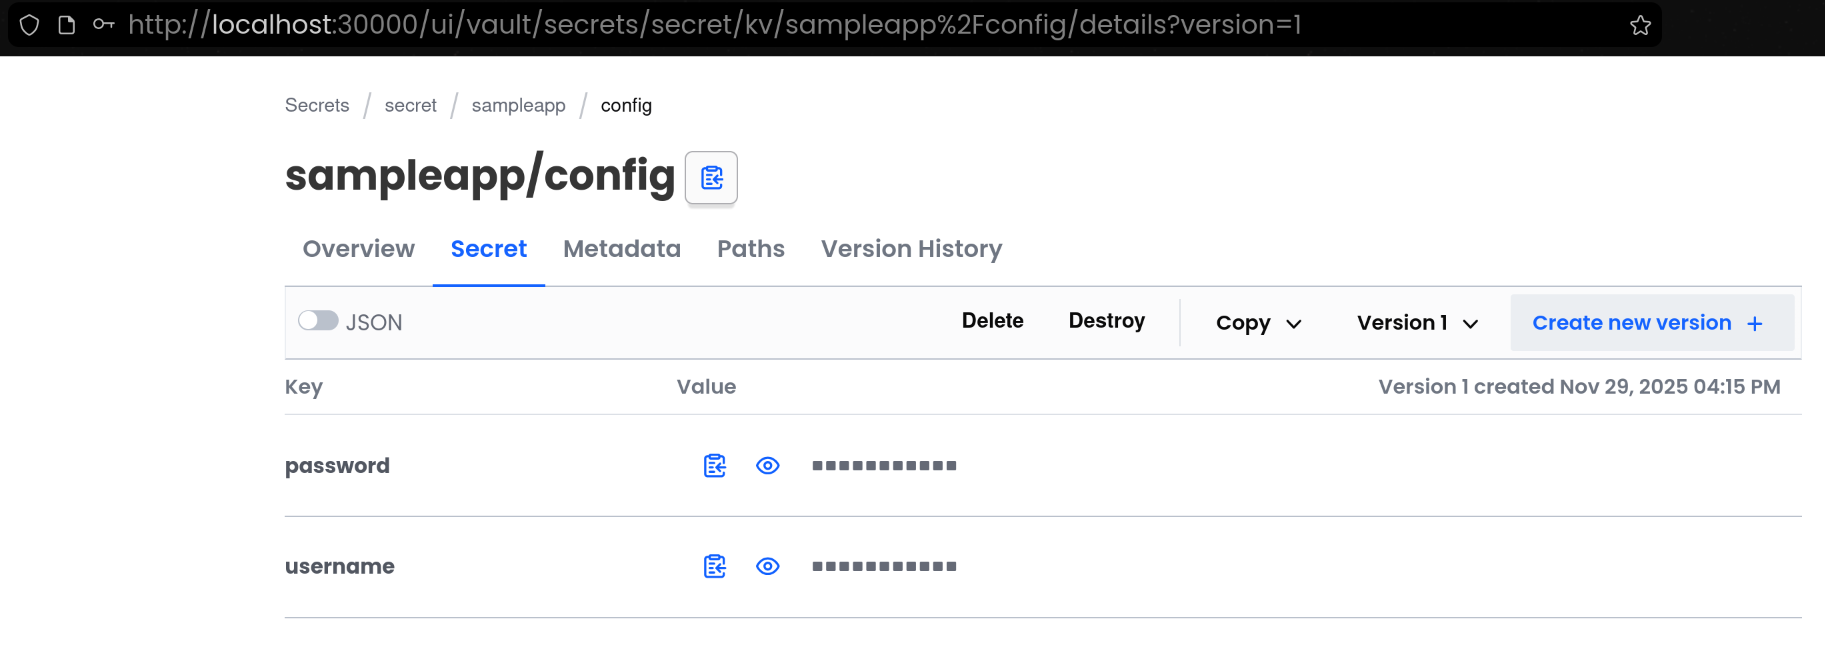
3. Secrets Engine 화면에서 Key / Value 확인
(1) [Secrets Engine] 탭 접속 후 [sampleapp - config] 접속하여 실제 저장된 Key / Value 확인
(2) vault kv get 명령으로 데이터 확인
1
2
3
4
5
6
7
8
9
10
11
12
13
14
15
16
17
18
19
20
| vault kv get secret/sampleapp/config
# 결과
======== Secret Path ========
secret/data/sampleapp/config
======= Metadata =======
Key Value
--- -----
created_time 2025-11-29T07:15:22.793730231Z
custom_metadata <nil>
deletion_time n/a
destroyed false
version 1
====== Data ======
Key Value
--- -----
password p@ssw0rd
username demo
|
4. REST API로 KV 시크릿 조회
1
2
3
4
5
6
7
8
9
10
11
12
13
14
15
16
17
18
19
20
21
22
23
24
25
26
| curl -s --header "X-Vault-Token: root" \
--request GET http://127.0.0.1:30000/v1/secret/data/sampleapp/config | jq
{
"request_id": "c1b18701-a153-3019-fc6b-df878ba74065",
"lease_id": "",
"renewable": false,
"lease_duration": 0,
"data": {
"data": {
"password": "p@ssw0rd",
"username": "demo"
},
"metadata": {
"created_time": "2025-11-29T07:15:22.793730231Z",
"custom_metadata": null,
"deletion_time": "",
"destroyed": false,
"version": 1
}
},
"wrap_info": null,
"warnings": null,
"auth": null,
"mount_type": "kv"
}
|
🤖 Vault Agent
1. Vault AppRole 인증 구성으로 애플리케이션용 권한 분리
(1) 현재 활성화된 인증방식 확인
1
2
3
4
5
| vault auth list
Path Type Accessor Description Version
---- ---- -------- ----------- -------
token/ token auth_token_2e19e80a token based credentials n/a
|
(2) AppRole 활성화
1
2
3
| vault auth enable approle || echo "AppRole already enabled"
Success! Enabled approle auth method at: approle/
|
1
2
3
4
5
6
| vault auth list
Path Type Accessor Description Version
---- ---- -------- ----------- -------
approle/ approle auth_approle_e1e3b07f n/a n/a
token/ token auth_token_2e19e80a token based credentials n/a
|
(3) sampleapp용 읽기 전용 정책 생성
1
2
3
4
5
6
7
| vault policy write sampleapp-policy - <<EOF
path "secret/data/sampleapp/*" {
capabilities = ["read"]
}
EOF
Success! Uploaded policy: sampleapp-policy
|
(4) AppRole Role 생성
- 앞서 만든
sampleapp-policy 를 Role에 연결
1
2
3
4
5
6
7
| vault write auth/approle/role/sampleapp-role \
token_policies="sampleapp-policy" \
secret_id_ttl="1h" \
token_ttl="1h" \
token_max_ttl="4h"
Success! Data written to: auth/approle/role/sampleapp-role
|
(5) Role ID 및 Secret ID 추출 및 저장
1
2
3
4
5
6
7
| ROLE_ID=$(vault read -field=role_id auth/approle/role/sampleapp-role/role-id)
SECRET_ID=$(vault write -f -field=secret_id auth/approle/role/sampleapp-role/secret-id)
echo "ROLE_ID: $ROLE_ID"
echo "SECRET_ID: $SECRET_ID"
ROLE_ID: f7165557-3127-151e-f46b-6895400f0cb9
SECRET_ID: 0dc675d7-16a4-ea02-6edf-947ecf1df3a8
|
1
2
3
| mkdir -p approle-creds
echo "$ROLE_ID" > approle-creds/role_id.txt
echo "$SECRET_ID" > approle-creds/secret_id.txt
|
(6) Kubernetes Secret으로 AppRole 자격증명 저장
- Vault Agent가 읽을 수 있도록 K8s Secret 생성
1
2
3
4
5
6
7
| kubectl create secret generic vault-approle -n vault \
--from-literal=role_id="${ROLE_ID}" \
--from-literal=secret_id="${SECRET_ID}" \
--save-config \
--dry-run=client -o yaml | kubectl apply -f -
secret/vault-approle created
|
2. Vault Agent Sidecar 구성으로 시크릿 자동 렌더링
(1) Vault Agent 설정 ConfigMap 생성 (vault-agent-config.hcl)
1
2
3
4
5
6
7
8
9
10
11
12
13
14
15
16
17
18
19
20
21
22
23
24
25
26
27
28
29
30
31
32
33
34
35
36
37
38
39
| cat <<EOF | kubectl create configmap vault-agent-config -n vault --from-file=agent-config.hcl=/dev/stdin --dry-run=client -o yaml | kubectl apply -f -
vault {
address = "http://vault.vault.svc:8200"
}
auto_auth {
method "approle" {
config = {
role_id_file_path = "/etc/vault/approle/role_id"
secret_id_file_path = "/etc/vault/approle/secret_id"
remove_secret_id_file_after_reading = false
}
}
sink "file" {
config = {
path = "/etc/vault-agent-token/token"
}
}
}
template_config {
static_secret_render_interval = "20s"
}
template {
destination = "/etc/secrets/index.html"
contents = <<EOH
<html>
<body>
<p>username: </p>
<p>password: </p>
</body>
</html>
EOH
}
EOF
configmap/vault-agent-config created
|
(2) Nginx + Vault Agent Sidecar Deployment 배포
1
2
3
4
5
6
7
8
9
10
11
12
13
14
15
16
17
18
19
20
21
22
23
24
25
26
27
28
29
30
31
32
33
34
35
36
37
38
39
40
41
42
43
44
45
46
47
48
49
50
51
| kubectl apply -n vault -f - <<EOF
apiVersion: apps/v1
kind: Deployment
metadata:
name: nginx-vault-demo
spec:
replicas: 1
selector:
matchLabels:
app: nginx-vault-demo
template:
metadata:
labels:
app: nginx-vault-demo
spec:
containers:
- name: nginx
image: nginx:latest
ports:
- containerPort: 80
volumeMounts:
- name: html-volume
mountPath: /usr/share/nginx/html
- name: vault-agent-sidecar
image: hashicorp/vault:latest
args:
- "agent"
- "-config=/etc/vault/agent-config.hcl"
volumeMounts:
- name: vault-agent-config
mountPath: /etc/vault
- name: vault-approle
mountPath: /etc/vault/approle
- name: vault-token
mountPath: /etc/vault-agent-token
- name: html-volume
mountPath: /etc/secrets
volumes:
- name: vault-agent-config
configMap:
name: vault-agent-config
- name: vault-approle
secret:
secretName: vault-approle
- name: vault-token
emptyDir: {}
- name: html-volume
emptyDir: {}
EOF
deployment.apps/nginx-vault-demo created
|
(3) Service(NodePort) 생성
1
2
3
4
5
6
7
8
9
10
11
12
13
14
15
16
17
| kubectl apply -f - <<EOF
apiVersion: v1
kind: Service
metadata:
name: nginx-service
spec:
type: NodePort
selector:
app: nginx-vault-demo
ports:
- protocol: TCP
port: 80
targetPort: 80
nodePort: 30001 # Kind에서 설정한 Port
EOF
service/nginx-service created
|
(4) 생성된 컨테이너 확인
2/2 로 메인 컨테이너 + 사이드카 컨테이너가 정상 기동된 상태 확인함
1
2
3
4
| kubectl get pod -l app=nginx-vault-demo
NAME READY STATUS RESTARTS AGE
nginx-vault-demo-7776649597-nhjwx 2/2 Running 0 25s
|
nginx 와 vault-agent-sidecar 두 컨테이너가 같은 파드에서 동작 중인 것 확인함
1
2
3
4
5
6
7
8
9
10
11
12
13
14
15
16
17
18
| kubectl describe pod -l app=nginx-vault-demo
...
Containers:
nginx:
Container ID: containerd://90164913f860373c20944e6ecd7d7c0cbc2cf56a51fbaddbfcdb2791397ceffb
Image: nginx:latest
...
vault-agent-sidecar:
Container ID: containerd://cd1d2ea7a5791e22a2edae0e21dde14986a43f4730761822325aa405175f4c4b
Image: hashicorp/vault:latest
Image ID: docker.io/hashicorp/vault@sha256:f4e2687b72858a9e2160c344c9fa1ef74c07f21a89a8c00534ab64d3f187b927
Port: <none>
Host Port: <none>
Args:
agent
-config=/etc/vault/agent-config.hcl
...
|
1
2
3
4
| kubectl get mutatingwebhookconfigurations.admissionregistration.k8s.io
NAME WEBHOOKS AGE
vault-agent-injector-cfg 1 13m
|
(5) Vault Agent 동작 및 마운트 파일 검증
1
2
3
4
5
6
7
8
9
10
11
| kubectl exec -it -n vault deploy/nginx-vault-demo -c vault-agent-sidecar -- vault agent -h
Usage: vault agent [options]
This command starts a Vault Agent that can perform automatic authentication
in certain environments.
Start an agent with a configuration file:
$ vault agent -config=/etc/vault/config.hcl
...
|
1
2
3
4
5
6
7
8
9
10
11
12
13
14
15
16
17
18
19
20
21
22
23
24
25
26
27
28
29
30
31
32
33
34
35
36
37
| kubectl exec -it -n vault deploy/nginx-vault-demo -c vault-agent-sidecar -- cat /etc/vault/agent-config.hcl
vault {
address = "http://vault.vault.svc:8200"
}
auto_auth {
method "approle" {
config = {
role_id_file_path = "/etc/vault/approle/role_id"
secret_id_file_path = "/etc/vault/approle/secret_id"
remove_secret_id_file_after_reading = false
}
}
sink "file" {
config = {
path = "/etc/vault-agent-token/token"
}
}
}
template_config {
static_secret_render_interval = "20s"
}
template {
destination = "/etc/secrets/index.html"
contents = <<EOH
<html>
<body>
<p>username: </p>
<p>password: </p>
</body>
</html>
EOH
}
|
1
2
3
4
5
| kubectl exec -it -n vault deploy/nginx-vault-demo -c vault-agent-sidecar -- ls -l /etc/vault/approle
total 0
lrwxrwxrwx 1 root root 14 Nov 29 07:21 role_id -> ..data/role_id
lrwxrwxrwx 1 root root 16 Nov 29 07:21 secret_id -> ..data/secret_id
|
1
2
3
4
5
| kubectl exec -it -n vault deploy/nginx-vault-demo -c vault-agent-sidecar -- cat /etc/vault/approle/role_id
kubectl exec -it -n vault deploy/nginx-vault-demo -c vault-agent-sidecar -- cat /etc/vault/approle/secret_id
f7165557-3127-151e-f46b-6895400f0cb9
0dc675d7-16a4-ea02-6edf-947ecf1df3a8
|
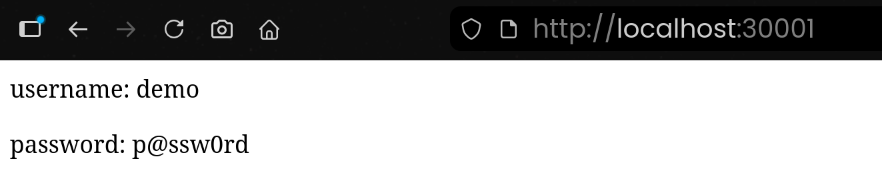
(6) Nginx가 서빙하는 index.html 내용 확인
1
2
3
4
| kubectl exec -it -n vault deploy/nginx-vault-demo -c nginx -- ls -l /usr/share/nginx/html
total 4
-rw-r--r-- 1 100 1000 94 Nov 29 07:21 index.html
|
1
2
3
4
5
6
7
8
| kubectl exec -it -n vault deploy/nginx-vault-demo -c nginx -- cat /usr/share/nginx/html/index.html
<html>
<body>
<p>username: demo</p>
<p>password: p@ssw0rd</p>
</body>
</html>
|
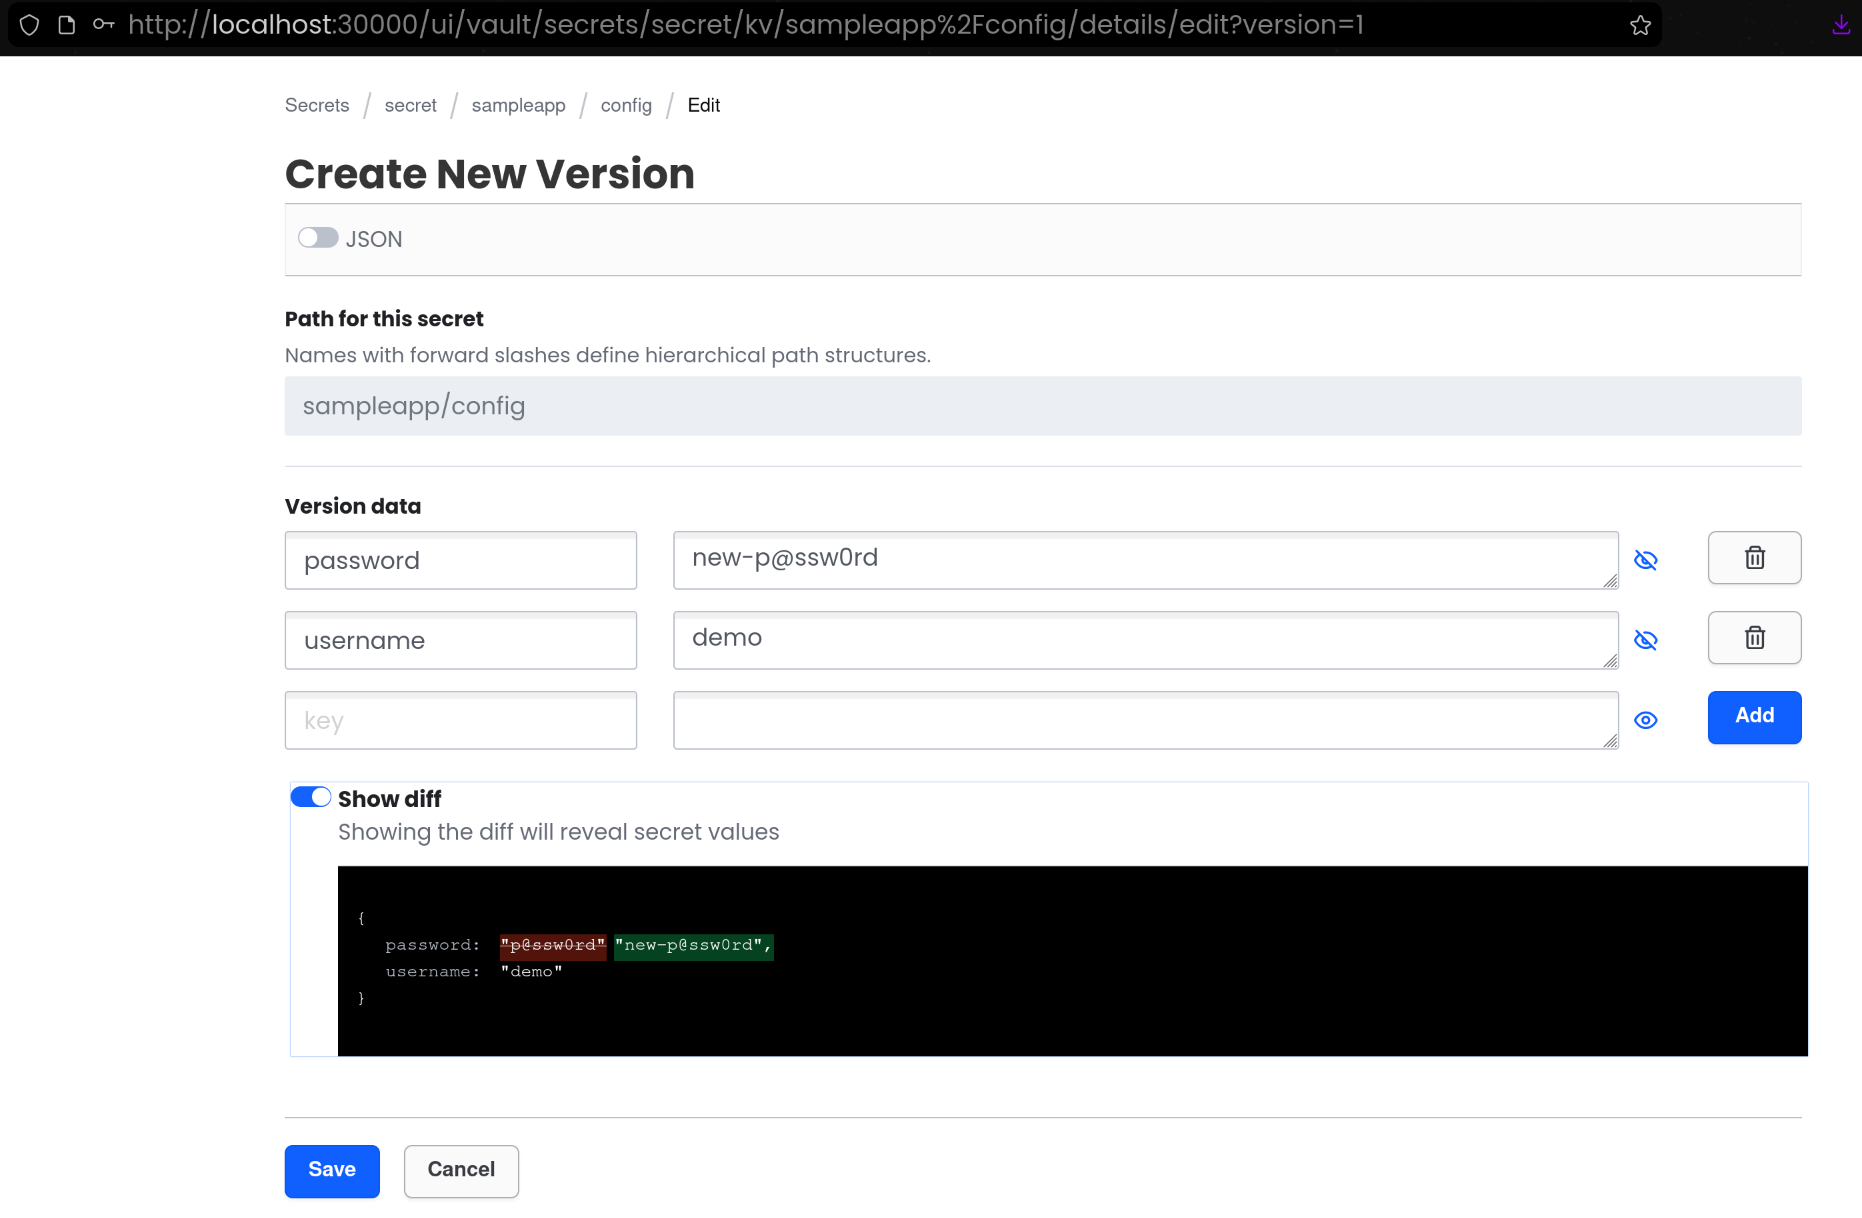
3. KV 값 변경 시 Vault Agent 템플릿 자동 갱신 확인
(1) Vault UI에서 KV 값 변경
- [Create new version +] 클릭
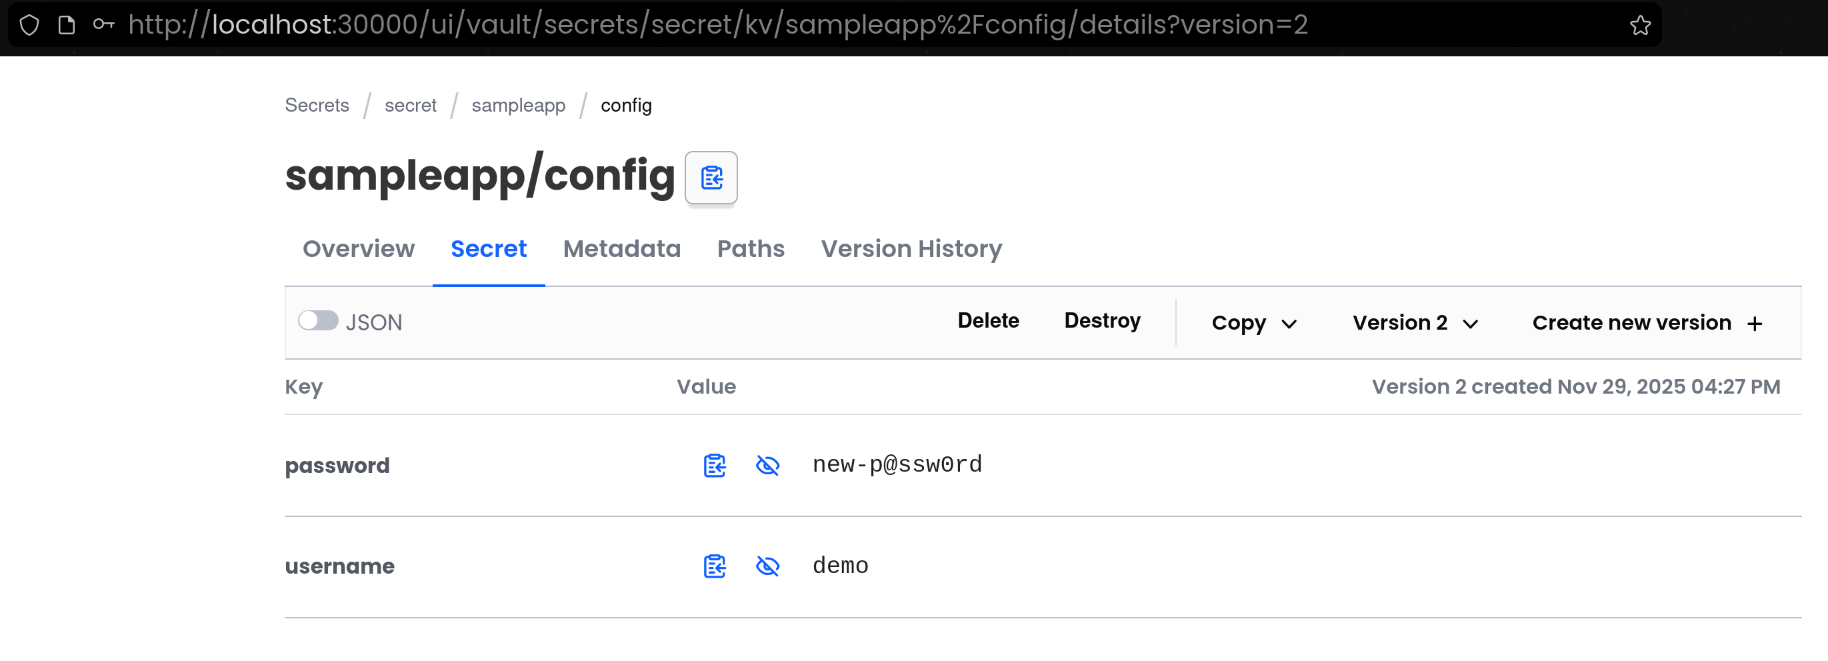
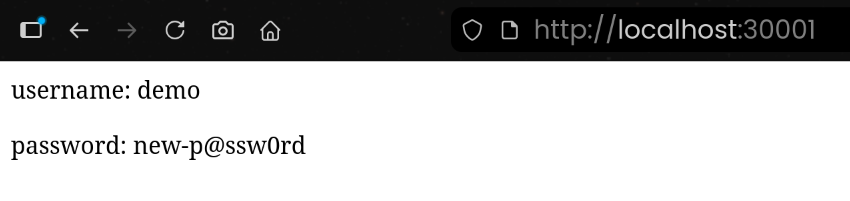
(2) Vault Agent 템플릿 재렌더링 결과 확인
1
2
3
4
5
6
7
8
| kubectl exec -it -n vault deploy/nginx-vault-demo -c nginx -- cat /usr/share/nginx/html/index.html
<html>
<body>
<p>username: demo</p>
<p>password: new-p@ssw0rd</p>
</body>
</html>
|
4. 리소스 삭제
1
2
3
| kubectl delete deployment/nginx-vault-demo \
service/nginx-service \
secret/vault-approle -n vault
|
🧩 Jenkins + KV 시크릿
1. Jenkins 컨테이너 사전구성
(1) Jenkins 컨테이너 기동
1
2
3
4
5
6
7
8
9
10
11
12
13
14
15
16
17
18
19
20
21
22
23
| cat <<EOT > docker-compose.yaml
services:
jenkins:
container_name: jenkins
image: jenkins/jenkins
restart: unless-stopped
networks:
- cicd-network
ports:
- "8080:8080"
- "50000:50000" # Jenkins Agent - Controller : JNLP
volumes:
- /var/run/docker.sock:/var/run/docker.sock
- jenkins_home:/var/jenkins_home
volumes:
jenkins_home:
networks:
cicd-network:
driver: bridge
EOT
|
1
2
3
4
5
6
| docker compose up -d
[+] Running 3/3
✔ Network cicd_cicd-network Created 0.0s
✔ Volume cicd_jenkins_home Created 0.0s
✔ Container jenkins Started 0.2s
|
1
2
3
4
| docker compose ps
NAME IMAGE COMMAND SERVICE CREATED STATUS PORTS
jenkins jenkins/jenkins "/usr/bin/tini -- /u…" jenkins 28 seconds ago Up 27 seconds 0.0.0.0:8080->8080/tcp, [::]:8080->8080/tcp, 0.0.0.0:50000->50000/tcp, [::]:50000->50000/tcp
|
1
2
3
4
5
| for i in jenkins ; do echo ">> container : $i <<"; docker compose exec $i sh -c "whoami && pwd"; echo; done
>> container : jenkins <<
jenkins
/
|
1
2
3
| docker compose exec jenkins bash
jenkins@98e0acb7ca41:/$ exit
exit
|
(2) Jenkins 컨테이너 초기 설정
1
2
3
| docker compose exec jenkins cat /var/jenkins_home/secrets/initialAdminPassword
b188177001fa448d9156f59e8d4e2122
|
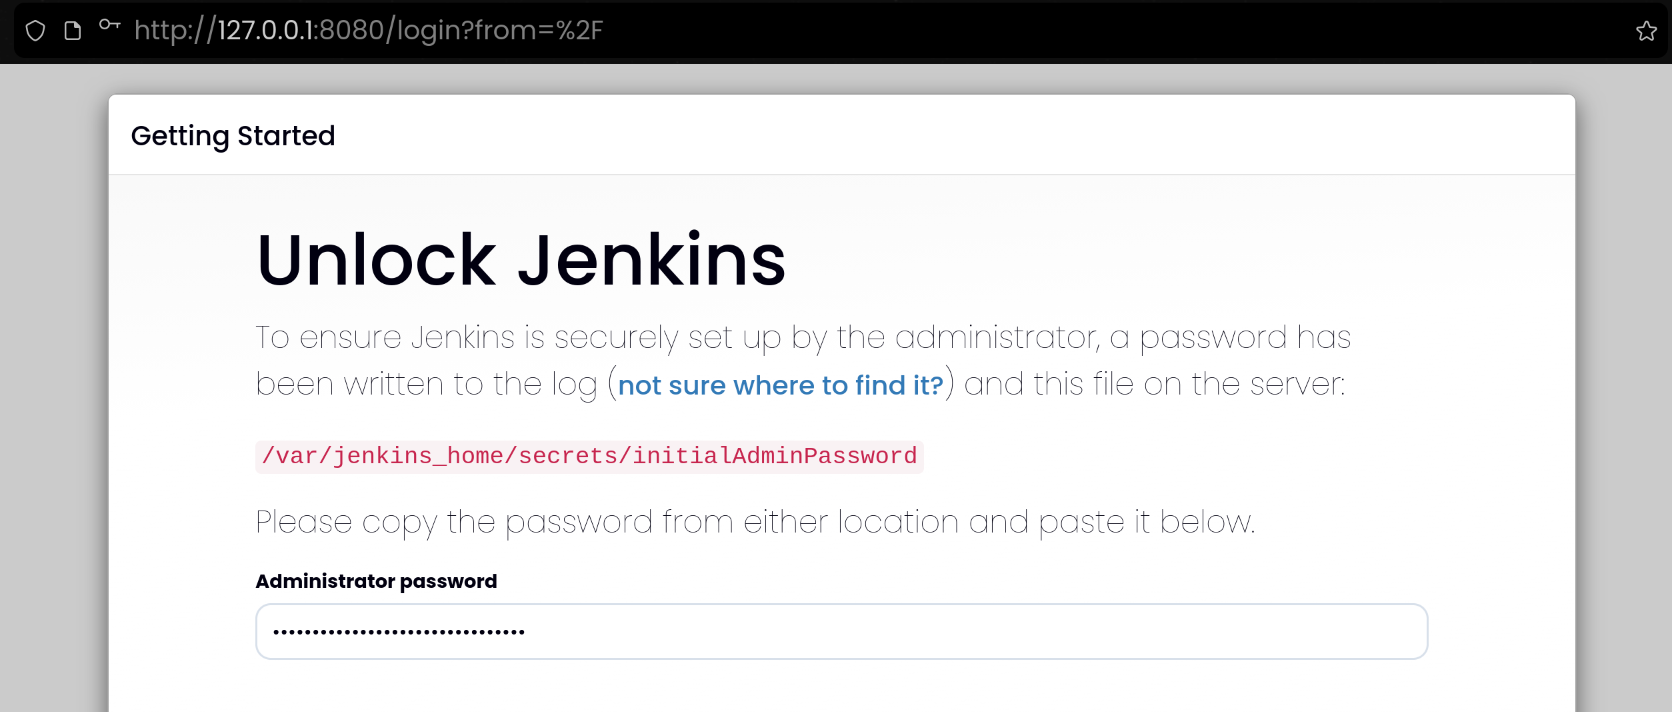
1
2
| http://127.0.0.1:8080
b188177001fa448d9156f59e8d4e2122
|
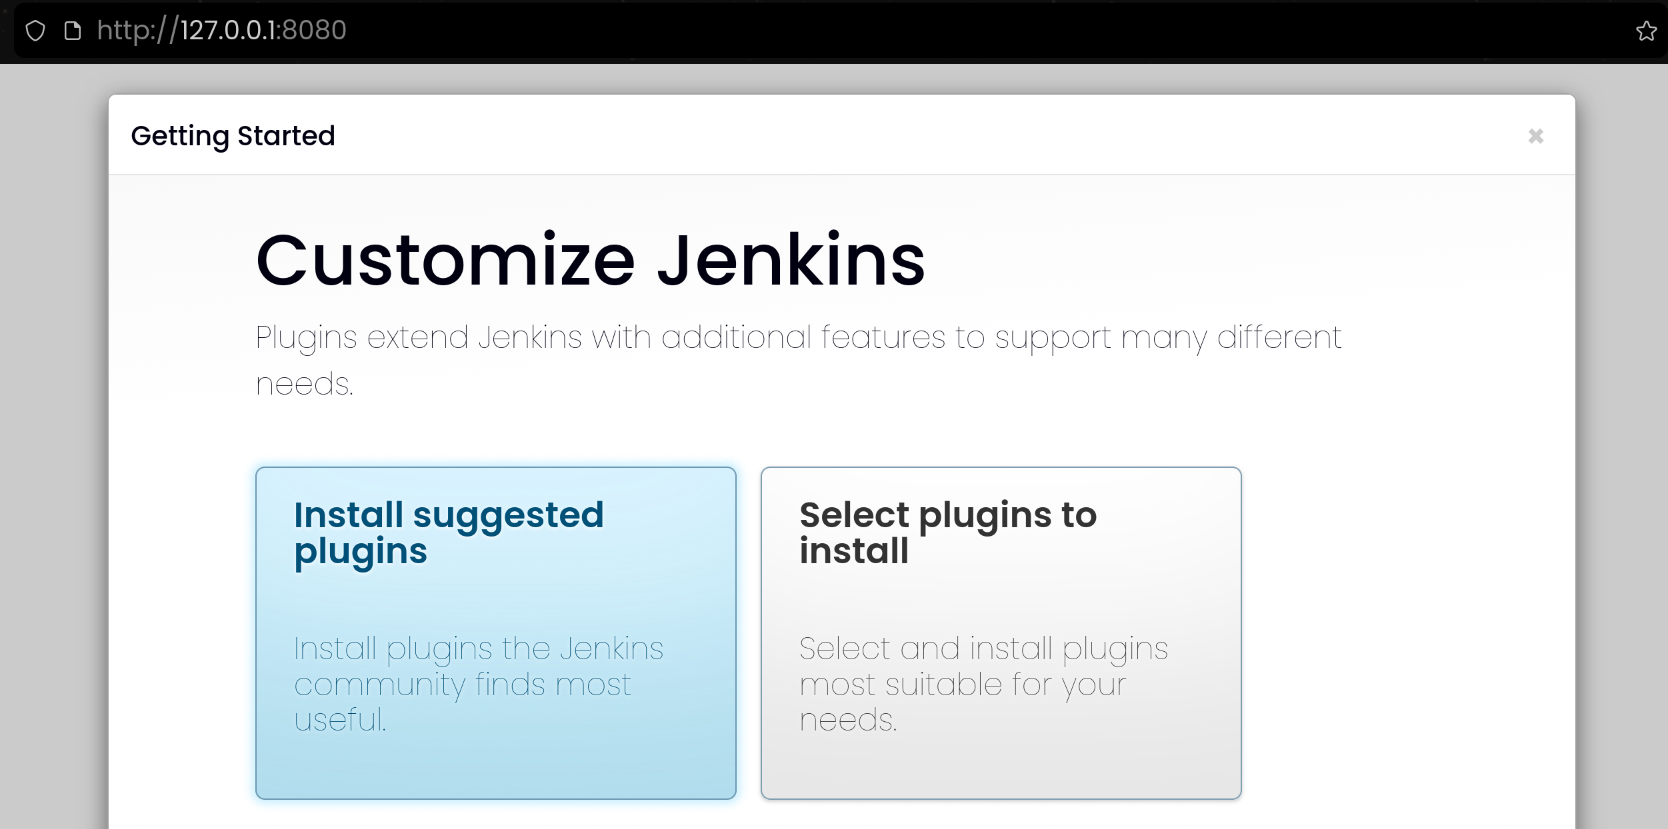
- Install suggested plugins 선택하여 기본 플러그인 설치
1
2
3
4
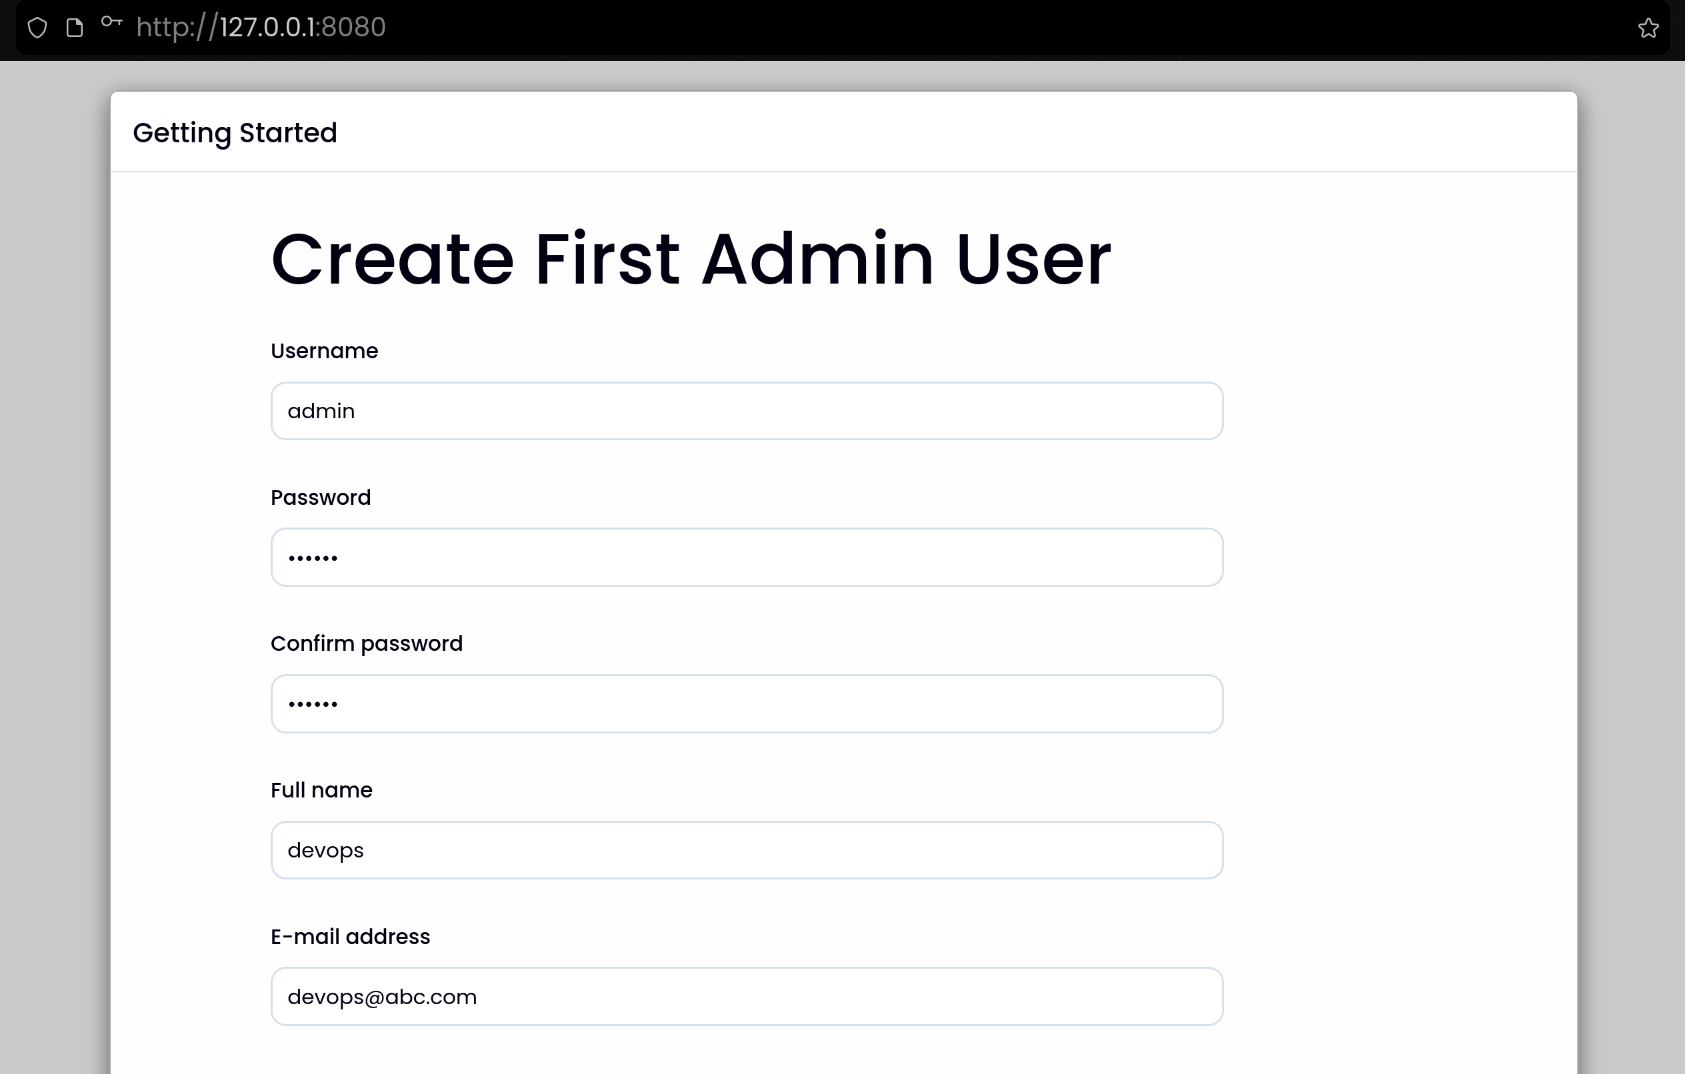
| Username: admin
Password: qwe123
Full name: devops
E-mail address: devops@abc.com
|
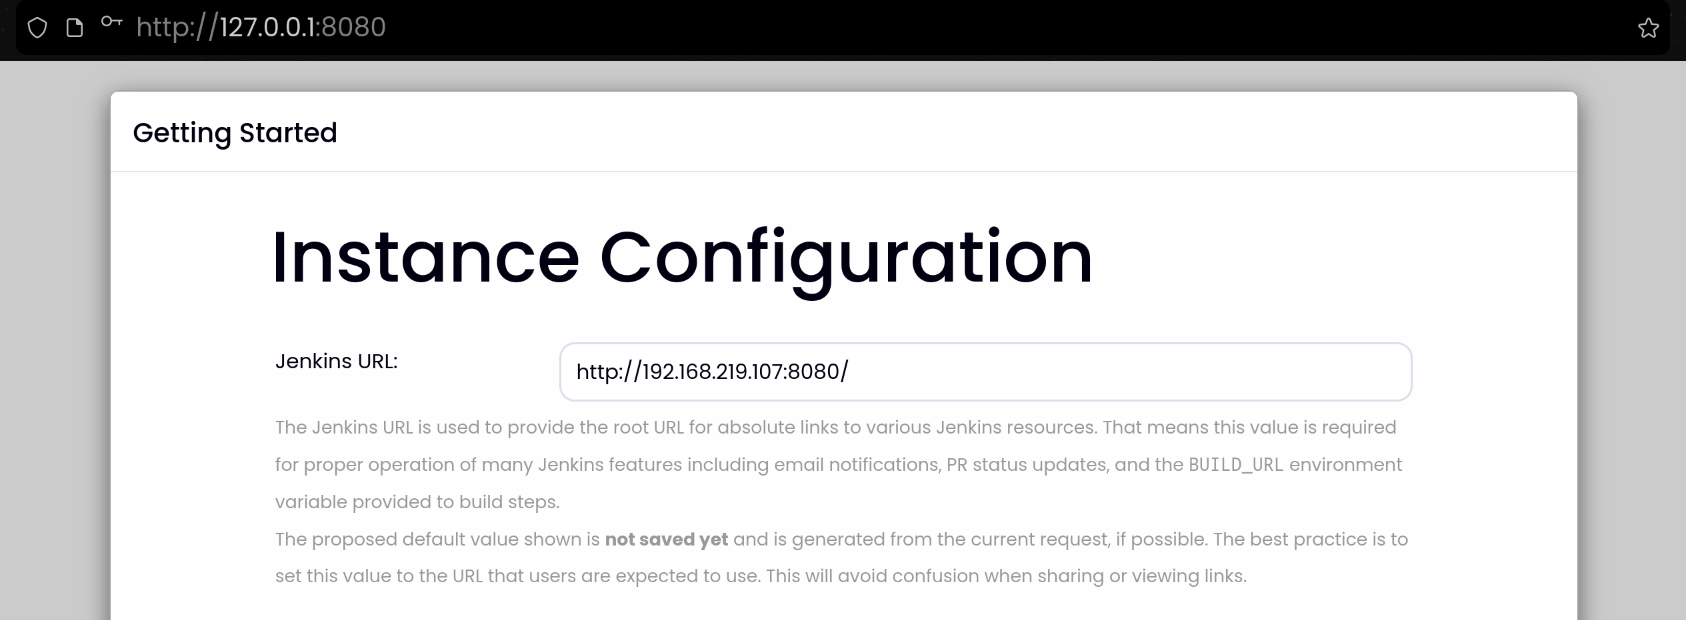
- Jenkins URL 설정 : 각자
자신의 PC의 IP를 입력
2. Jenkins에서 Vault Plugin 설치
1
2
3
4
| 1. Jenkins UI 접속
2. 상단 메뉴에서 Manage Jenkins → Plugins
3. Available 탭에서 Vault 검색
4. HashiCorp Vault Plugin 설치
|
3. Vault AppRole 정보 확인
- 이전 실습에서 생성한 AppRole 자격 증명을 파일로 관리했다는 가정
1
2
3
4
5
6
7
| cd approle-creds
cat role_id.txt
f7165557-3127-151e-f46b-6895400f0cb9
cat secret_id.txt
0dc675d7-16a4-ea02-6edf-947ecf1df3a8
|
4. Jenkins에서 Vault 설정 및 Credentials 추가
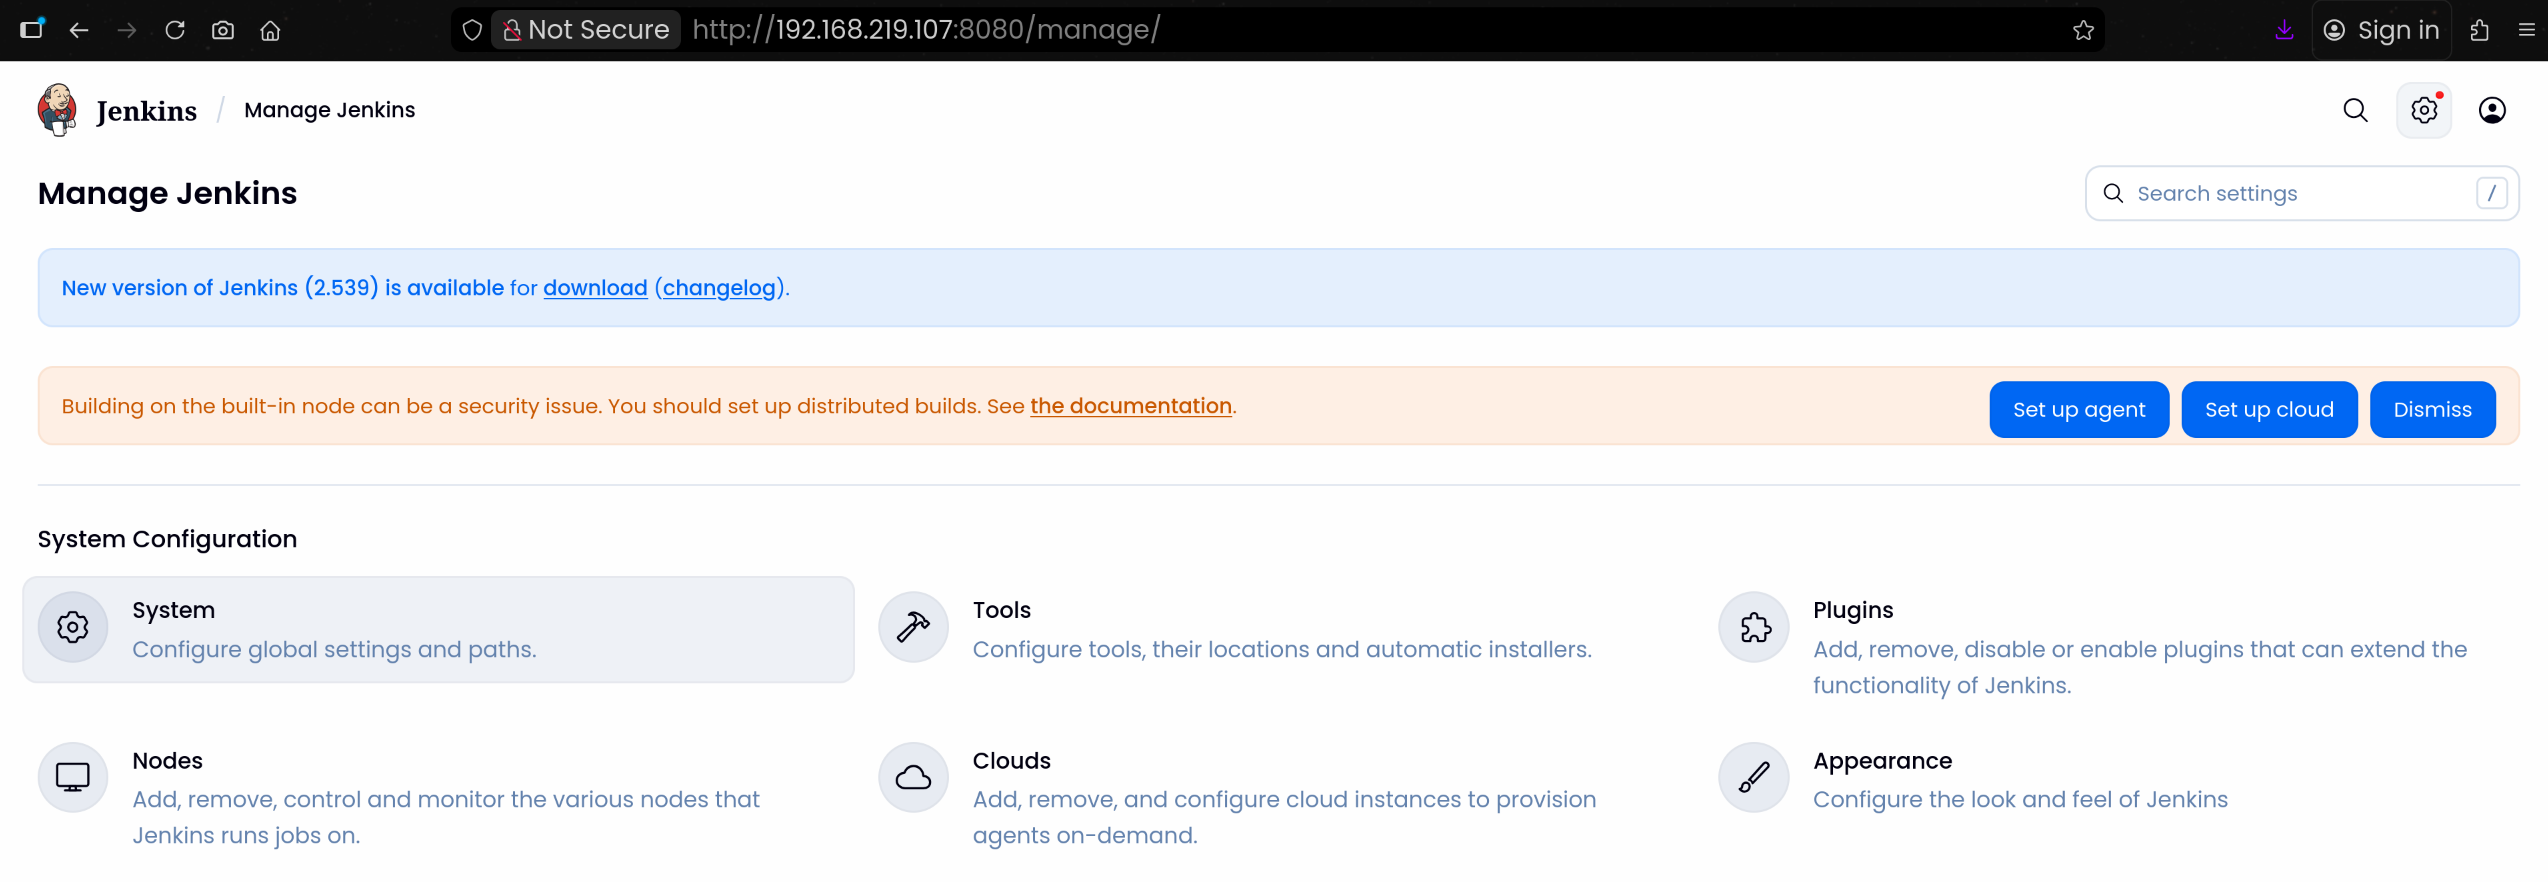
(1) Jenkins UI → Manage Jenkins → Configure System
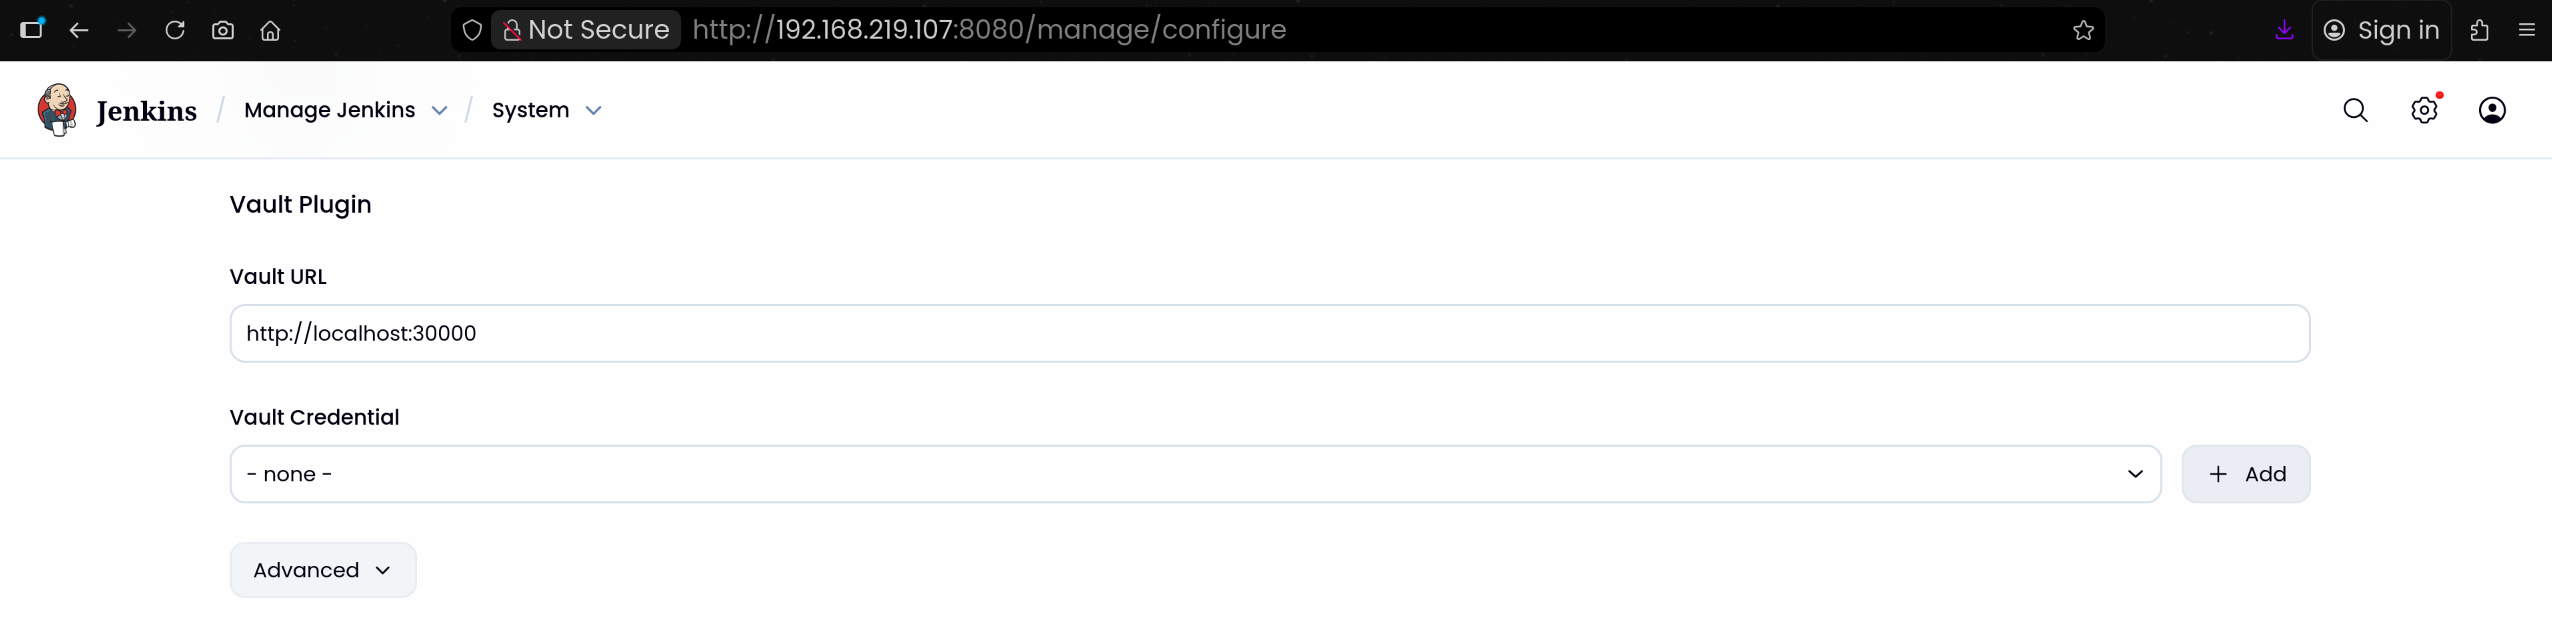
(2) Vault Plugin Configuration 섹션으로 이동
1
2
| Vault URL 입력 후 [+ Add] 버튼 클릭
Vault URL: http://localhost:30000
|
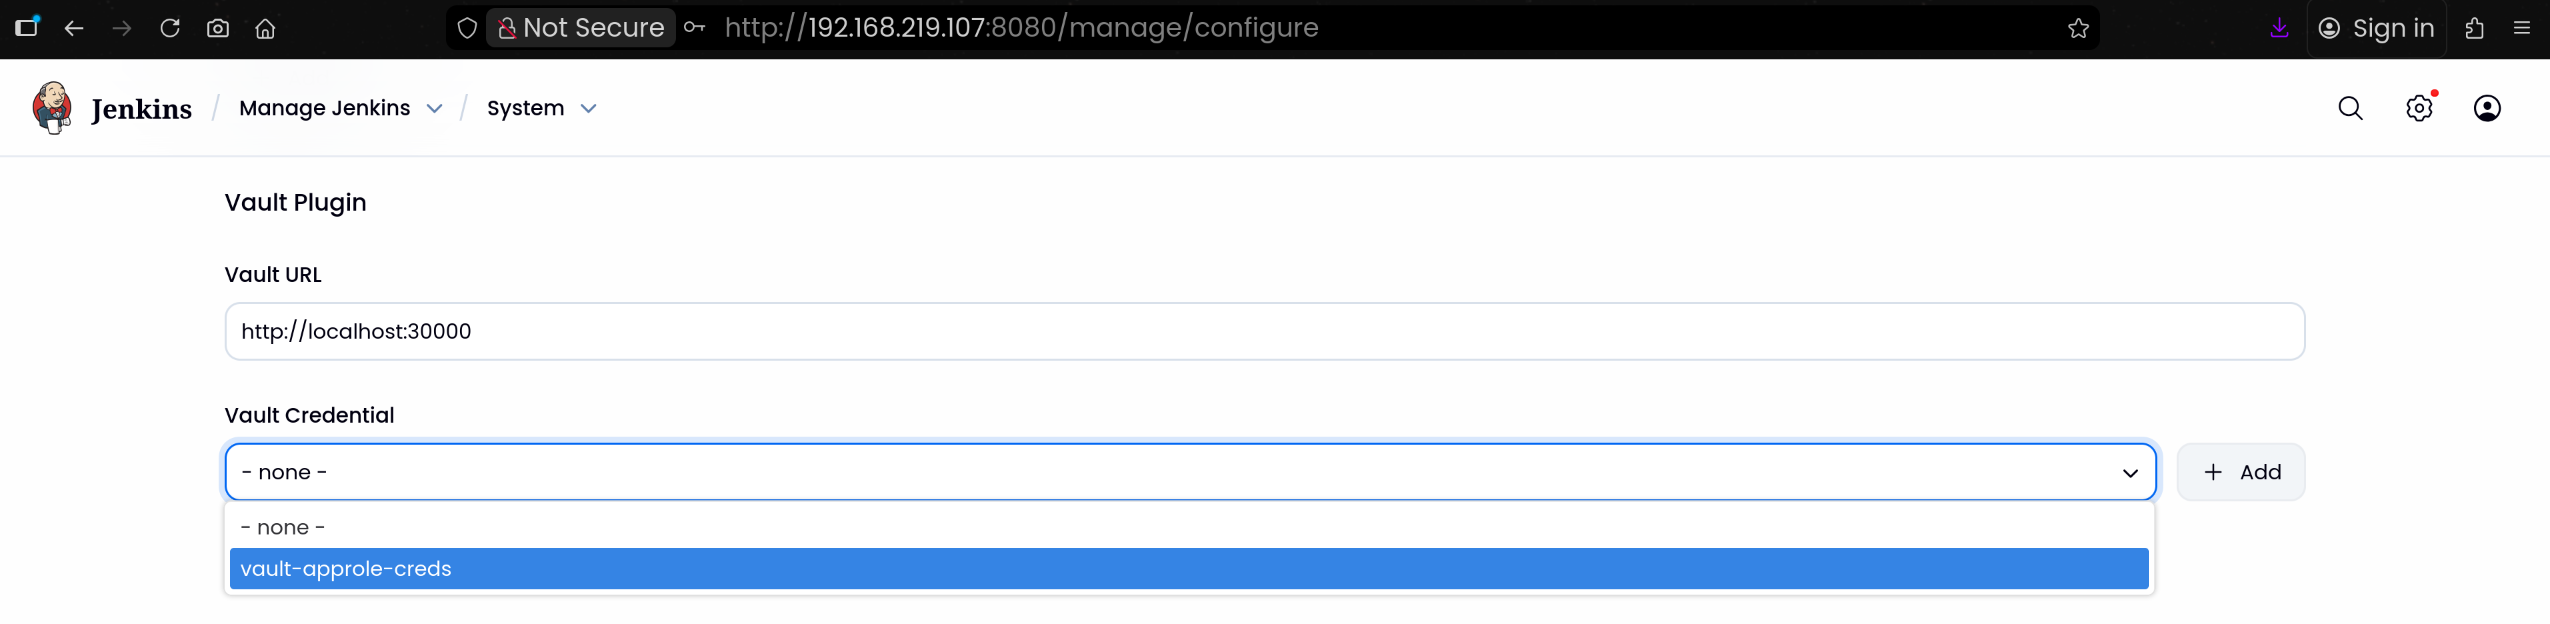
(3) Vault AppRole Credentials 생성
1
2
3
4
| Kind : Vault AppRole Credential
Role ID: f7165557-3127-151e-f46b-6895400f0cb9
Secret ID: 0dc675d7-16a4-ea02-6edf-947ecf1df3a8
[Save] 버튼 클릭하여 저장하고 나오기
|
5. Jenkins Pipeline Job 생성
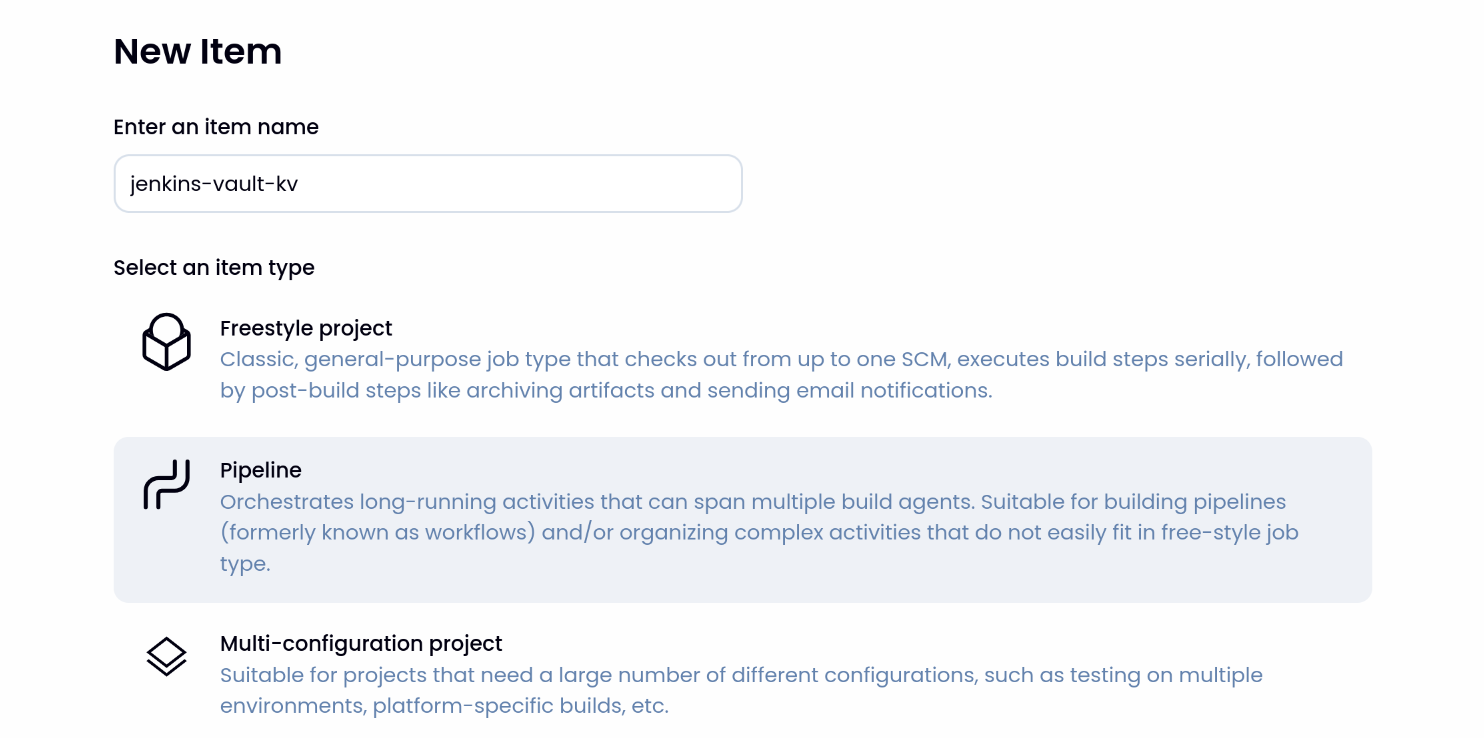
(1) Jenkins UI → New Item → Pipeline 선택
(2) jenkins-vault-kv 입력 후 생성
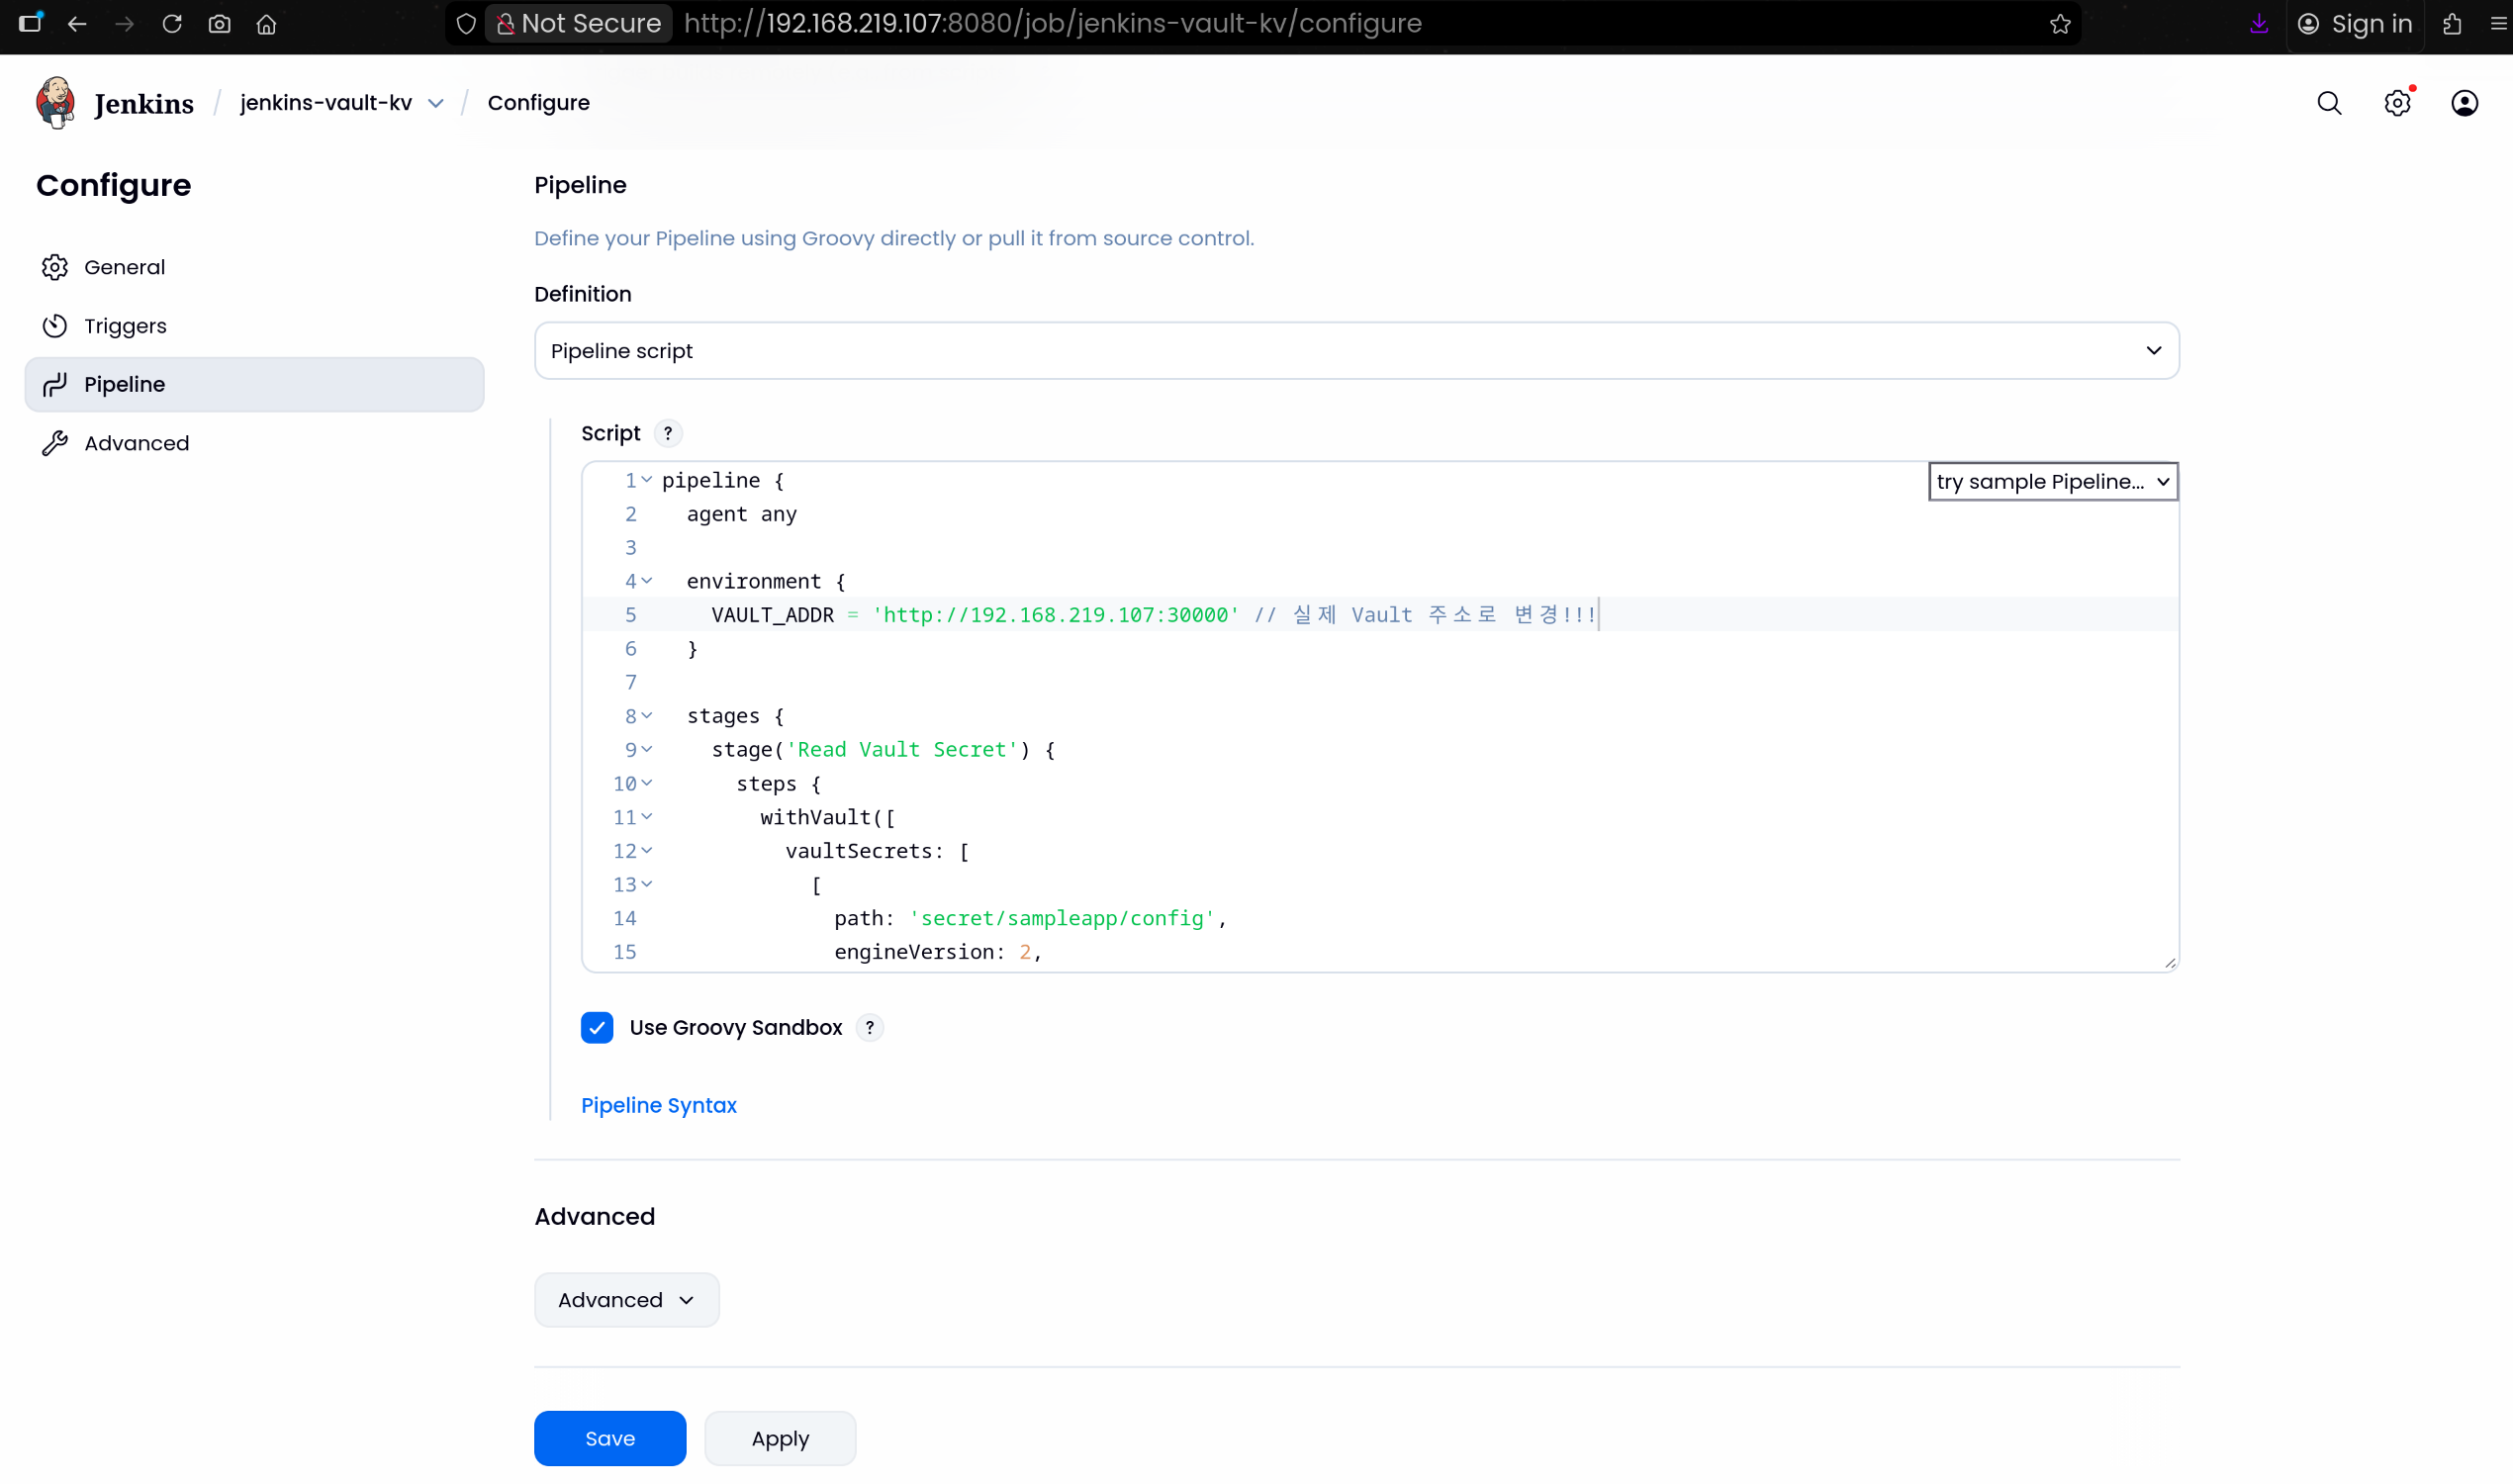
(3) Jenkinsfile 작성
1
2
3
4
5
6
7
8
9
10
11
12
13
14
15
16
17
18
19
20
21
22
23
24
25
26
27
28
29
30
31
32
33
34
35
36
37
38
39
| pipeline {
agent any
environment {
VAULT_ADDR = 'http://192.168.219.107:30000' // 실제 Vault 주소로 변경!!!
}
stages {
stage('Read Vault Secret') {
steps {
withVault([
vaultSecrets: [
[
path: 'secret/sampleapp/config',
engineVersion: 2,
secretValues: [
[envVar: 'USERNAME', vaultKey: 'username'],
[envVar: 'PASSWORD', vaultKey: 'password']
]
]
],
configuration: [
vaultUrl: "${VAULT_ADDR}",
vaultCredentialId: 'vault-approle-creds'
]
]) {
sh '''
echo "Username from Vault: $USERNAME"
echo "Password from Vault: $PASSWORD"
'''
script {
echo "Username (env): ${env.USERNAME}"
echo "Password (env): ${env.PASSWORD}"
}
}
}
}
}
}
|
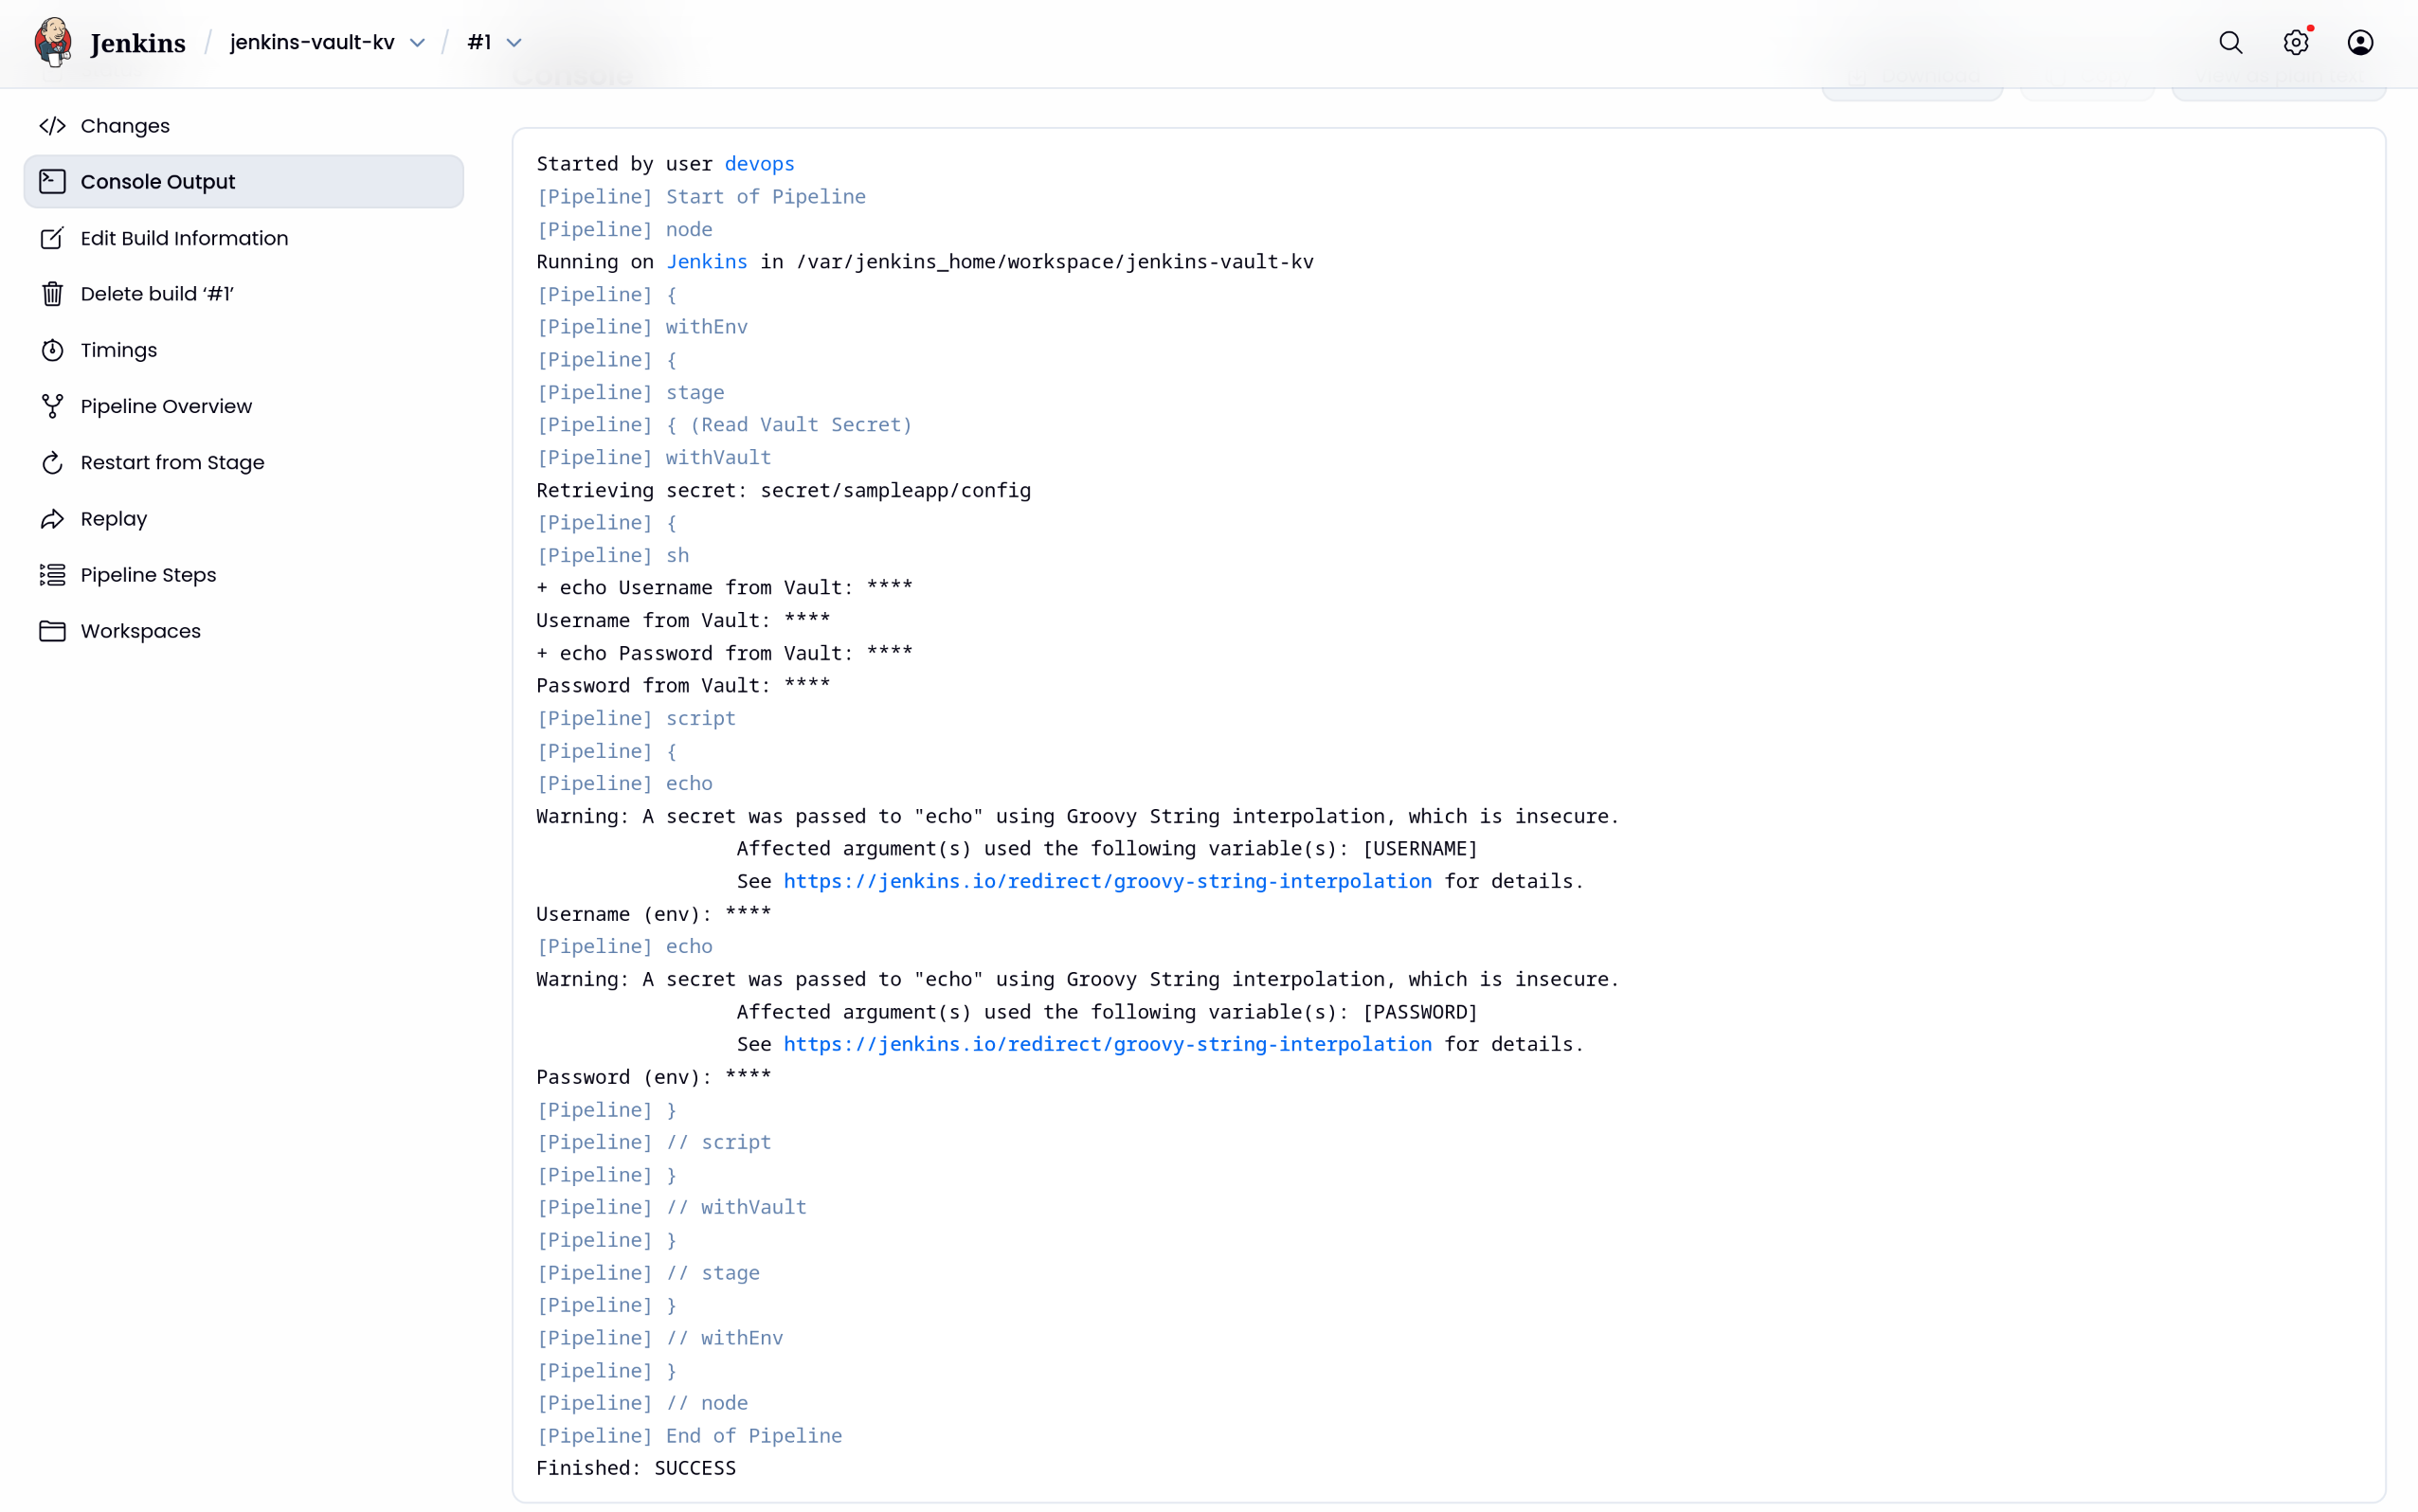
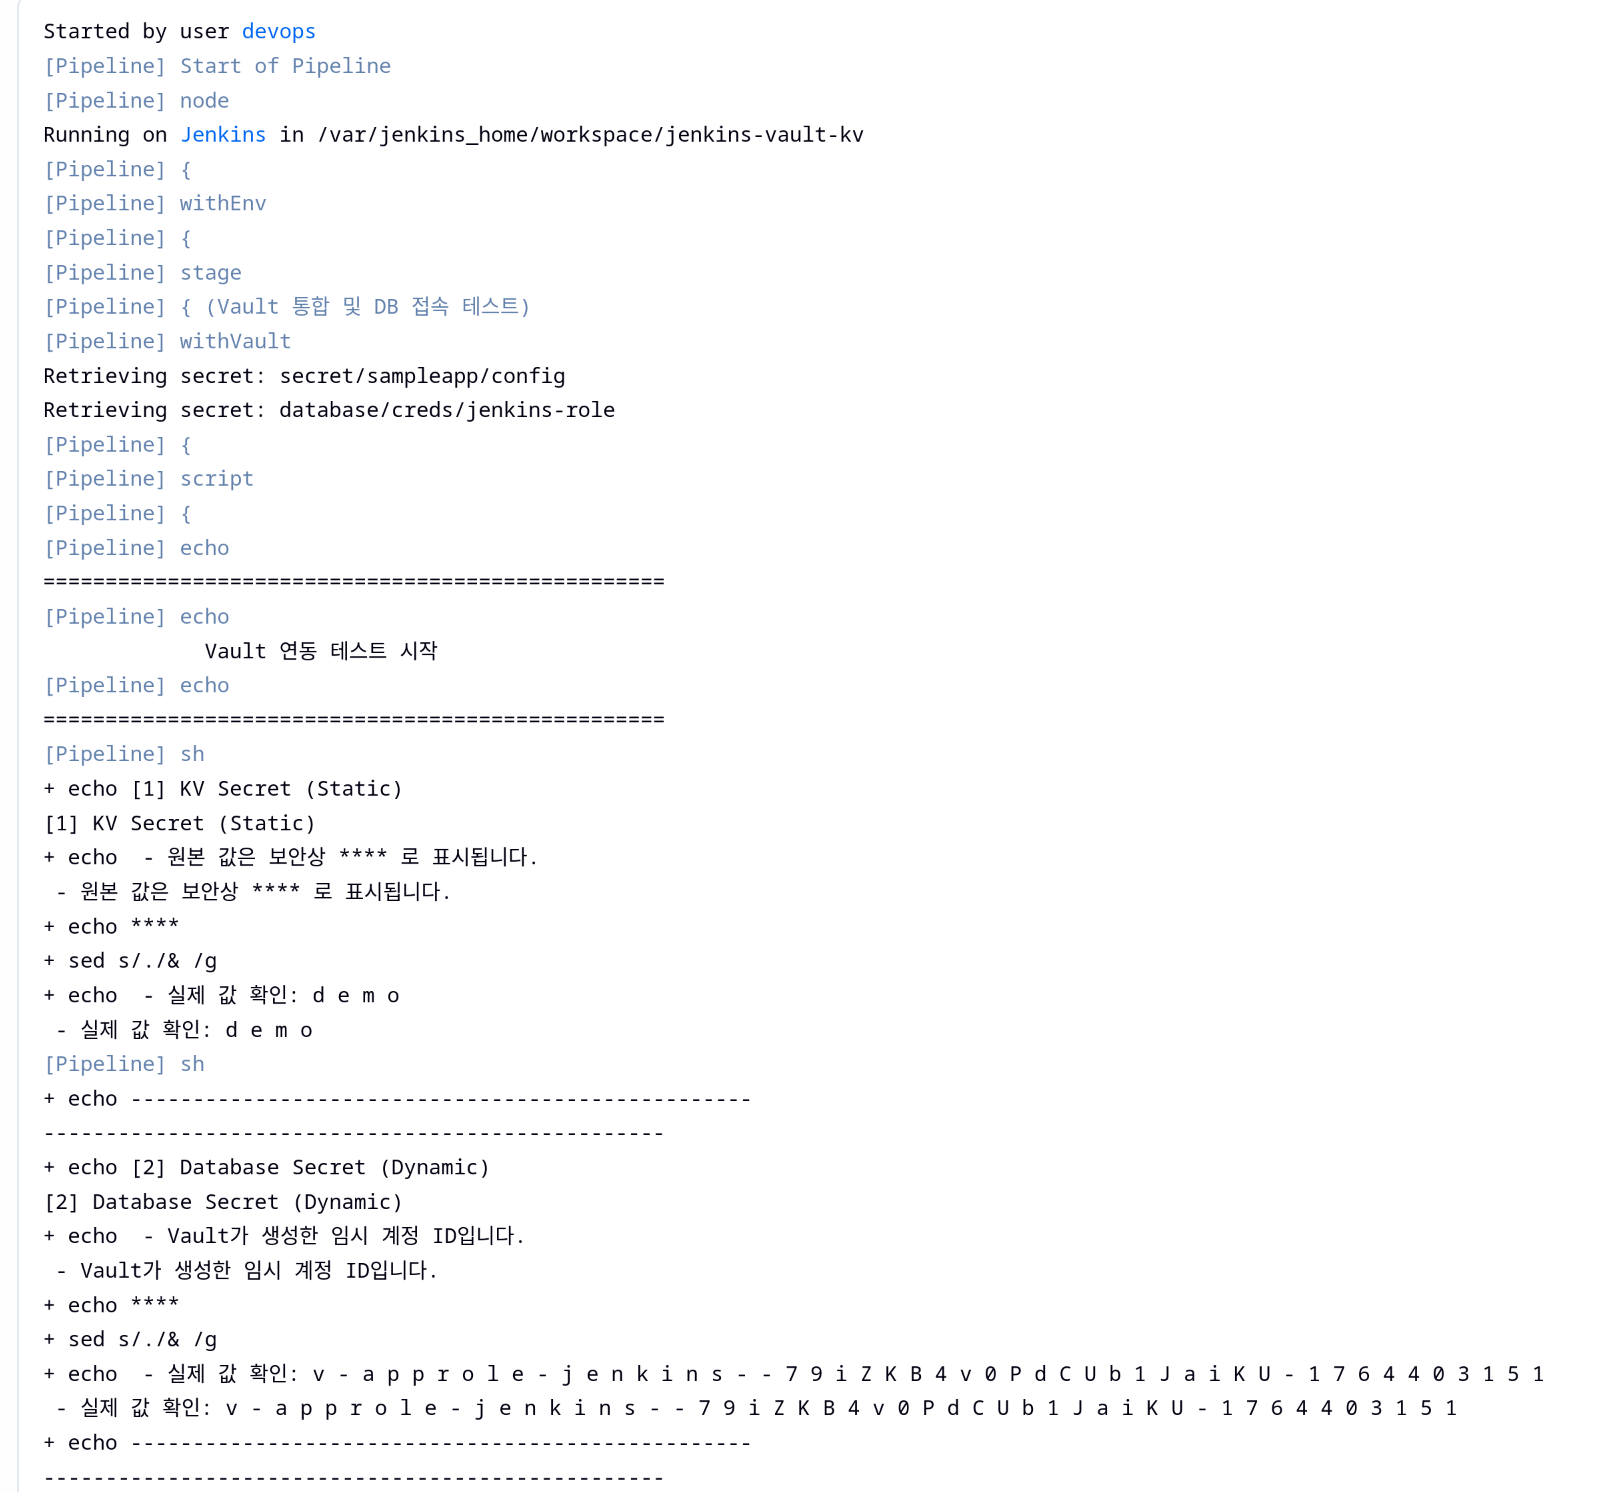
(4) Jenkins 실행결과 → 보안상 취약하므로 마스킹처리됨
🐘 Jenkins + 동적(Dynamic) DB 시크릿
1. PostgreSQL 배포 및 NodePort 서비스 구성
1
2
3
4
5
6
7
8
9
10
11
12
13
14
15
16
17
18
19
20
21
22
23
24
25
26
27
28
29
30
31
32
33
34
35
36
37
38
39
40
41
42
43
| cat <<EOF | kubectl apply -f -
apiVersion: apps/v1
kind: Deployment
metadata:
name: postgres
namespace: default
spec:
selector:
matchLabels:
app: postgres
template:
metadata:
labels:
app: postgres
spec:
containers:
- name: postgres
image: postgres:13
env:
- name: POSTGRES_PASSWORD
value: "rootpassword"
- name: POSTGRES_DB
value: "mydb"
ports:
- containerPort: 5432
---
apiVersion: v1
kind: Service
metadata:
name: postgres
namespace: default
spec:
type: NodePort
ports:
- port: 5432
targetPort: 5432
nodePort: 30002 # [External] Jenkins 접속용
selector:
app: postgres
EOF
deployment.apps/postgres created
service/postgres created
|
2. Vault Database Secrets Engine 설정
(1) Vault 환경 변수 설정
1
2
| export VAULT_ADDR=http://127.0.0.1:30000
export VAULT_TOKEN=root
|
(2) Database Secret Engine 활성화
1
2
3
4
5
6
7
8
9
10
11
| vault secrets enable database
Success! Enabled the database secrets engine at: database/
vault secrets list
Path Type Accessor Description
---- ---- -------- -----------
cubbyhole/ cubbyhole cubbyhole_94020688 per-token private secret storage
database/ database database_b1424172 n/a
identity/ identity identity_d6877608 identity store
secret/ kv kv_050b6113 key/value secret storage
sys/ system system_428d6c50 system endpoints used for control, policy and debugging
|
(3) Vault <-> Postgres 연결 구성
1
2
3
4
5
6
7
8
| vault write database/config/my-postgresql-database \
plugin_name=postgresql-database-plugin \
allowed_roles="jenkins-role" \
connection_url="postgresql://:@postgres.default.svc.cluster.local:5432/mydb?sslmode=disable" \
username="postgres" \
password="rootpassword"
Success! Data written to: database/config/my-postgresql-database
|
- Vault가 Postgres에 접근할 때 사용할 관리자 계정 정보 지정
- K8s 내부 DNS(
postgres.default.svc.cluster.local)로 접근함
(4) 동적 계정 생성용 Role 정의
1
2
3
4
5
6
7
| vault write database/roles/jenkins-role \
db_name=my-postgresql-database \
creation_statements="CREATE ROLE \"\" WITH LOGIN PASSWORD '' VALID UNTIL ''; GRANT SELECT ON ALL TABLES IN SCHEMA public TO \"\";" \
default_ttl="1h" \
max_ttl="24h"
Success! Data written to: database/roles/jenkins-role
|
- Vault가 실제 Postgres에 만들 임시 계정 규칙 정의
- 유효 기간
default_ttl=1h - public 스키마의 모든 테이블에 SELECT 권한 부여
3. 기존 AppRole Policy 확장 (KV + Database 동시 사용)
(1) sampleapp-policy에 DB 권한 추가
1
2
3
4
5
6
7
8
9
10
11
12
13
14
15
16
| vault policy write sampleapp-policy - <<EOF
# 1. KV v2 데이터 읽기
path "secret/data/sampleapp/*" {
capabilities = ["read"]
}
# 2. KV v2 목록 조회 (플러그인 에러 방지용 필수!)
path "secret/metadata/sampleapp/*" {
capabilities = ["list", "read"]
}
# 3. DB Creds 발급
path "database/creds/jenkins-role" {
capabilities = ["read"]
}
EOF
Success! Uploaded policy: sampleapp-policy
|
- 기존 KV 권한에 DB 동적 시크릿 발급 권한을 합침
(2) sampleapp-policy 를 조회해 정책이 정상 반영되었는지 확인
1
2
3
4
5
6
7
8
9
10
11
12
13
14
| vault policy read sampleapp-policy
# 1. KV v2 데이터 읽기
path "secret/data/sampleapp/*" {
capabilities = ["read"]
}
# 2. KV v2 목록 조회 (플러그인 에러 방지용 필수!)
path "secret/metadata/sampleapp/*" {
capabilities = ["list", "read"]
}
# 3. DB Creds 발급
path "database/creds/jenkins-role" {
capabilities = ["read"]
}
|
(3) AppRole에 default + sampleapp-policy 적용
1
2
3
4
5
6
7
| vault write auth/approle/role/sampleapp-role \
token_policies="default,sampleapp-policy" \
secret_id_ttl="0" \
token_ttl="1h" \
token_max_ttl="4h"
Success! Data written to: auth/approle/role/sampleapp-role
|
- 이렇게 하면
sampleapp-role을 가진 애플리케이션(Jenkins)은 별도의 재인증 없이, 다음 토큰 갱신이나 로그인 시점부터 바로 DB 권한을 쓸 수 있음
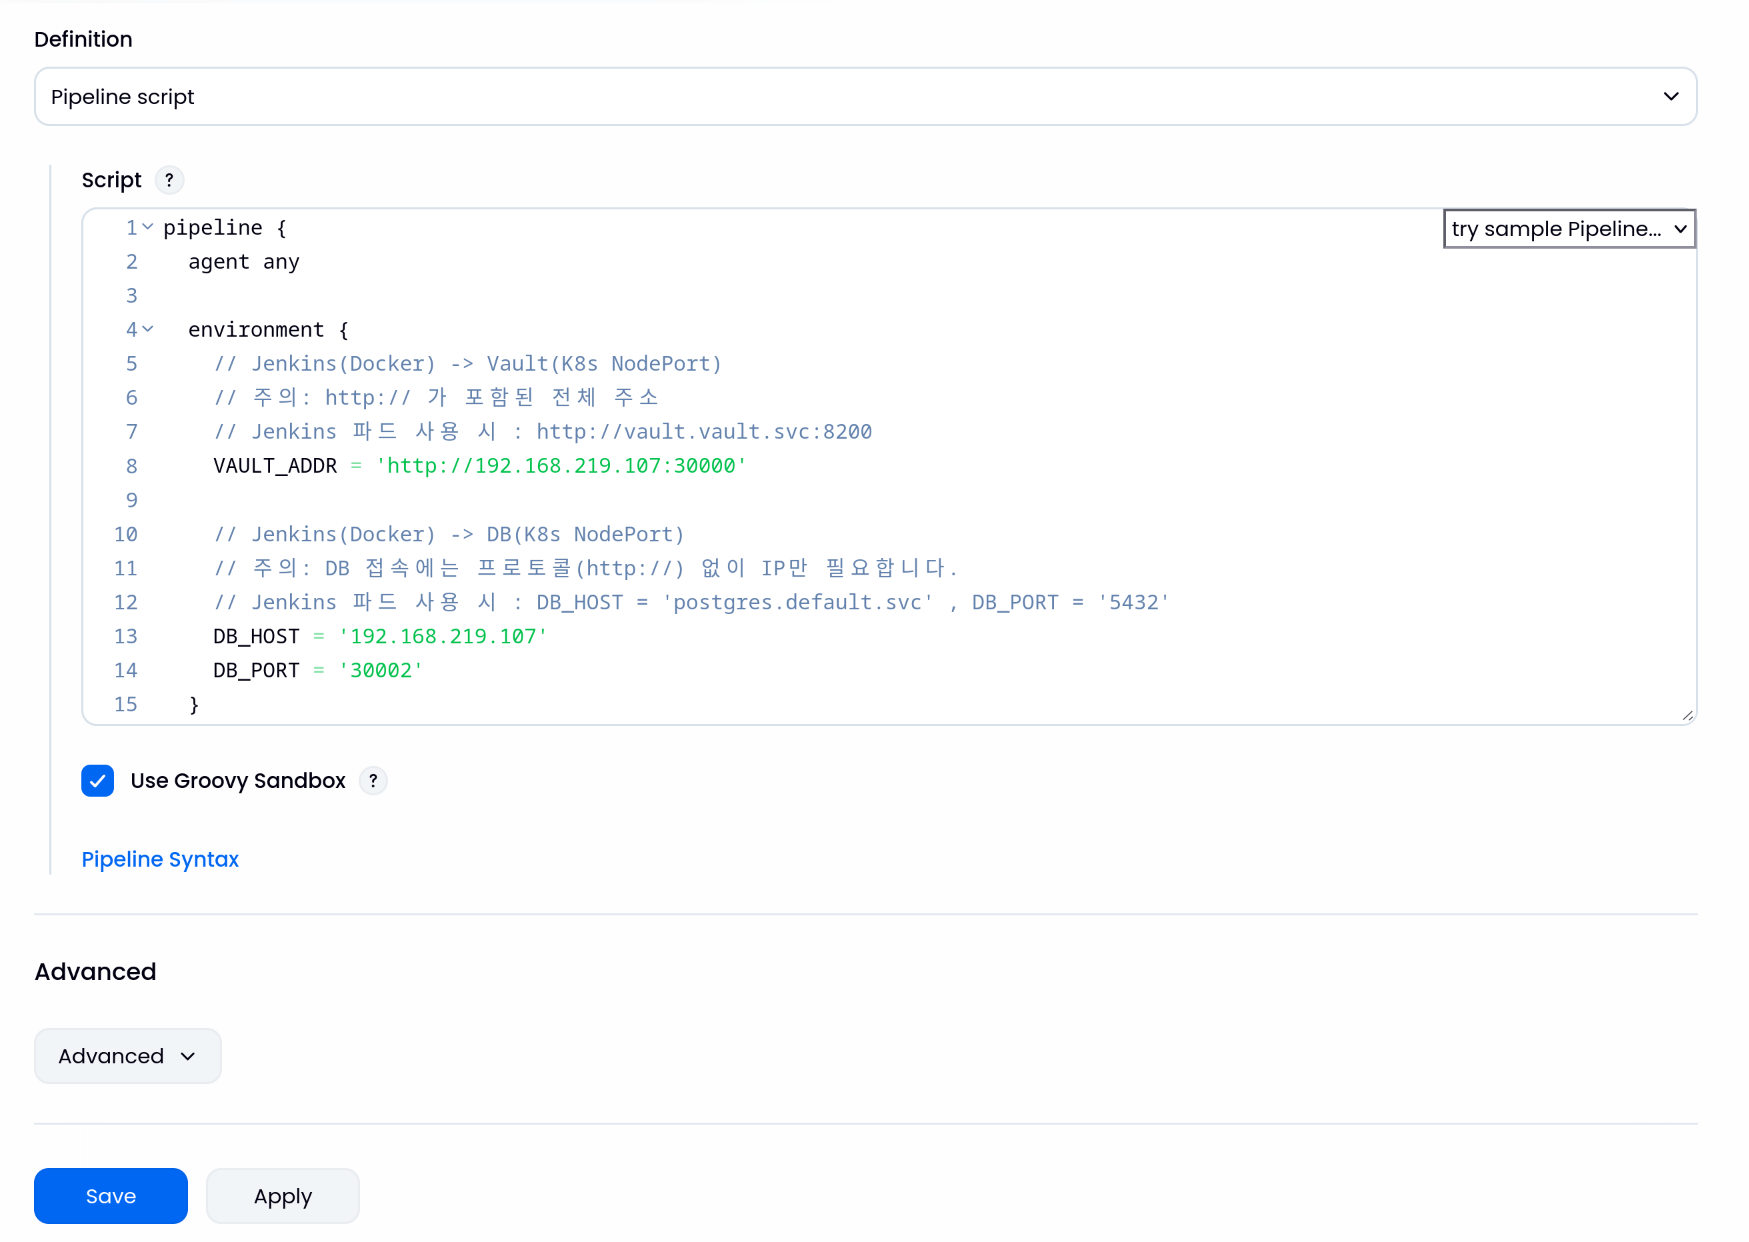
4. Jenkins Pipeline에서 Dynamic DB 시크릿 사용
1
2
3
4
5
6
7
8
9
10
11
12
13
14
15
16
17
18
19
20
21
22
23
24
25
26
27
28
29
30
31
32
33
34
35
36
37
38
39
40
41
42
43
44
45
46
47
48
49
50
51
52
53
54
55
56
57
58
59
60
61
62
63
64
65
66
67
68
69
70
71
72
73
74
75
76
77
78
79
80
81
82
83
84
85
86
87
88
89
90
91
92
93
94
95
96
97
98
99
| pipeline {
agent any
environment {
// Jenkins(Docker) -> Vault(K8s NodePort)
// 주의: http:// 가 포함된 전체 주소
// Jenkins 파드 사용 시 : http://vault.vault.svc:8200
VAULT_ADDR = 'http://192.168.219.107:30000'
// Jenkins(Docker) -> DB(K8s NodePort)
// 주의: DB 접속에는 프로토콜(http://) 없이 IP만 필요합니다.
// Jenkins 파드 사용 시 : DB_HOST = 'postgres.default.svc' , DB_PORT = '5432'
DB_HOST = '192.168.219.107'
DB_PORT = '30002'
}
stages {
stage('Vault 통합 및 DB 접속 테스트') {
steps {
withVault([
configuration: [
vaultUrl: "${VAULT_ADDR}",
vaultCredentialId: 'vault-approle-creds',
// ⚠️ 중요: 여기서 전역 engineVersion 설정을 하지 않습니다.
skipSslVerification: true
],
vaultSecrets: [
// 1. KV Secret (정적 시크릿)
// KV v2 엔진을 사용하므로 engineVersion: 2를 명시합니다.
[
path: 'secret/sampleapp/config',
engineVersion: 2,
secretValues: [
[envVar: 'STATIC_USER', vaultKey: 'username']
]
],
// 2. Database Secret (동적 시크릿)
// DB 엔진은 기본 방식(v1)으로 통신해야 경로 에러가 없습니다.
[
path: 'database/creds/jenkins-role',
engineVersion: 1,
secretValues: [
[envVar: 'DB_USER', vaultKey: 'username'],
[envVar: 'DB_PASS', vaultKey: 'password']
]
]
]
]) {
script {
echo "=================================================="
echo " Vault 연동 테스트 시작 "
echo "=================================================="
// 1. 정적 시크릿 확인
// sed 명령어로 글자 사이에 공백을 넣어 마스킹(****)을 우회합니다.
// 예: d e m o
sh '''
echo "[1] KV Secret (Static)"
echo " - 원본 값은 보안상 **** 로 표시됩니다."
echo " - 실제 값 확인: $(echo $STATIC_USER | sed "s/./& /g")"
'''
// 2. 동적 시크릿 확인 (핵심!)
// Vault가 생성한 임시 DB 계정(v-token-...)을 확인합니다.
sh '''
echo "--------------------------------------------------"
echo "[2] Database Secret (Dynamic)"
echo " - Vault가 생성한 임시 계정 ID입니다."
echo " - 실제 값 확인: $(echo $DB_USER | sed "s/./& /g")"
echo "--------------------------------------------------"
'''
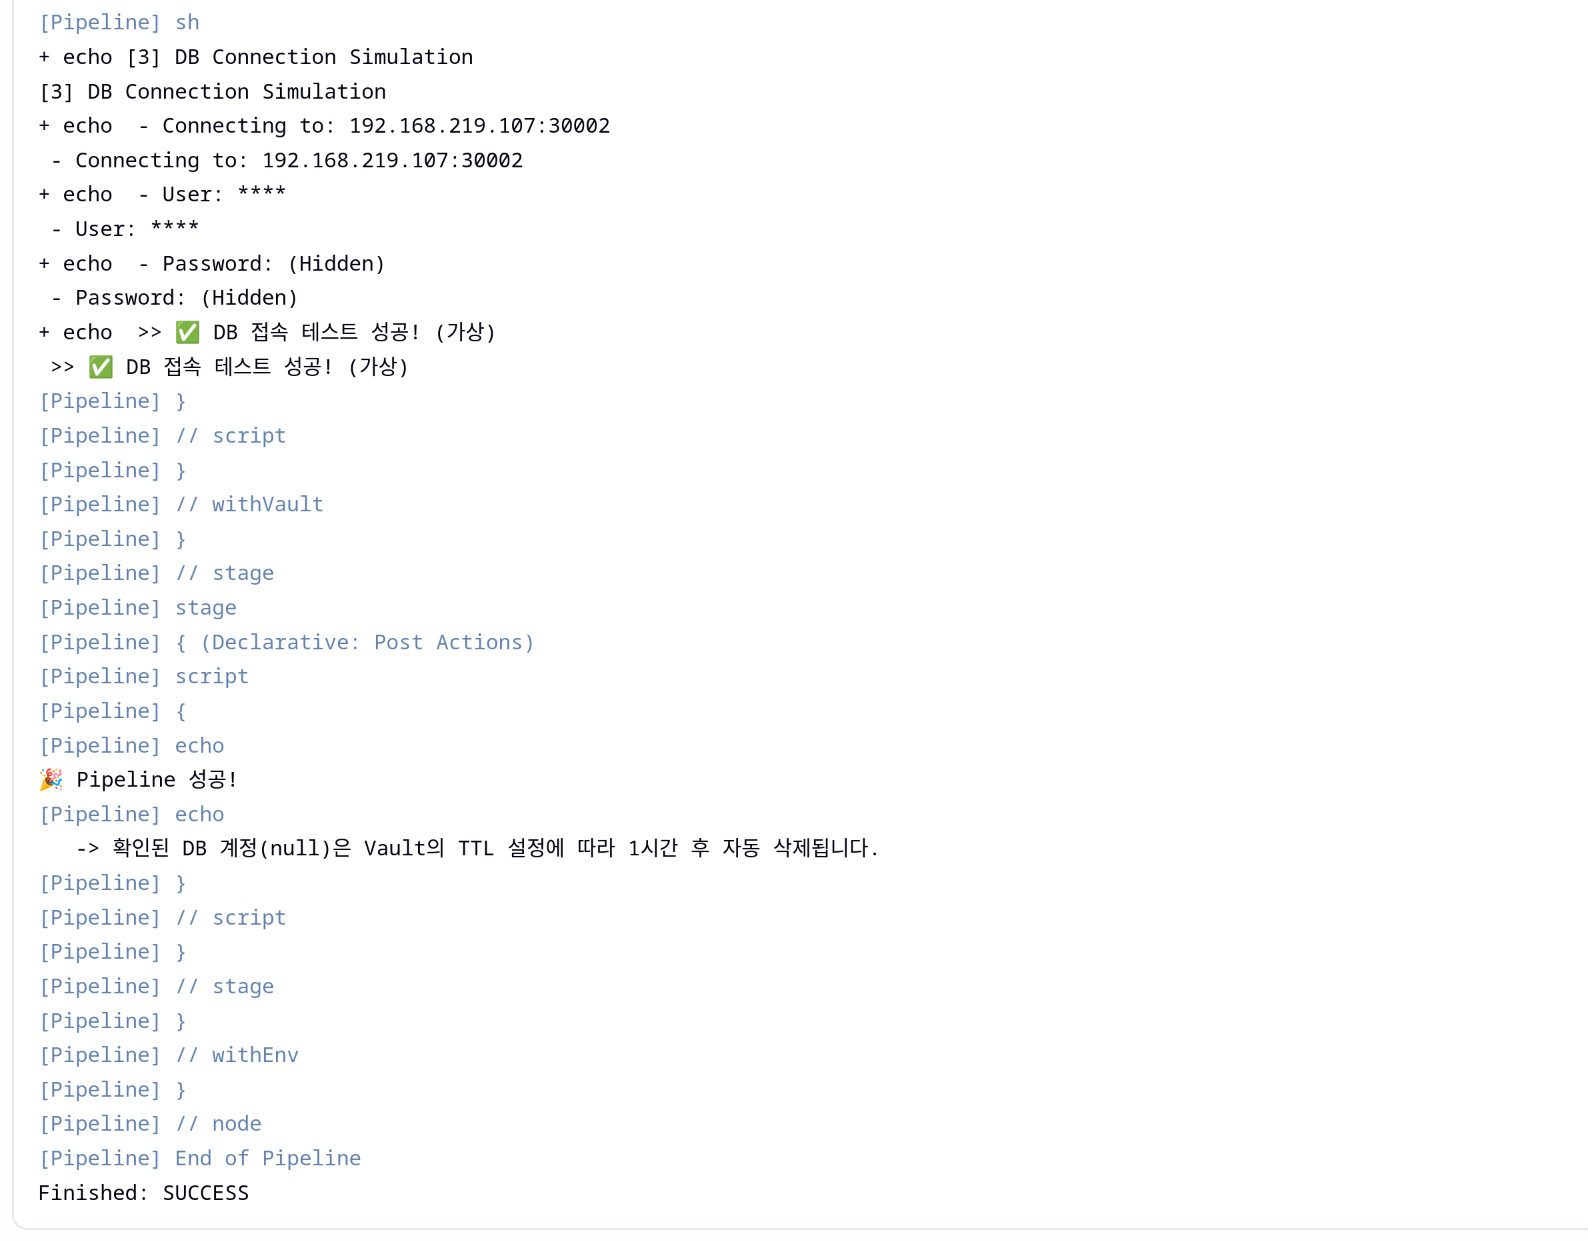
// 3. DB 접속 시뮬레이션
// 실제 애플리케이션에서 DB 연결 문자열을 만드는 과정입니다.
sh '''
echo "[3] DB Connection Simulation"
echo " - Connecting to: ${DB_HOST}:${DB_PORT}"
echo " - User: ${DB_USER}"
echo " - Password: (Hidden)"
echo " >> ✅ DB 접속 테스트 성공! (가상)"
'''
}
}
}
}
}
post {
success {
script {
echo "🎉 Pipeline 성공!"
echo " -> 확인된 DB 계정(${env.DB_USER})은 Vault의 TTL 설정에 따라 1시간 후 자동 삭제됩니다."
}
}
failure {
echo "💥 Pipeline 실패! Vault 로그나 네트워크 설정을 확인하세요."
}
}
}
|
5. PostgreSQL 내부에서 동적 계정 생성 여부 검증
1
2
3
4
5
6
7
8
9
10
11
| kubectl exec -it -n default deploy/postgres -- psql -U postgres
psql (13.23 (Debian 13.23-1.pgdg13+1))
Type "help" for help.
postgres=# \du
List of roles
Role name | Attributes | Member of
----------------------------------------------------+------------------------------------------------------------+-----------
postgres | Superuser, Create role, Create DB, Replication, Bypass RLS | {}
v-approle-jenkins--79iZKB4v0PdCUb1JaiKU-1764403151 | Password valid until 2025-11-29 08:59:16+00 | {}
|
- Vault가 실제로 PostgreSQL에 계정을 만들었는지 확인하려면 DB 안에서 Role 목록 조회
v-approle-jenkins-... 로 시작하는 Role이 바로 Vault가 만든 임시 계정임- Attributes에
Password valid until …이 명시되어 있으며 TTL이 지나면 Vault가 계정을 정리하거나 더 이상 유효하지 않게 됨
📦 암호화(Encryption)와 Vault Transit 엔진
1. 사전준비: 환경변수 설정
1
2
3
4
| export NS=vault-demo
export IMAGE=hyungwookhub/vault-transit-demo:v1
export VAULT_ADDR=http://localhost:30000
export VAULT_TOKEN=root
|
2. Vault Transit 활성화
(1) Vault 서버 현재 상태 확인 (Seal 여부, 클러스터 상태 등)
1
2
3
4
5
6
7
8
9
10
11
12
13
14
15
| vault status
Key Value
--- -----
Seal Type shamir
Initialized true
Sealed false
Total Shares 1
Threshold 1
Version 1.20.4
Build Date 2025-09-23T13:22:38Z
Storage Type inmem
Cluster Name vault-cluster-1597f923
Cluster ID ead5b677-accb-a319-bc9b-9997309c7712
HA Enabled false
|
(2) Transit Secrets Engine 활성화 (암복호화 전용 엔진)
1
2
3
| vault secrets enable transit
Success! Enabled the transit secrets engine at: transit/
|
1
2
3
4
5
6
7
8
9
10
| vault secrets list
Path Type Accessor Description
---- ---- -------- -----------
cubbyhole/ cubbyhole cubbyhole_94020688 per-token private secret storage
database/ database database_b1424172 n/a
identity/ identity identity_d6877608 identity store
secret/ kv kv_050b6113 key/value secret storage
sys/ system system_428d6c50 system endpoints used for control, policy and debugging
transit/ transit transit_dfe4b3fa n/a
|
(3) 암호화 키 생성 (ds-poc)
1
2
3
4
5
6
7
8
9
10
11
12
13
14
15
16
17
18
19
20
21
| vault write -f transit/keys/ds-poc type=aes256-gcm96
Key Value
--- -----
allow_plaintext_backup false
auto_rotate_period 0s
deletion_allowed false
derived false
exportable false
imported_key false
keys map[1:1764403997]
latest_version 1
min_available_version 0
min_decryption_version 1
min_encryption_version 0
name ds-poc
supports_decryption true
supports_derivation true
supports_encryption true
supports_signing false
type aes256-gcm96
|
(4) Transit 엔진 내에 생성된 키 목록 확인
1
2
3
4
5
| vault list transit/keys
Keys
----
ds-poc
|
3. Transit 엔진 암·복호 테스트
(1) 평문을 Base64 인코딩 후 Vault Transit Encrypt API 호출
1
2
3
4
| PLAINTEXT="My Data"
CIPHERTEXT=$(vault write -field=ciphertext transit/encrypt/ds-poc \
plaintext=$(echo -n "$PLAINTEXT" | base64))
|
(2) 생성된 암호문(Ciphertext) 값 확인
1
2
| echo "ciphertext: $CIPHERTEXT"
ciphertext: vault:v1:PAXCenGUxHc/2owgm5GlP38zmq6K5ZLNzAy78n9xMjX2+2Q=
|
(3) 암호문을 Transit Decrypt API에 전달 후 Base64 디코딩
1
2
3
4
| vault write -field=plaintext transit/decrypt/ds-poc \
ciphertext="$CIPHERTEXT" | base64 -d && echo
My Data
|
4. MySQL 배포 및 VaultData DB 준비
(1) MySQL Deployment + Service(NodePort) 생성
1
2
3
4
5
6
7
8
9
10
11
12
13
14
15
16
17
18
19
20
21
22
23
24
25
26
27
28
29
30
31
32
33
34
35
36
37
38
39
40
41
42
43
44
45
46
47
48
| cat <<EOF | kubectl apply -f -
apiVersion: v1
kind: Namespace
metadata:
name: ${NS}
---
apiVersion: apps/v1
kind: Deployment
metadata:
name: mysql
namespace: ${NS}
spec:
selector:
matchLabels:
app: mysql
template:
metadata:
labels:
app: mysql
spec:
containers:
- name: mysql
image: mysql:8.0.31
env:
- name: MYSQL_ROOT_PASSWORD
value: "rootpassword"
ports:
- containerPort: 3306
---
apiVersion: v1
kind: Service
metadata:
name: mysql
namespace: ${NS}
spec:
type: NodePort
selector:
app: mysql
ports:
- name: mysql
port: 3306
targetPort: 3306
nodePort: 30002
EOF
namespace/vault-demo created
deployment.apps/mysql created
service/mysql created
|
(2) MySQL 배포 상태 확인
1
2
| kubectl -n ${NS} rollout status deploy/mysql
deployment "mysql" successfully rolled out
|
(3) VaultData DB 생성
1
2
3
4
| kubectl -n ${NS} exec -it deploy/mysql -- \
mysql -uroot -prootpassword -e "CREATE DATABASE IF NOT EXISTS VaultData;"
mysql: [Warning] Using a password on the command line interface can be insecure.
|
(4) Database 생성확인
1
2
3
4
5
6
7
8
9
| kubectl -n ${NS} exec -it deploy/mysql -- \
mysql -uroot -prootpassword -e "SHOW DATABASES LIKE 'VaultData';"
mysql: [Warning] Using a password on the command line interface can be insecure.
+----------------------+
| Database (VaultData) |
+----------------------+
| VaultData |
+----------------------+
|
5. Vault Transit Demo 애플리케이션 배포
1
2
3
4
5
6
7
8
9
10
11
12
13
14
15
16
17
18
19
20
21
22
23
24
25
26
27
28
29
30
31
32
33
34
35
36
37
38
39
40
41
42
43
44
45
46
47
48
49
50
51
52
53
54
55
56
57
58
59
60
61
62
63
64
65
66
| cat <<EOF | kubectl apply -f -
apiVersion: apps/v1
kind: Deployment
metadata:
name: vault-transit-demo
namespace: ${NS}
spec:
replicas: 1
selector:
matchLabels:
app: vault-transit-demo
template:
metadata:
labels:
app: vault-transit-demo
spec:
containers:
- name: app
image: ${IMAGE}
imagePullPolicy: IfNotPresent
ports:
- containerPort: 8080
env:
- name: MYSQL_HOST
value: mysql.${NS}.svc.cluster.local
- name: MYSQL_PORT
value: "3306"
- name: MYSQL_DB_NAME
value: VaultData
- name: MYSQL_USERNAME
value: root
- name: MYSQL_USERPW
value: rootpassword
- name: VAULT_HOST
value: vault.vault.svc.cluster.local # 필요 시 노드 IP/NodePort로 교체
- name: VAULT_PORT
value: "8200" # NodePort로 붙을 땐 30000 등으로 교체
- name: VAULT_SCHEME
value: http
- name: VAULT_TOKEN
value: root
- name: VAULT_TRANSIT_KEY_NAME
value: ds-poc
- name: SERVER_PORT
value: "8080"
- name: AWS_REGION
value: "ap-northeast-2"
---
apiVersion: v1
kind: Service
metadata:
name: vault-transit-demo
namespace: ${NS}
spec:
type: NodePort
selector:
app: vault-transit-demo
ports:
- port: 8080
targetPort: 8080
nodePort: 30003
name: http
EOF
deployment.apps/vault-transit-demo created
service/vault-transit-demo created
|
6. 애플리케이션 레벨 데이터/파일 암호화 실습
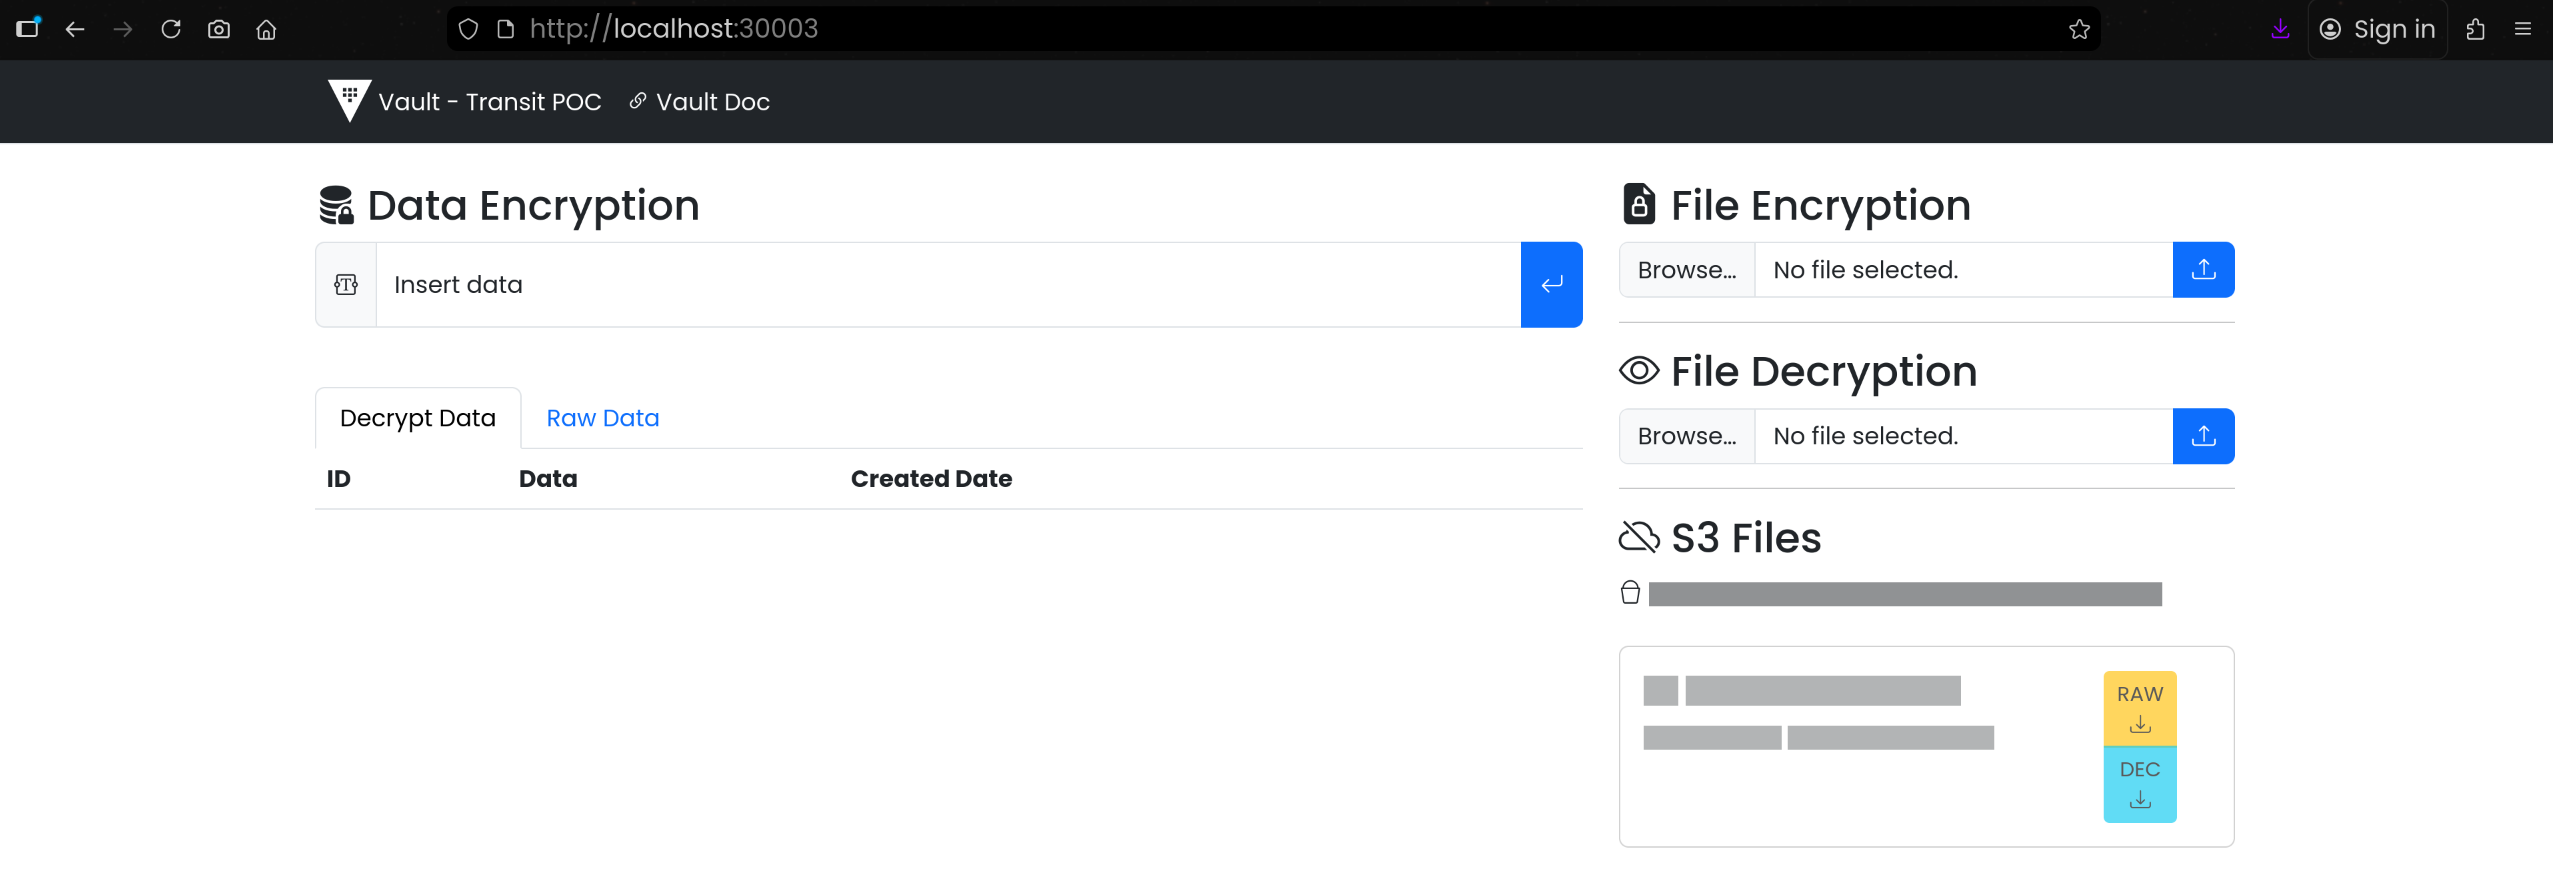
(1) UI 접속
(2) Data Encryption: 텍스트 암/복호화
- Raw Data:
vault: 접두사로 시작하는 암호화된 데이터 확인
1
2
3
4
5
6
7
8
9
10
11
12
13
14
15
16
| kubectl -n ${NS} exec -it deploy/mysql -- \
mysql -uroot -prootpassword -e "USE VaultData; SHOW TABLES; SELECT id,data,date_created FROM vault_data;"
# 결과
mysql: [Warning] Using a password on the command line interface can be insecure.
+---------------------+
| Tables_in_VaultData |
+---------------------+
| vault_data |
+---------------------+
+----+-----------------------------------------------------------------------+----------------------------+
| id | data | date_created |
+----+-----------------------------------------------------------------------+----------------------------+
| 1 | vault:v1:Na0Q4biE6LjXuzqqUE6HldBzcDk/yGZ+ftjNMhm05lTACWjfGhW0WQiFFw== | 2025-11-29 17:25:56.660000 |
| 2 | vault:v1:EG+3dRyndoJHbLSQfTyNEHmOHcFKY7gwLdx1zs5ea1nJrWGWU3tc2Q== | 2025-11-29 17:26:00.766000 |
+----+-----------------------------------------------------------------------+----------------------------+
|
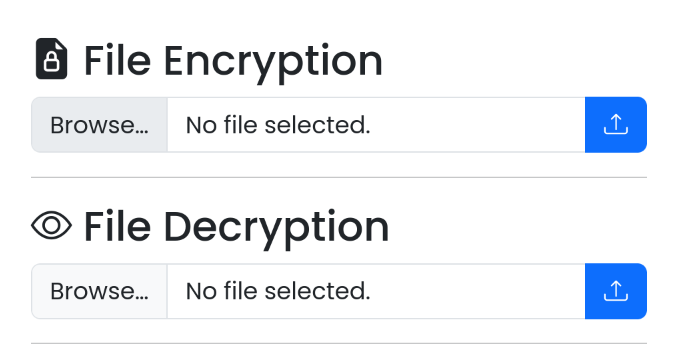
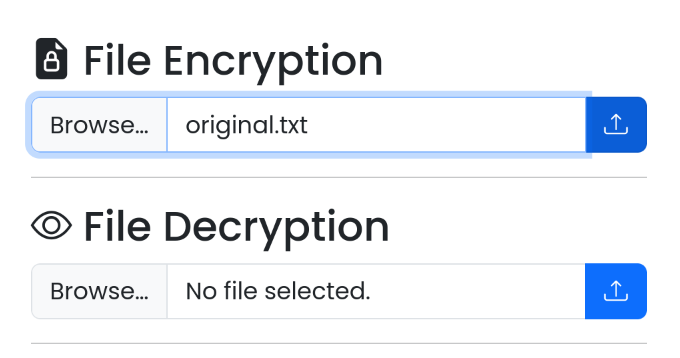
(3) Data Encryption: 파일 암/복호화
1
2
3
4
5
6
| # 샘플파일 생성
echo "hello vault transit" > original.txt
# 업로드 전 확인
md5sum original.txt
5b92abfe363ae7212a37a55f96bf5967 original.txt
|
- [File Encryption] - [Browse…] 선택 후
original.txt 파일 업로드
- 암호화 된 파일 다운로드:
original.txt.enc - 원본 파일과 해시 값 비교
1
2
3
| md5sum original.txt original.txt.enc
5b92abfe363ae7212a37a55f96bf5967 original.txt
77fd4610857f05572eeb8c12d02b3dfa original.txt.enc # 해시값 변경 확인
|
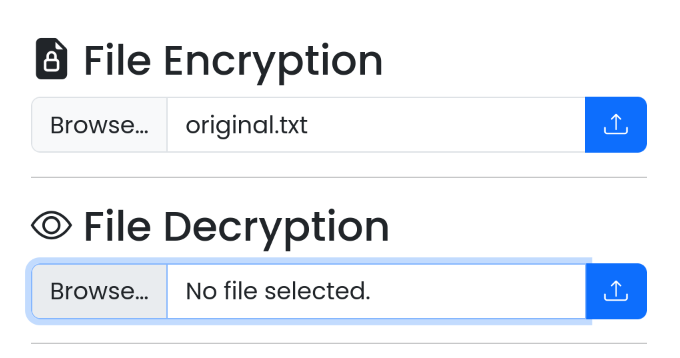
- [File Decryption] - [Choose File] 선택 후
original.txt.enc 파일 업로드
- 복호화 된 파일 다운로드:
original.txt
1
2
3
4
5
6
| mv original.txt original.dec # 파일명이 동일해서 변경..
md5sum original.txt original.txt.enc original.dec
5b92abfe363ae7212a37a55f96bf5967 original.txt
77fd4610857f05572eeb8c12d02b3dfa original.txt.enc
5b92abfe363ae7212a37a55f96bf5967 original.dec
|
7. 정리/클린업
1
2
3
| kubectl delete ns ${NS}
namespace "vault-demo" deleted
|