⚙️ 실습 환경 구성 - 젠킨스
1. 작업 디렉토리 생성 후 이동
1
2
| mkdir cicd-labs
cd cicd-labs
|
2. 도커 컴포즈 파일 생성
1
2
3
4
5
6
7
8
9
10
11
12
13
14
15
16
17
18
19
20
21
22
23
| cat <<EOT > docker-compose.yaml
services:
jenkins:
container_name: jenkins
image: jenkins/jenkins
restart: unless-stopped
networks:
- kind
ports:
- "8080:8080"
- "50000:50000"
volumes:
- /var/run/docker.sock:/var/run/docker.sock
- jenkins_home:/var/jenkins_home
volumes:
jenkins_home:
networks:
kind:
external: true
EOT
|
3. 젠킨스 배포
✅ 출력
1
2
3
| [+] Running 2/2
✔ Volume "cicd-labs_jenkins_home" Created 0.0s
✔ Container jenkins Started
|
4. 도커 컴포즈 컨테이너 상태 조회
✅ 출력
1
2
| NAME IMAGE COMMAND SERVICE CREATED STATUS PORTS
jenkins jenkins/jenkins "/usr/bin/tini -- /u…" jenkins 10 seconds ago Up 9 seconds 0.0.0.0:8080->8080/tcp, [::]:8080->8080/tcp, 0.0.0.0:50000->50000/tcp, [::]:50000->50000/tcp
|
5. 기본 정보 확인
1
| for i in jenkins ; do echo ">> container : $i <<"; docker compose exec $i sh -c "whoami && pwd"; echo; done
|
✅ 출력
1
2
3
| >> container : jenkins <<
jenkins
/
|
6. 도커를 이용하여 젠킨스 컨테이너로 접속
1
2
3
4
| docker compose exec jenkins bash
jenkins@01fee1ac3d51:/$ exit
exit
|
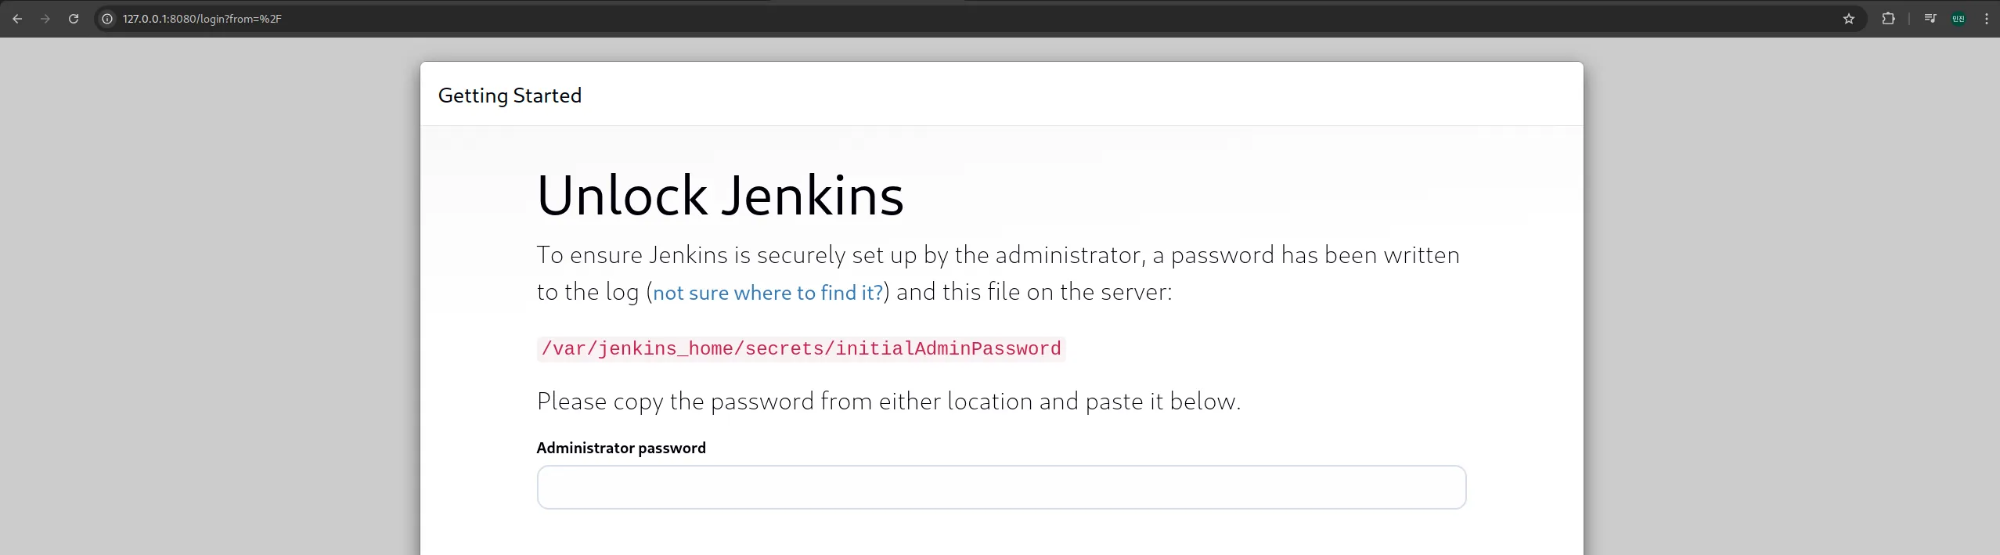
7. 젠킨스 초기 암호 확인
1
| docker compose exec jenkins cat /var/jenkins_home/secrets/initialAdminPassword
|
✅ 출력
1
| 72eb90cdffce42118d6c28cc5c4f063a
|
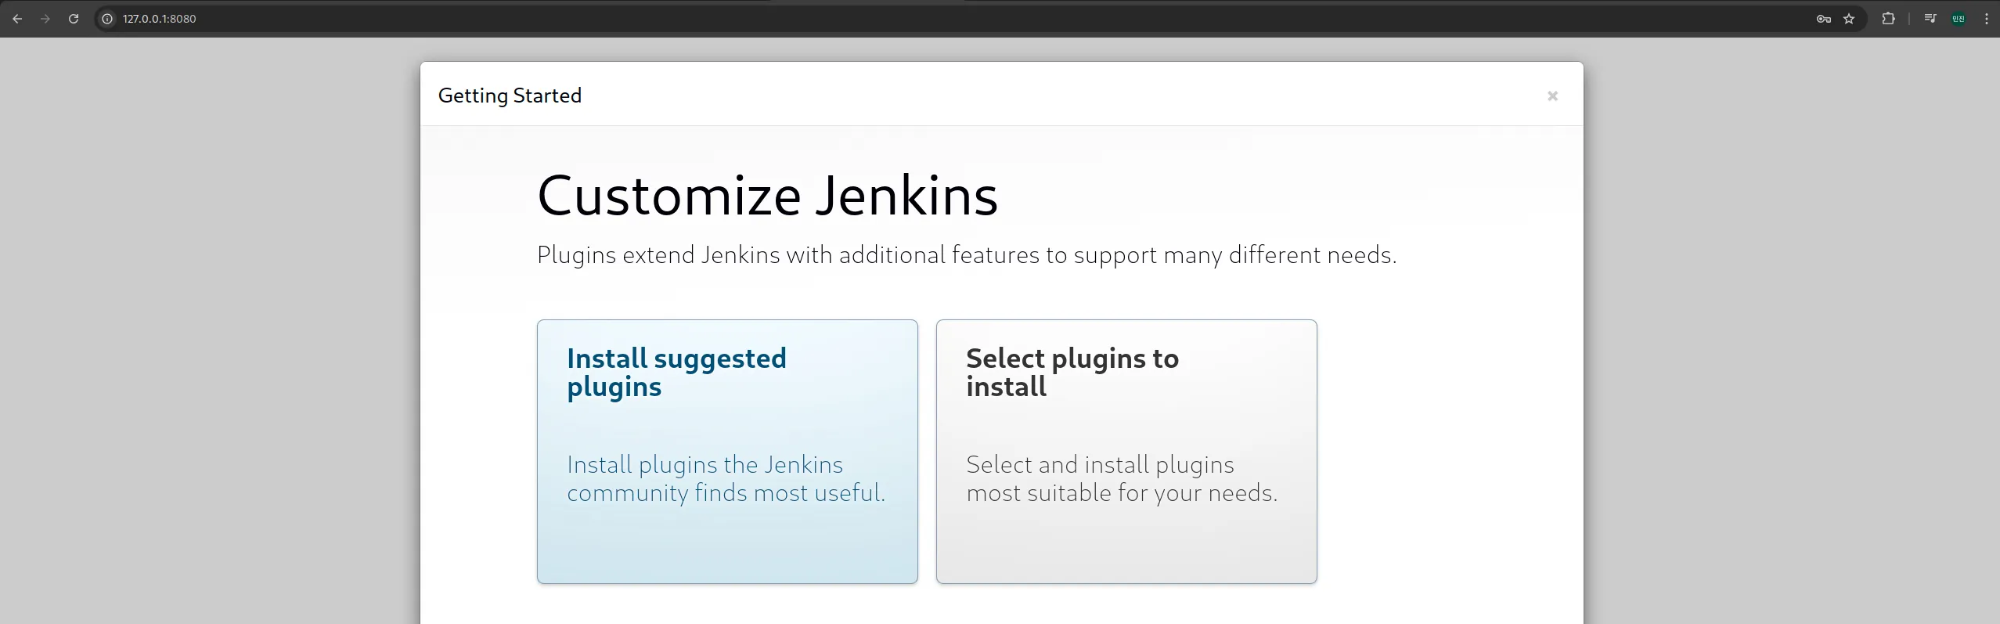
8. 젠킨스 웹 접속
(1) http://127.0.0.1:8080 접속 후, 초기 암호 입력
(2) Install suggested plugins 옵션 선택
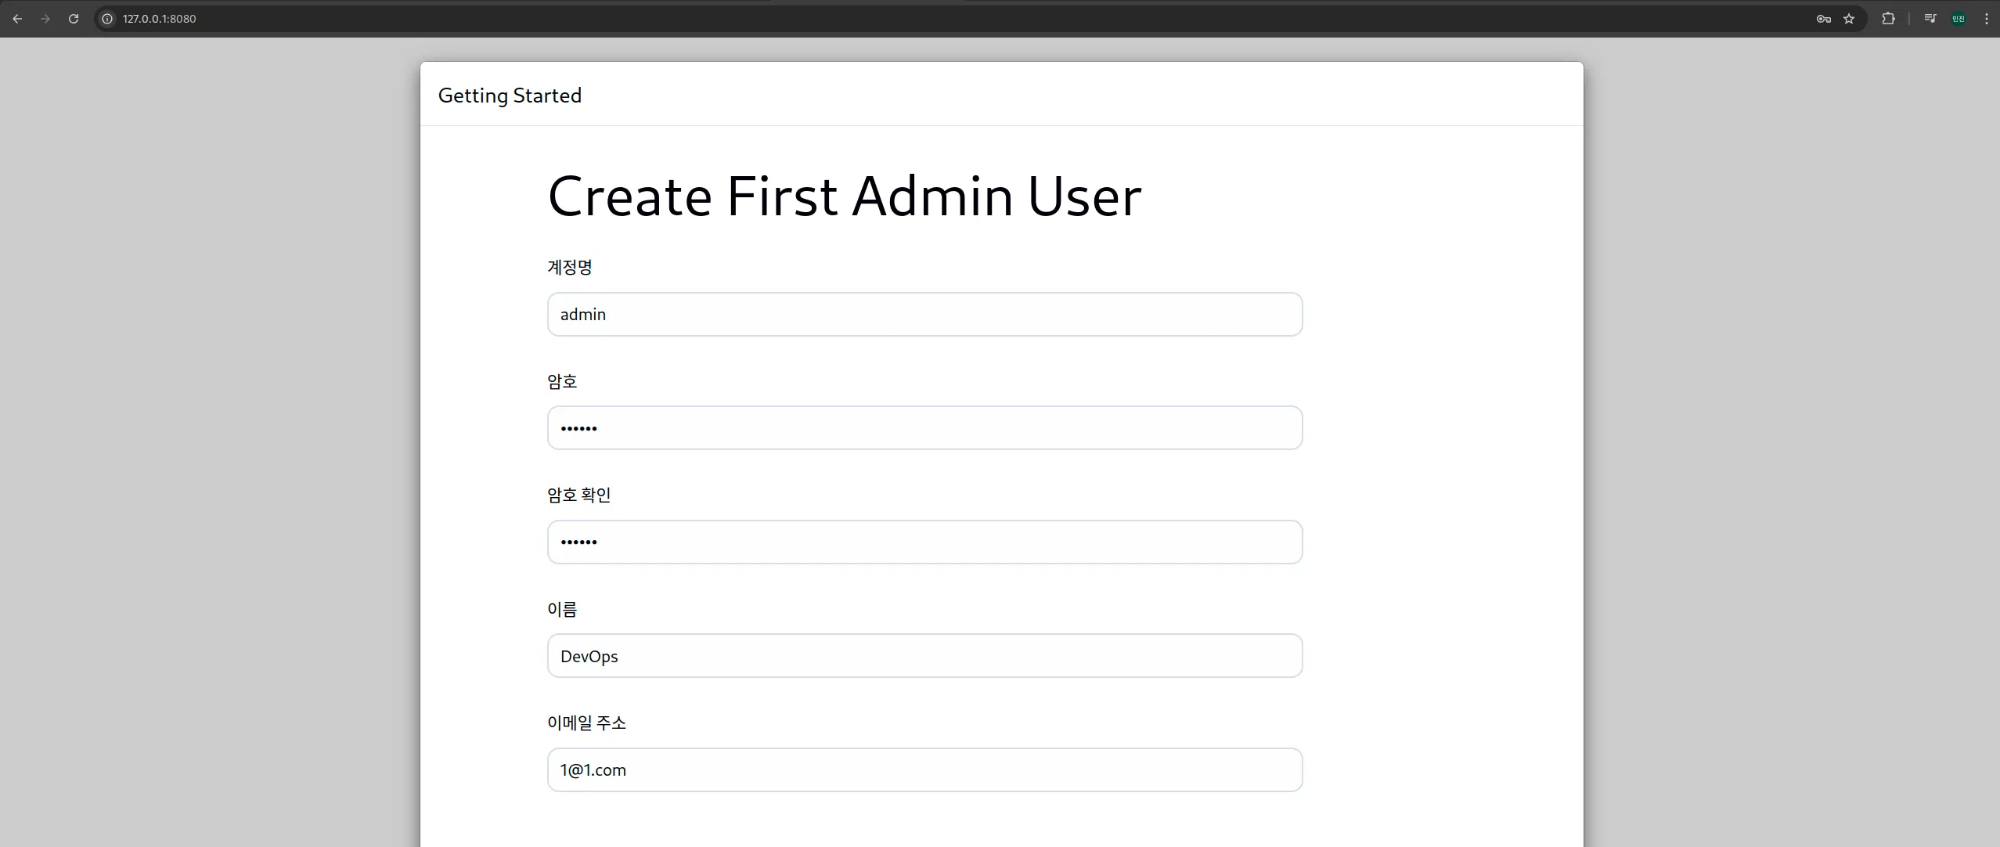
(3) Admin User 계정 생성 - admin / qwe123으로 설정
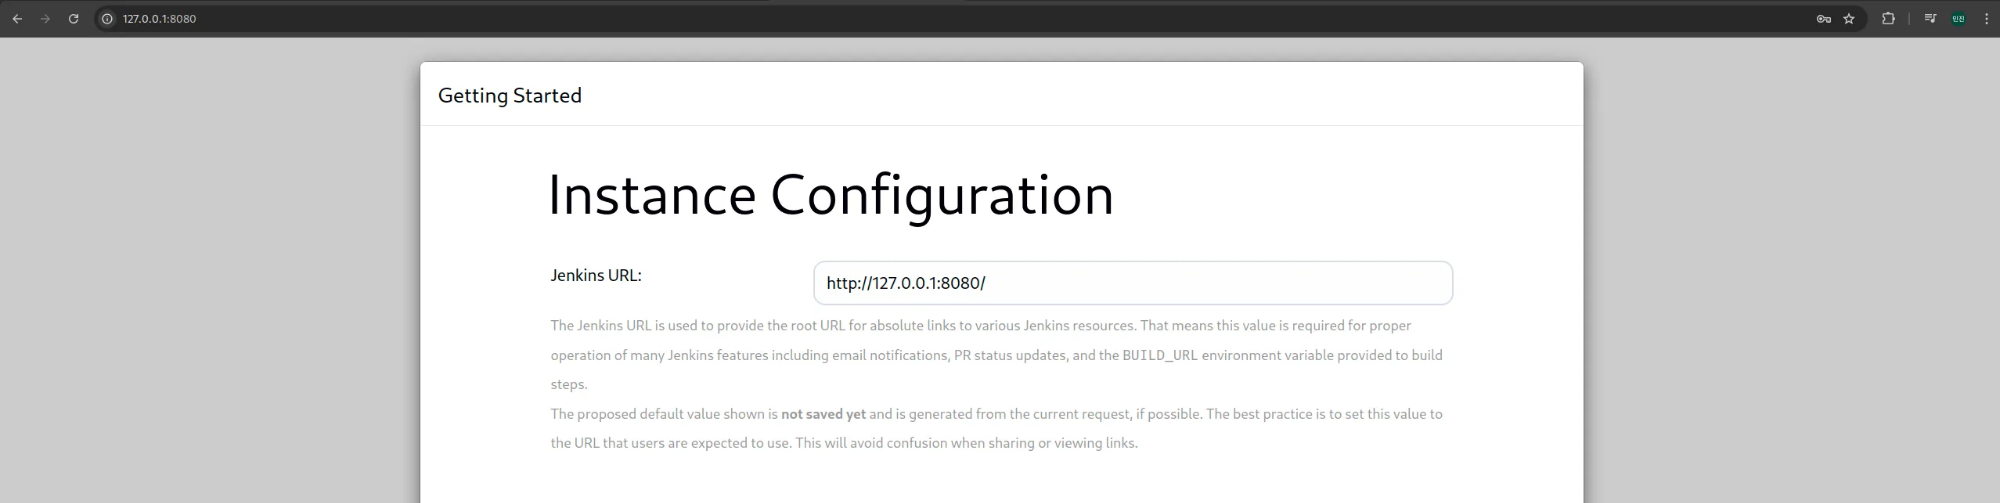
(4) 젠킨스 URL 설정 - http://127.0.0.1:8080/
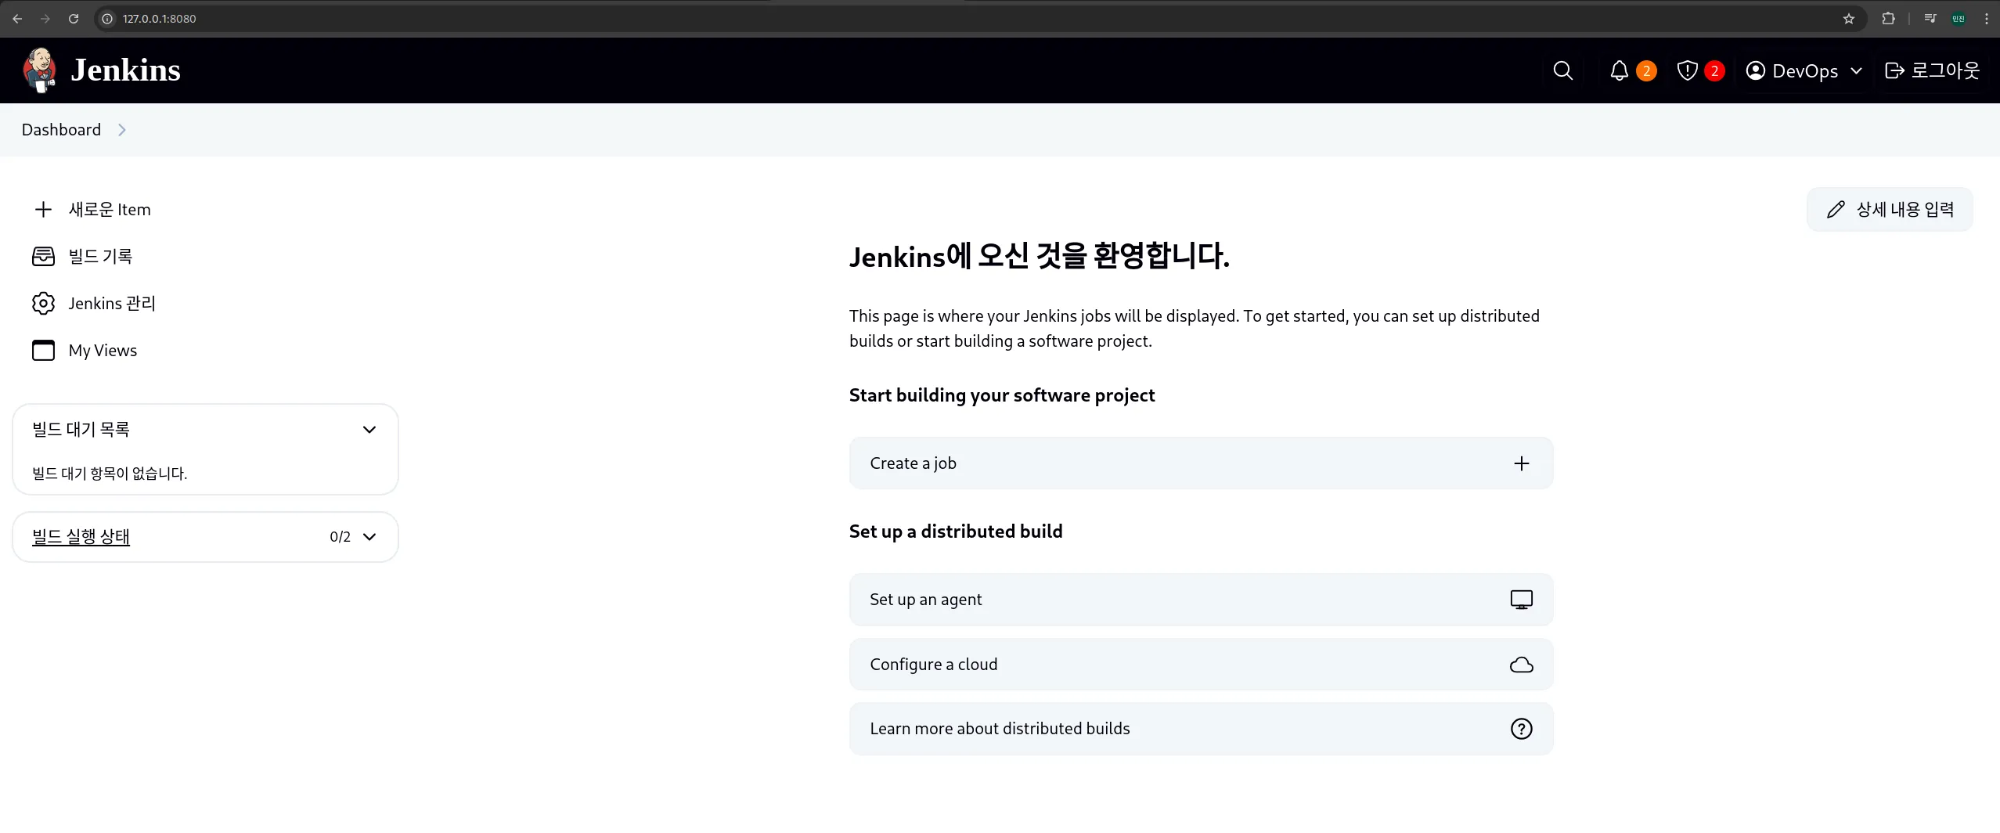
(5) 젠킨스 초기 진입 화면
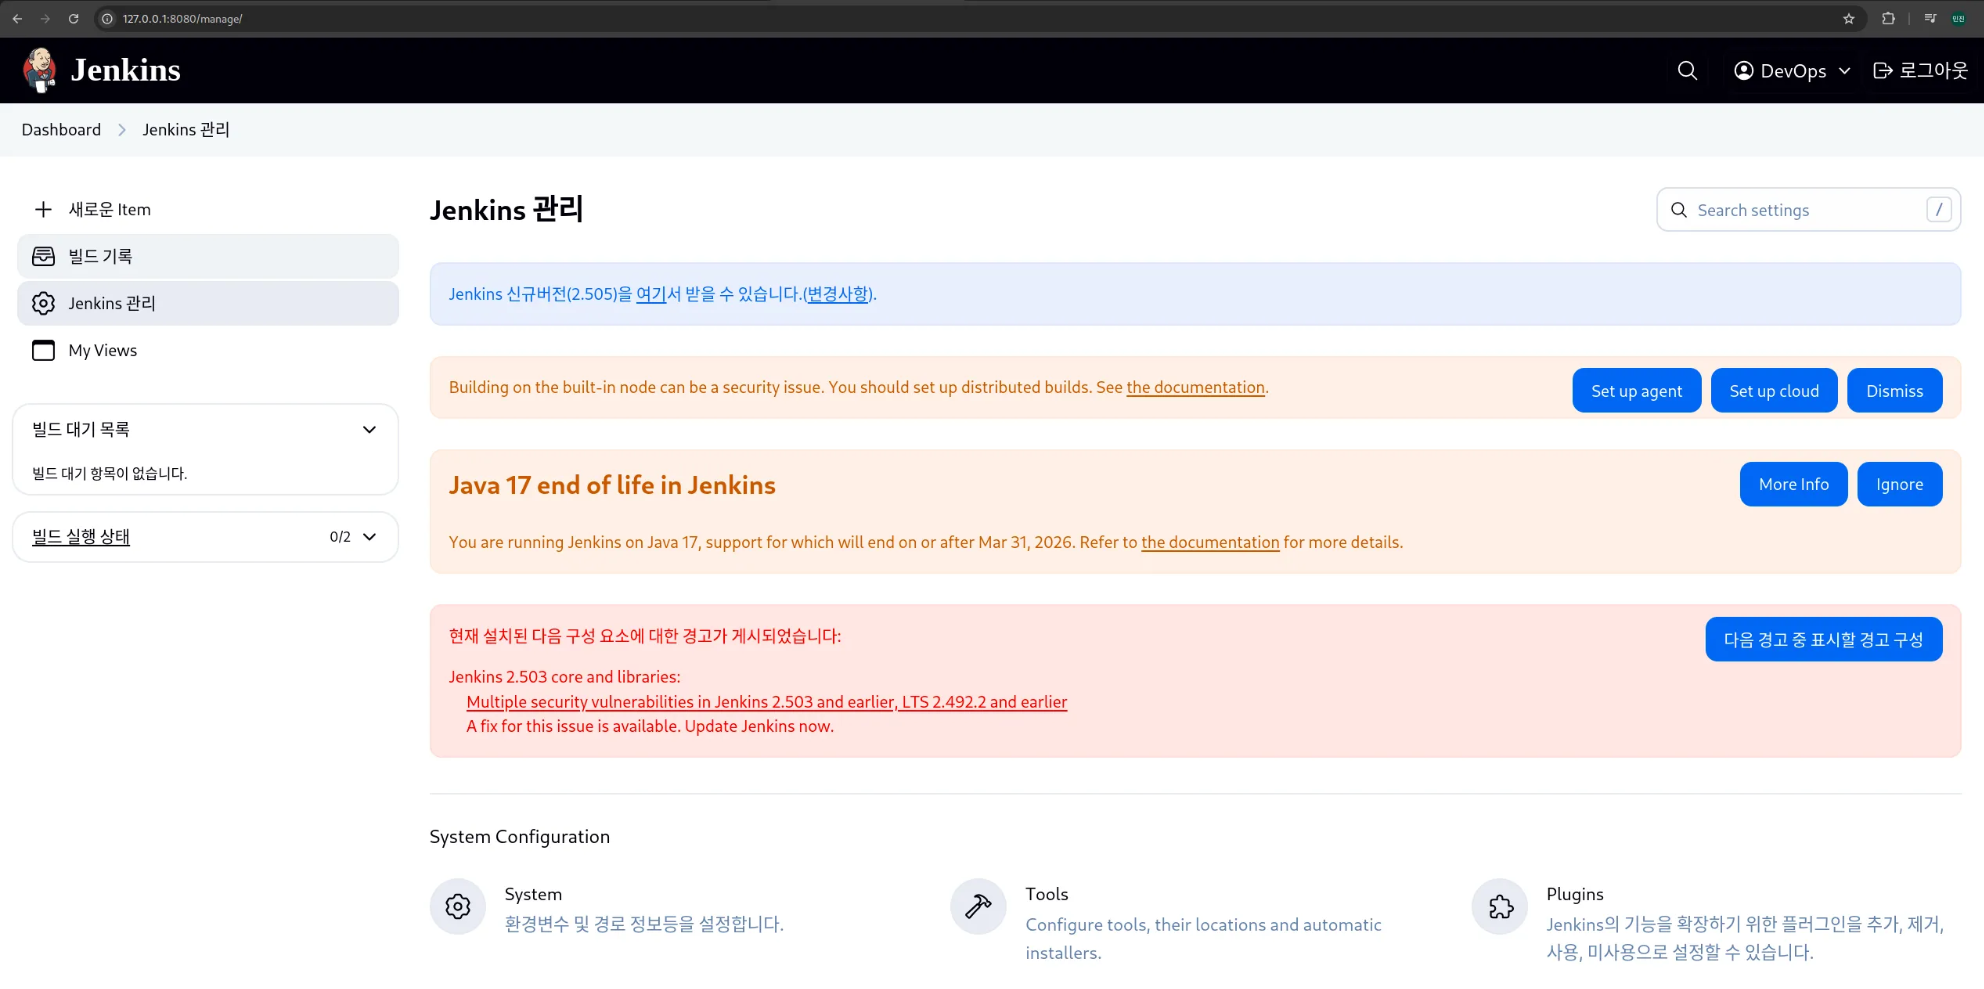
(6) 젠킨스 관리에서 Vault 플러그인 설치
🐳 실습 환경 구성 - K8S(kind)
1. cicd-labs 디렉터리에서 아래 파일 작성
1
2
3
4
5
6
7
8
9
10
11
12
13
14
15
16
17
18
19
20
21
22
23
24
25
| cat > kind-3node.yaml <<EOF
kind: Cluster
apiVersion: kind.x-k8s.io/v1alpha4
networking:
apiServerAddress: "127.0.0.1" # $MyIP로 설정하셔도 됩니다.
nodes:
- role: control-plane
extraPortMappings:
- containerPort: 30000
hostPort: 30000
- containerPort: 30001
hostPort: 30001
- containerPort: 30002
hostPort: 30002
- containerPort: 30003
hostPort: 30003
- containerPort: 30004
hostPort: 30004
- containerPort: 30005
hostPort: 30005
- containerPort: 30006
hostPort: 30006
- role: worker
- role: worker
EOF
|
2. 클러스터 배포
1
| kind create cluster --config kind-3node.yaml --name myk8s --image kindest/node:v1.32.2
|
✅ 출력
1
2
3
4
5
6
7
8
9
10
11
12
13
14
| Creating cluster "myk8s" ...
✓ Ensuring node image (kindest/node:v1.32.2) 🖼
✓ Preparing nodes 📦 📦 📦
✓ Writing configuration 📜
✓ Starting control-plane 🕹️
✓ Installing CNI 🔌
✓ Installing StorageClass 💾
✓ Joining worker nodes 🚜
Set kubectl context to "kind-myk8s"
You can now use your cluster with:
kubectl cluster-info --context kind-myk8s
Have a nice day! 👋
|
3. kind 상세 정보 확인
1
| docker inspect kind | jq
|
✅ 출력
1
2
3
4
5
6
7
8
9
10
11
12
13
14
15
16
17
18
19
20
21
22
23
24
25
26
27
28
29
30
31
32
33
34
35
36
37
38
39
40
41
42
43
44
45
46
47
48
49
50
51
52
53
54
55
56
57
58
59
60
61
62
63
64
65
66
67
68
| [
{
"Name": "kind",
"Id": "dbf072d0a217f53e0b62f42cee01bcecc1b2f6ea216475178db001f2e38681f5",
"Created": "2025-01-26T16:18:22.33980443+09:00",
"Scope": "local",
"Driver": "bridge",
"EnableIPv4": true,
"EnableIPv6": true,
"IPAM": {
"Driver": "default",
"Options": {},
"Config": [
{
"Subnet": "172.18.0.0/16",
"Gateway": "172.18.0.1"
},
{
"Subnet": "fc00:f853:ccd:e793::/64",
"Gateway": "fc00:f853:ccd:e793::1"
}
]
},
"Internal": false,
"Attachable": false,
"Ingress": false,
"ConfigFrom": {
"Network": ""
},
"ConfigOnly": false,
"Containers": {
"01fee1ac3d51d8f4c4378c53b6f3a70cded0c9a396bd4a79d53928fbc6721205": {
"Name": "jenkins",
"EndpointID": "ae52706c8e8daeab92282bb420ee330ad56930c00df0c416234b41f22eb9e6f1",
"MacAddress": "12:af:53:29:a0:79",
"IPv4Address": "172.18.0.2/16",
"IPv6Address": "fc00:f853:ccd:e793::2/64"
},
"042a42ff8494a7808acc048296edb5b56f774e6952f26b32e3ad8849e8609ba7": {
"Name": "myk8s-worker",
"EndpointID": "cb2eaddcec377ef1c6d8830f52543b74db764d531dd46f88bda4342acc24c974",
"MacAddress": "5a:fc:0b:04:57:a8",
"IPv4Address": "172.18.0.5/16",
"IPv6Address": "fc00:f853:ccd:e793::5/64"
},
"32e83d82c8dffd8e6fcbd63553f0746b0922d00746f00237833b07289bc90351": {
"Name": "myk8s-control-plane",
"EndpointID": "4238a09cf1f512561228ae26a402760f0e0122b672b85ade532e5c25fe7d8d0d",
"MacAddress": "96:c4:e1:40:51:45",
"IPv4Address": "172.18.0.4/16",
"IPv6Address": "fc00:f853:ccd:e793::4/64"
},
"7e7f2094bcb6741db5a989c933f2b3bd3018162bea16866482f22be6b0ac79fd": {
"Name": "myk8s-worker2",
"EndpointID": "ae38ac7b95ee524c15506cc2bbdda2748d867b039804701ede4d7db38c03446c",
"MacAddress": "9e:66:99:7c:98:ff",
"IPv4Address": "172.18.0.3/16",
"IPv6Address": "fc00:f853:ccd:e793::3/64"
}
},
"Options": {
"com.docker.network.bridge.enable_ip_masquerade": "true",
"com.docker.network.driver.mtu": "1500"
},
"Labels": {}
}
]
|
4. k8s api 주소 확인
✅ 출력
1
2
3
4
| Kubernetes control plane is running at https://127.0.0.1:33907
CoreDNS is running at https://127.0.0.1:33907/api/v1/namespaces/kube-system/services/kube-dns:dns/proxy
To further debug and diagnose cluster problems, use 'kubectl cluster-info dump'.
|
5. 노드 정보 확인
1
| kubectl get node -o wide
|
✅ 출력
1
2
3
4
| NAME STATUS ROLES AGE VERSION INTERNAL-IP EXTERNAL-IP OS-IMAGE KERNEL-VERSION CONTAINER-RUNTIME
myk8s-control-plane Ready control-plane 2m41s v1.32.2 172.18.0.4 <none> Debian GNU/Linux 12 (bookworm) 6.13.8-arch1-1 containerd://2.0.3
myk8s-worker Ready <none> 2m31s v1.32.2 172.18.0.5 <none> Debian GNU/Linux 12 (bookworm) 6.13.8-arch1-1 containerd://2.0.3
myk8s-worker2 Ready <none> 2m31s v1.32.2 172.18.0.3 <none> Debian GNU/Linux 12 (bookworm) 6.13.8-arch1-1 containerd://2.0.3
|
6. 파드 정보 확인
1
| kubectl get pod -A -o wide
|
✅ 출력
1
2
3
4
5
6
7
8
9
10
11
12
13
14
| NAMESPACE NAME READY STATUS RESTARTS AGE IP NODE NOMINATED NODE READINESS GATES
kube-system coredns-668d6bf9bc-c86ph 1/1 Running 0 3m15s 10.244.0.4 myk8s-control-plane <none> <none>
kube-system coredns-668d6bf9bc-w6wlq 1/1 Running 0 3m15s 10.244.0.3 myk8s-control-plane <none> <none>
kube-system etcd-myk8s-control-plane 1/1 Running 0 3m21s 172.18.0.4 myk8s-control-plane <none> <none>
kube-system kindnet-dmqn7 1/1 Running 0 3m15s 172.18.0.4 myk8s-control-plane <none> <none>
kube-system kindnet-jq854 1/1 Running 0 3m14s 172.18.0.5 myk8s-worker <none> <none>
kube-system kindnet-wr5lw 1/1 Running 0 3m14s 172.18.0.3 myk8s-worker2 <none> <none>
kube-system kube-apiserver-myk8s-control-plane 1/1 Running 0 3m22s 172.18.0.4 myk8s-control-plane <none> <none>
kube-system kube-controller-manager-myk8s-control-plane 1/1 Running 0 3m22s 172.18.0.4 myk8s-control-plane <none> <none>
kube-system kube-proxy-8z75j 1/1 Running 0 3m15s 172.18.0.4 myk8s-control-plane <none> <none>
kube-system kube-proxy-9f76d 1/1 Running 0 3m14s 172.18.0.3 myk8s-worker2 <none> <none>
kube-system kube-proxy-9tbwd 1/1 Running 0 3m14s 172.18.0.5 myk8s-worker <none> <none>
kube-system kube-scheduler-myk8s-control-plane 1/1 Running 0 3m21s 172.18.0.4 myk8s-control-plane <none> <none>
local-path-storage local-path-provisioner-7dc846544d-g4974 1/1 Running 0 3m15s 10.244.0.2 myk8s-control-plane <none> <none>
|
7. 네임스페이스 확인
✅ 출력
1
2
3
4
5
6
| NAME STATUS AGE
default Active 4m18s
kube-node-lease Active 4m17s
kube-public Active 4m18s
kube-system Active 4m18s
local-path-storage Active 4m14s
|
8. 컨트롤플레인/워커 노드(컨테이너) 확인
✅ 출력
1
2
3
4
5
| CONTAINER ID IMAGE COMMAND CREATED STATUS PORTS NAMES
7e7f2094bcb6 kindest/node:v1.32.2 "/usr/local/bin/entr…" 5 minutes ago Up 5 minutes myk8s-worker2
042a42ff8494 kindest/node:v1.32.2 "/usr/local/bin/entr…" 5 minutes ago Up 5 minutes myk8s-worker
32e83d82c8df kindest/node:v1.32.2 "/usr/local/bin/entr…" 5 minutes ago Up 5 minutes 0.0.0.0:30000-30006->30000-30006/tcp, 127.0.0.1:33907->6443/tcp myk8s-control-plane
01fee1ac3d51 jenkins/jenkins "/usr/bin/tini -- /u…" 20 minutes ago Up 20 minutes 0.0.0.0:8080->8080/tcp, [::]:8080->8080/tcp, 0.0.0.0:50000->50000/tcp, [::]:50000->50000/tcp jenkins
|
9. kube config 파일 확인
✅ 출력
1
2
3
4
5
6
7
8
9
10
11
12
13
14
15
16
17
18
19
| apiVersion: v1
clusters:
- cluster:
certificate-authority-data: LS0tLS1CRUdJTiBDRVJUSUZJQ0FURS0tLS0tCk1JSURCVENDQWUyZ0F3SUJBZ0lJUWg4OEtlSkZuMUV3RFFZSktvWklodmNOQVFFTEJRQXdGVEVUTUJFR0ExVUUKQXhNS2EzVmlaWEp1WlhSbGN6QWVGdzB5TlRBME1URXhORFE0TWpkYUZ3MHpOVEEwTURreE5EVXpNamRhTUJVeApFekFSQmdOVkJBTVRDbXQxWW1WeWJtVjBaWE13Z2dFaU1BMEdDU3FHU0liM0RRRUJBUVVBQTRJQkR3QXdnZ0VLCkFvSUJBUUNsS3dWWSt6dy9BQUtqekQvbGc4T3AxWjBQeVBORTBIeVNXTWJtd3ZqN3d6eUpKOCtmMmhJdm9TUkkKWkxnRG1ZUVFhbkdkT0E5UUplY0NKbDV5dk9RSkcrTE12UHU5ZlNqT1UvSE5oVE91aE40RFQrMjJtMUh6aDdTVwpTam5JN1JJbm55dHBJckJ0RFVxMGhxaXFJaHZrcU5xSThPUTNta3F0cDEzQnRlMUtpemNMdjA0bUFNSGJ2MG5sCnF1UUVoelRPN0poK05DcFhlZVkxVDN5RDhpM1I4WEZOL3o3YWh6OVoyd3VyZGpXeHlGbXBOWU4zVGp4YTlMdy8Kc3MxamNVVjNXVEtNVEx6YzJacnNjQ1FPZHBVU1JMQnJqYzdqQ2RHMEJOSUhpcDJoMGZ4b3M1T204WEpZcGtsVAp2dkQwWUswUlB6ZGg2WkEzREZwZU1KL2Q5N28vQWdNQkFBR2pXVEJYTUE0R0ExVWREd0VCL3dRRUF3SUNwREFQCkJnTlZIUk1CQWY4RUJUQURBUUgvTUIwR0ExVWREZ1FXQkJTcVQ0ZVgwa3lHcEJXdjZMN3JETlJRQTRIdG5qQVYKQmdOVkhSRUVEakFNZ2dwcmRXSmxjbTVsZEdWek1BMEdDU3FHU0liM0RRRUJDd1VBQTRJQkFRQmdEL1Fvck9kcApJL3hwMVBTL0p5emNRTzlyV0VKOExTMld0T3grWkowa2ZCRGF0ZDIwUGwxTDBLcDlTRWM3TUpBbFk2RXlIRG95CnpqUFdLS2JQNFZPK2RkMVo2TkJBVDN6NFNObndQSVdEVS9uWjIvM0FESVVpU2tVMFpxR3FIQTI3WDE2MlVDMGIKT2VnaTl4YnE4Qk1teGJ1L2lCeUZROXNVOWpLTG15eUhPS3JqR25hMUJTbVVKZ1ZxVEEvVEFYRTUrTXpjeitzMgpoaXJOUjVEMUFIa2ZrVEE5L25DYytmRXFTSHdaTWpiUTNjcmJuTW1wUzZzbnVWS0lDZWw5VHRiQVZHbVphNWRrCmpRdGJyUld1Wjd5MjM5cTFaZks3T3ZBbUtnWERTK3JteWhQWUtGNVh4QmV6eFlHUVVhUzJJZFlZWEtDdlFER2QKR2c0SVZHSkhaZ3AxCi0tLS0tRU5EIENFUlRJRklDQVRFLS0tLS0K
server: https://127.0.0.1:33907
name: kind-myk8s
contexts:
- context:
cluster: kind-myk8s
user: kind-myk8s
name: kind-myk8s
current-context: kind-myk8s
kind: Config
preferences: {}
users:
- name: kind-myk8s
user:
client-certificate-data: LS0tLS1CRUdJTiBDRVJUSUZJQ0FURS0tLS0tCk1JSURLVENDQWhHZ0F3SUJBZ0lJUUJxd0FRRkNtSTh3RFFZSktvWklodmNOQVFFTEJRQXdGVEVUTUJFR0ExVUUKQXhNS2EzVmlaWEp1WlhSbGN6QWVGdzB5TlRBME1URXhORFE0TWpkYUZ3MHlOakEwTVRFeE5EVXpNamRhTUR3eApIekFkQmdOVkJBb1RGbXQxWW1WaFpHMDZZMngxYzNSbGNpMWhaRzFwYm5NeEdUQVhCZ05WQkFNVEVHdDFZbVZ5CmJtVjBaWE10WVdSdGFXNHdnZ0VpTUEwR0NTcUdTSWIzRFFFQkFRVUFBNElCRHdBd2dnRUtBb0lCQVFDa1VSWDIKWHB4eXA3VDU2cTBxcmo1SURGcTI4L3hzZHFoeGNPN1Y4YnZhVkJHWEFFVzkrZHYzOURoLzVQSm05dzZLYm5MQwpxSTI0VENwNy9aMk04SU9XNVZveE5uTVp6K2tYYm5LSWhFQU9xb3BoSi9ybVVBemwwOUxkNGsvWTVFR1ZGWmpJClRhTXpIb1gzS1N3WUNMODJBd09BMTh3MGZnMDkrRWRkcW1HclZqMFMyVmNtWEFhYXFUYjFXd3dXdHQrTGFtZ2IKRGhjL2hFY0tESWxtaWZGNkJjbXlqRFlMVS9EUnJxbG5hMlR0bzFNWEJuUEMxM0FvL29pR254T0NXd3RlbXcwOQpTNFo1eGVGNVYvV0hETFlqaGVDYndYc2paUW9Fa1ZsVjBCdnJtZjYyVmlqa1pSZ29LY3lSWVBsQWhIYmpsaGxvCkhsakt6cG5yYWk0R0ZaMk5BZ01CQUFHalZqQlVNQTRHQTFVZER3RUIvd1FFQXdJRm9EQVRCZ05WSFNVRUREQUsKQmdnckJnRUZCUWNEQWpBTUJnTlZIUk1CQWY4RUFqQUFNQjhHQTFVZEl3UVlNQmFBRktwUGg1ZlNUSWFrRmEvbwp2dXNNMUZBRGdlMmVNQTBHQ1NxR1NJYjNEUUVCQ3dVQUE0SUJBUUFla29ocS9ycUVGa1psOU5vM1EwZjh0S0RQClF5aGk4cFRUNHFsRUJtNFNxNlMvdDVFSE1yT0VWcm5RM1FaNlZuS0F1cWVubVh5bzc3UC8rSHorYnNXeUlvMFQKMnFVRUZxdnJKbEFMYzhWWVNlSDJtaHB2MXBBd05LU1ltYnQwb0pMUUEwMUNrRlpLM1ZDUXdvaEozOG5VWERSNQpWNk5OTU5MT3J6ZHFvbXgySWJzQ2hJY2NwQTVqNnBJcmppaFZUV25EaUFtZjlBUS90YjhlSWZXM0JlNGxDMzE1CjRZTmFkenl4QUp2RFl1L1FPdjYxNXQ1ZmF1Y0xSN1dTYTVNUjJXdXk4NXYvSlRNc28wNlhBeUNVVDM0SFFQWkIKMHpPa080WmVzZFlVTkVmUnZFYS9OWmdING8wMVRGUEVwZE9kVEZmemsvQ1FSVzBXbHFYQ2NzQnZScVU1Ci0tLS0tRU5EIENFUlRJRklDQVRFLS0tLS0K
client-key-data: LS0tLS1CRUdJTiBSU0EgUFJJVkFURSBLRVktLS0tLQpNSUlFb3dJQkFBS0NBUUVBcEZFVjlsNmNjcWUwK2VxdEtxNCtTQXhhdHZQOGJIYW9jWER1MWZHNzJsUVJsd0JGCnZmbmI5L1E0ZitUeVp2Y09pbTV5d3FpTnVFd3FlLzJkalBDRGx1VmFNVFp6R2MvcEYyNXlpSVJBRHFxS1lTZjYKNWxBTTVkUFMzZUpQMk9SQmxSV1l5RTJqTXg2Rjl5a3NHQWkvTmdNRGdOZk1OSDROUGZoSFhhcGhxMVk5RXRsWApKbHdHbXFrMjlWc01GcmJmaTJwb0d3NFhQNFJIQ2d5SlpvbnhlZ1hKc293MkMxUHcwYTZwWjJ0azdhTlRGd1p6Cnd0ZHdLUDZJaHA4VGdsc0xYcHNOUFV1R2VjWGhlVmYxaHd5Mkk0WGdtOEY3STJVS0JKRlpWZEFiNjVuK3RsWW8KNUdVWUtDbk1rV0Q1UUlSMjQ1WVphQjVZeXM2WjYyb3VCaFdkalFJREFRQUJBb0lCQUVqWEdTRko5NWhyOTdJQgo4aG5GZkI1OE80cDJ4aU5leG5UalZ6eklHRHBFb2plS0MyQ1g3b2NRWUN0eDFuTUdlZytydm52RU5HN0tkTnJhCkpvbGY1VFZ6SG5SS2F1TzZZdDNjUERHQVR0VXhqSDVkTnIvNkpIMk5WU0MvUGg0cnNWYmhhQVVEUmFGWG1wTmkKVVFXbWV2ejZnUWNRb3BseWQzUk5KM1hDSGVIUmRyRjRyb3AxVFIzb1pBMHBmb0dsZmRMWVFmelhlOTM0b0IraQpDWGx1QXI2MWpVNVFvYUVVNDRGNjd6VW0vN1Z1T1Z2ZUticXBrQUtQdFFHcG4wdG5HVkozMFhjWjhRUm5mNVVuClVXZnRRK0NUK3BZaE9HYm51TmE4a1NPblhZamFIYmQwUlYwREE2b2laUldEWlFSL1RxdmlyUlorakpRQVIwWm8Kd2FXbkFSRUNnWUVBd0VRUVVjTTZZaGdNVG9sSThqZjAyQWJMMDBOU0RXRU5Sa1dOUlgxaDVlYmlNZnZnUExTcQpuSXZIUnJvTVdqeEk3TmkyeUdpTkFiMWtRQmhMcHdhOGIveDFwQW5rTXRtM1lyUTNLbmxEL016UkUrbGV6Uk1nCkg0QWRIT2d5UnFlMjNwYnZaanBNaWsrTEN0ZUNqcjVUOWJlL3BEdnU0MFJjT0hwL0dNc2wzYWNDZ1lFQTJzazQKd1I4QUJVVkZCUDV3UDhTMTFxbWNVWG5KdFV4Y2NZVlp0NkhBRUluTHdiR3ZVcXpJaElwd0kyaG9qUWh1aVVLNApxQkZEMFFwdHhRUjlwRE1ZV0I0Mi8vWmNYUjhNSzBPSXR1WXRrVm9wWjQzZkFuR3c4Mm5MZVV4TnRMSGxpTzhQCllDTXFvVUhabDFNVmZDc1hSbUxZdlgxSzBheUttZzgvaU5yWTJhc0NnWUVBa0k0Y0h2MUQxaUR5ajlIVVVKa1YKczU1WWZUeXVZblRId0QvbTJZcE5vc2NXNWpIVUJKQnBmazN4eEJGNTNCWmJWZ2dTVlZlV1BPcWloelk5R3hXTApkRDlDUzlWTUI1ZDlzKzUvVTZYZElpTDBSNTQ4c3I5Z2RZNmpWT3FYY2x3Q3VCU1Baak1LL1NxVkJjL0d6My8yCkxGYTg5Y1JCOWdtZHRMRVZBaFVySVIwQ2dZQkxiOWhPMW1hR2FyVDZuTlNOV0VFdWkvcm5LT3dBeEJ5WDA5ZjAKZGlRb1Q2cmUxV3BUUWxvOVFSS2JVdFBCMVNkdjBuNmpESmpxaWdNQlRLUVpxcmg1SWFuckpjSUJKY1JuWW5qUQpQNXQwbzdibENzamJLZUpPZTZyNTN2Sm9ISEs5ZlZnNjJNVkpKdEJrMmZQdGhWb1lIZHNIc3h6S0lRa0ZSNzZyCmJISWEwd0tCZ0RuK1NzdXFXd3hzbi9pTkZXa05IRGwvQTE0elN6S0kyTEd4YjhERG1adXZIM3FoRnJUU1NWYWMKbGFLdGZBZk1NckxLcThmUlJzNmZlZytXdjcxYUtLY09uTG9idFh4Ti9uTHN5WUdvSG9BRHRBN0NaeTJ3MXRUMwozVjQyZStlR2dBY3d1OXJwU1k3OVFaR00xWXAzbVBwU29RZi9SV21hS01WaWR2NlRVNlVQCi0tLS0tRU5EIFJTQSBQUklWQVRFIEtFWS0tLS0tCg==
|
🚀 실습 환경 구성 - Argo CD
1. 네임스페이스 생성
1
2
3
| kubectl create ns argocd
# 결과
namespace/argocd created
|
2. 파라미터 파일 작성
1
2
3
4
5
6
7
8
9
10
11
| cat <<EOF > argocd-values.yaml
dex:
enabled: false
server:
service:
type: NodePort
nodePortHttps: 30002
extraArgs:
- --insecure # HTTPS 대신 HTTP 사용
EOF
|
3. Argo CD 설치
1
2
| helm repo add argo https://argoproj.github.io/argo-helm
helm install argocd argo/argo-cd --version 7.8.13 -f argocd-values.yaml --namespace argocd
|
✅ 출력
1
2
3
4
5
6
7
8
9
10
11
12
13
14
15
16
17
18
19
20
21
22
| NAME: argocd
LAST DEPLOYED: Sat Apr 12 00:03:52 2025
NAMESPACE: argocd
STATUS: deployed
REVISION: 1
TEST SUITE: None
NOTES:
In order to access the server UI you have the following options:
1. kubectl port-forward service/argocd-server -n argocd 8080:443
and then open the browser on http://localhost:8080 and accept the certificate
2. enable ingress in the values file `server.ingress.enabled` and either
- Add the annotation for ssl passthrough: https://argo-cd.readthedocs.io/en/stable/operator-manual/ingress/#option-1-ssl-passthrough
- Set the `configs.params."server.insecure"` in the values file and terminate SSL at your ingress: https://argo-cd.readthedocs.io/en/stable/operator-manual/ingress/#option-2-multiple-ingress-objects-and-hosts
After reaching the UI the first time you can login with username: admin and the random password generated during the installation. You can find the password by running:
kubectl -n argocd get secret argocd-initial-admin-secret -o jsonpath="{.data.password}" | base64 -d
(You should delete the initial secret afterwards as suggested by the Getting Started Guide: https://argo-cd.readthedocs.io/en/stable/getting_started/#4-login-using-the-cli)
|
4. Argo CD 리소스 조회
1
| kubectl get pod,svc,ep,secret,cm -n argocd
|
✅ 출력
1
2
3
4
5
6
7
8
9
10
11
12
13
14
15
16
17
18
19
20
21
22
23
24
25
26
27
28
29
30
31
32
33
34
35
36
37
| NAME READY STATUS RESTARTS AGE
pod/argocd-application-controller-0 1/1 Running 0 4m35s
pod/argocd-applicationset-controller-cccb64dc8-j646p 1/1 Running 0 4m35s
pod/argocd-notifications-controller-7cd4d88cd4-77m4m 1/1 Running 0 4m35s
pod/argocd-redis-6c5698fc46-45nwd 1/1 Running 0 4m35s
pod/argocd-repo-server-5f6c4f4cf4-nnxxd 1/1 Running 0 4m35s
pod/argocd-server-7cb958f5fb-gcfk6 1/1 Running 0 4m35s
NAME TYPE CLUSTER-IP EXTERNAL-IP PORT(S) AGE
service/argocd-applicationset-controller ClusterIP 10.96.193.91 <none> 7000/TCP 4m35s
service/argocd-redis ClusterIP 10.96.153.239 <none> 6379/TCP 4m35s
service/argocd-repo-server ClusterIP 10.96.70.110 <none> 8081/TCP 4m35s
service/argocd-server NodePort 10.96.57.41 <none> 80:30080/TCP,443:30002/TCP 4m35s
NAME ENDPOINTS AGE
endpoints/argocd-applicationset-controller 10.244.1.4:7000 4m35s
endpoints/argocd-redis 10.244.2.2:6379 4m35s
endpoints/argocd-repo-server 10.244.1.5:8081 4m35s
endpoints/argocd-server 10.244.2.3:8080,10.244.2.3:8080 4m35s
NAME TYPE DATA AGE
secret/argocd-initial-admin-secret Opaque 1 4m11s
secret/argocd-notifications-secret Opaque 0 4m35s
secret/argocd-redis Opaque 1 4m38s
secret/argocd-secret Opaque 3 4m35s
secret/sh.helm.release.v1.argocd.v1 helm.sh/release.v1 1 5m2s
NAME DATA AGE
configmap/argocd-cm 9 4m35s
configmap/argocd-cmd-params-cm 32 4m35s
configmap/argocd-gpg-keys-cm 0 4m35s
configmap/argocd-notifications-cm 1 4m35s
configmap/argocd-rbac-cm 4 4m35s
configmap/argocd-redis-health-configmap 2 4m35s
configmap/argocd-ssh-known-hosts-cm 1 4m35s
configmap/argocd-tls-certs-cm 0 4m35s
configmap/kube-root-ca.crt 1 6m16s
|
5. Argo CD 관련 CRD 확인
1
| kubectl get crd | grep argo
|
✅ 출력
1
2
3
| applications.argoproj.io 2025-04-11T15:04:20Z
applicationsets.argoproj.io 2025-04-11T15:04:20Z
appprojects.argoproj.io 2025-04-11T15:04:20Z
|
6. appproject 설정 확인
1
| kubectl get appproject -n argocd -o yaml
|
✅ 출력
1
2
3
4
5
6
7
8
9
10
11
12
13
14
15
16
17
18
19
20
21
22
23
24
| apiVersion: v1
items:
- apiVersion: argoproj.io/v1alpha1
kind: AppProject
metadata:
creationTimestamp: "2025-04-11T15:04:44Z"
generation: 1
name: default
namespace: argocd
resourceVersion: "1742"
uid: 5e203a0e-a8fc-4786-9c35-8f39a20747e6
spec:
clusterResourceWhitelist:
- group: '*'
kind: '*'
destinations:
- namespace: '*'
server: '*'
sourceRepos:
- '*'
status: {}
kind: List
metadata:
resourceVersion: ""
|
7. 최초 접속 암호 확인
1
| kubectl -n argocd get secret argocd-initial-admin-secret -o jsonpath="{.data.password}" | base64 -d ;echo
|
✅ 출력
8. Argo CD 웹 접속
(1) http://127.0.0.1:30002 접속 - admin / EKd6o4KbnaCIjo1r (최초 접속 암호)
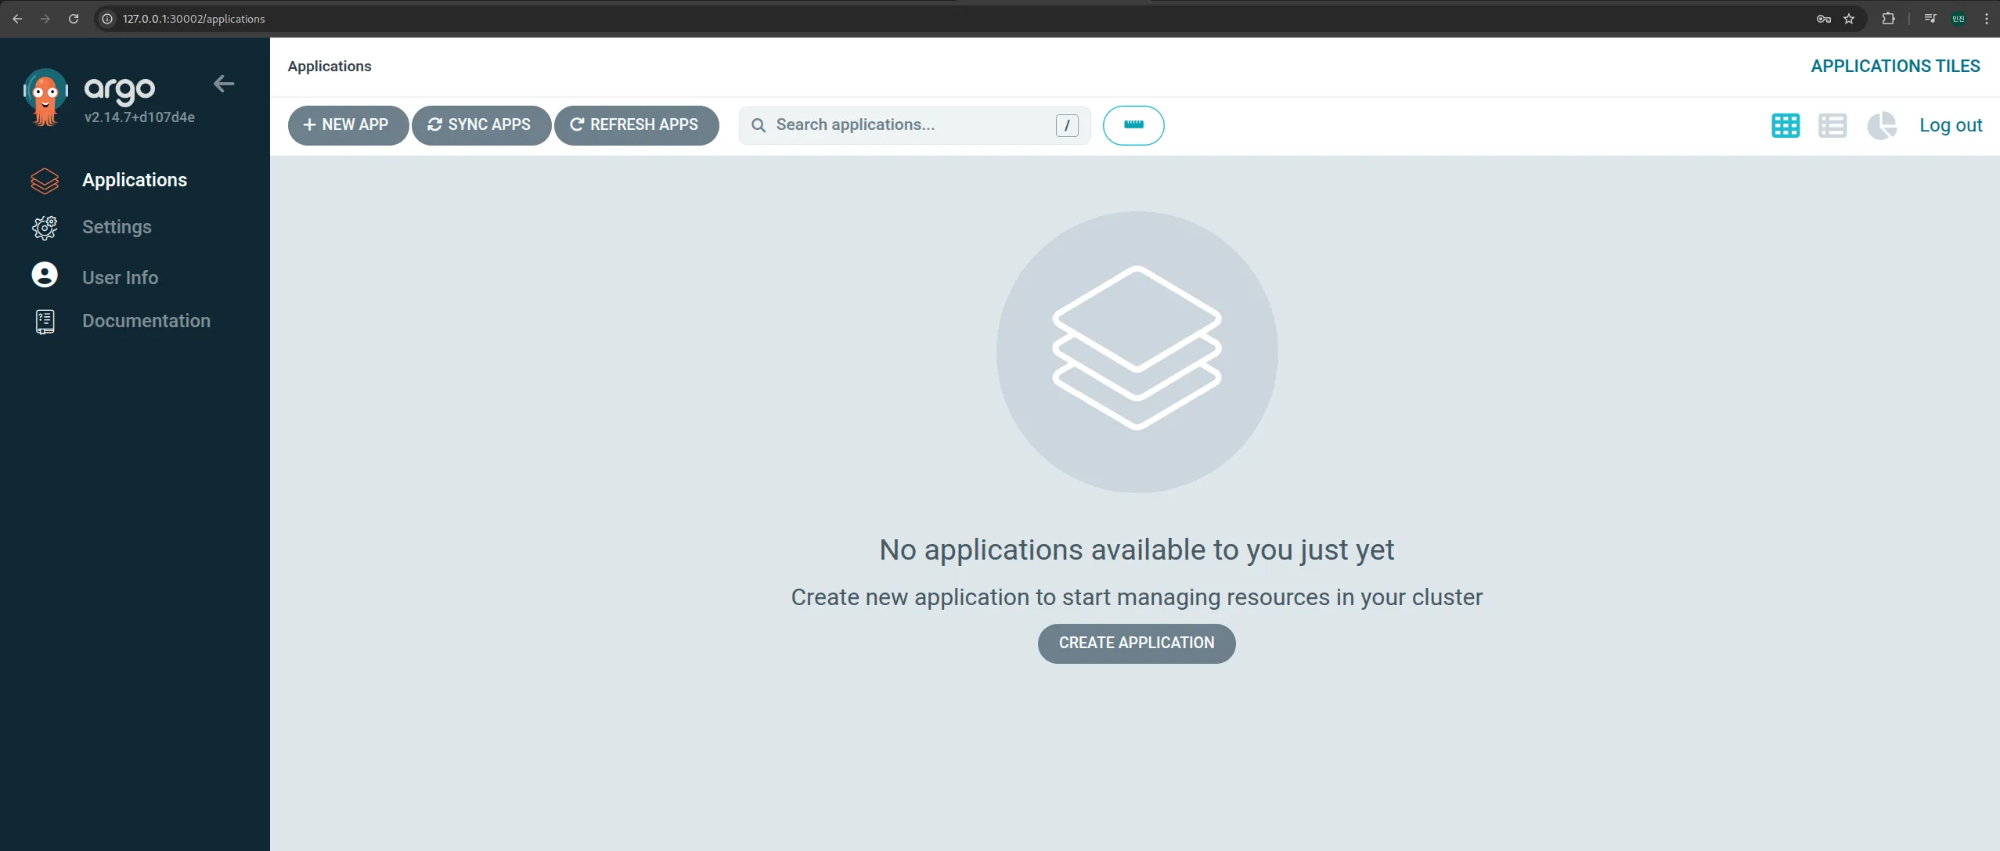
(2) Argo CD 초기 진입 화면
🛡️ 쿠버네티스에서 Vault 설치
1. 네임스페이스 생성
1
2
3
4
| kubectl create namespace vault
# 결과
namespace/vault created
|
2. Helm 레포지토리 추가
1
2
3
4
| helm repo add hashicorp https://helm.releases.hashicorp.com
# 결과
"hashicorp" has been added to your repositories
|
3. Helm 차트 설정
1
2
3
4
5
6
7
8
9
10
11
12
13
14
15
16
17
18
19
20
21
22
23
24
25
26
27
28
29
30
31
32
33
34
35
36
37
38
39
40
41
42
43
| cat <<EOF > override-values.yaml
global:
enabled: true
tlsDisable: true # Disable TLS for demo purposes
server:
image:
repository: "hashicorp/vault"
tag: "1.19.0"
standalone:
enabled: true
replicas: 1 # 단일 노드 실행
config: |
ui = true
disable_mlock = true
cluster_name = "vault-local"
listener "tcp" {
address = "[::]:8200"
cluster_address = "[::]:8201"
tls_disable = 1
}
storage "raft" { # Raft 구성 권장
path = "/vault/data"
node_id = "vault-dev-node-1"
}
service:
enabled: true
type: NodePort
port: 8200
targetPort: 8200
nodePort: 30000 # Kind에서 열어둔 포트 중 하나 사용
injector:
enabled: true
ui:
enabled: true
serviceType: "NodePort"
EOF
|
4. Helm 배포
1
| helm upgrade vault hashicorp/vault -n vault -f override-values.yaml --install
|
✅ 출력
1
2
3
4
5
6
7
8
9
10
11
12
13
14
15
16
17
18
| Release "vault" does not exist. Installing it now.
NAME: vault
LAST DEPLOYED: Sat Apr 12 09:36:54 2025
NAMESPACE: vault
STATUS: deployed
REVISION: 1
NOTES:
Thank you for installing HashiCorp Vault!
Now that you have deployed Vault, you should look over the docs on using
Vault with Kubernetes available here:
https://developer.hashicorp.com/vault/docs
Your release is named vault. To learn more about the release, try:
$ helm status vault
$ helm get manifest vault
|
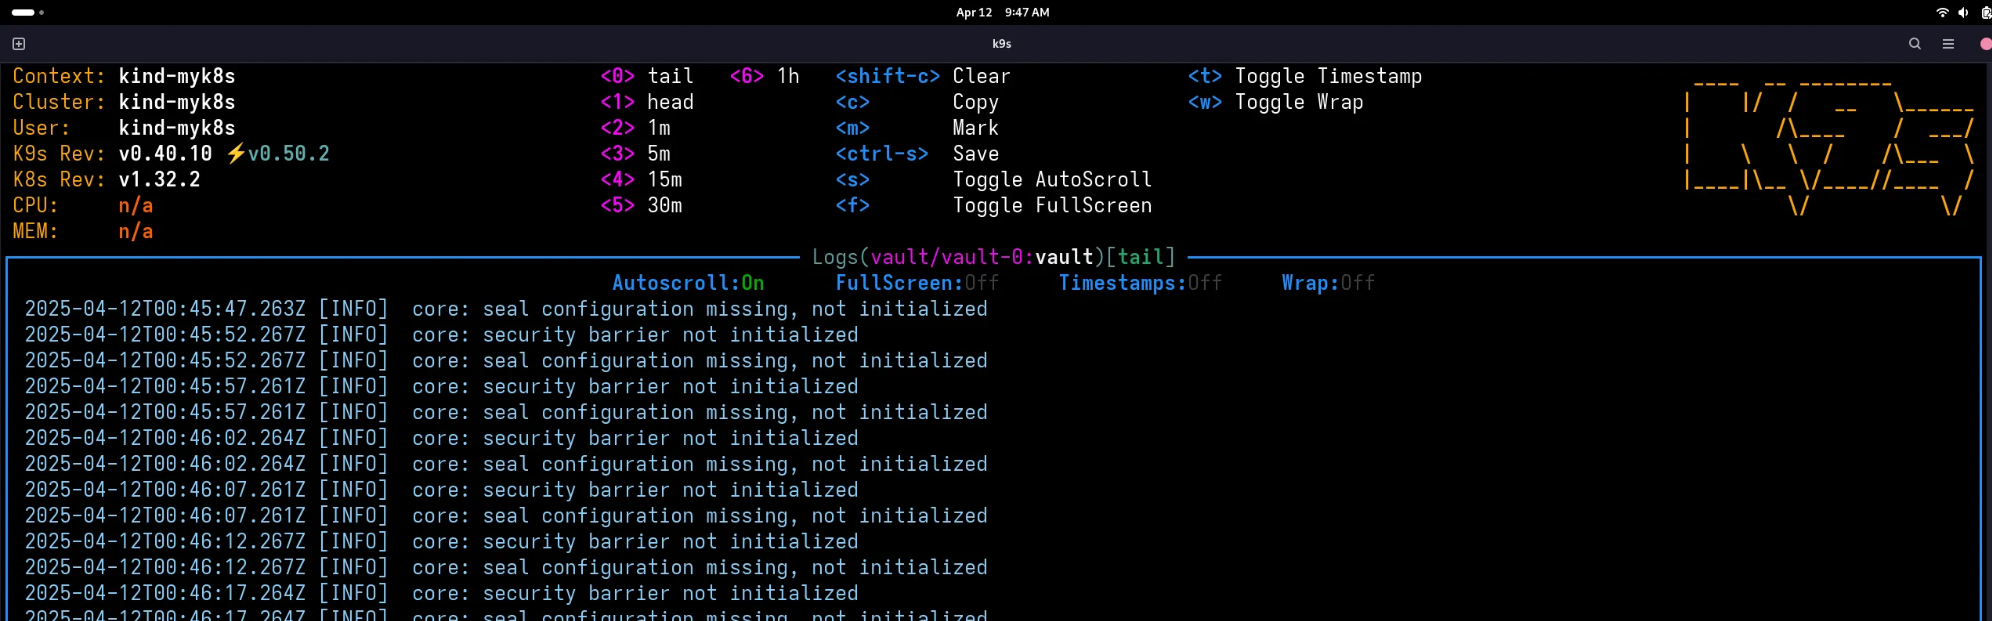
5. 초기화 실패 - seal configuration missing
6. 네임스페이스 변경 - vault
1
2
3
4
| kubens vault
# 결과
✔ Active namespace is "vault"
|
7. 배포 리소스 확인
✅ 출력
1
2
3
4
5
6
7
8
9
10
11
12
| NAME READY STATUS RESTARTS AGE
pod/vault-0 0/1 Running 0 8m41s
pod/vault-agent-injector-56459c7545-mlvpk 1/1 Running 0 8m41s
NAME TYPE CLUSTER-IP EXTERNAL-IP PORT(S) AGE
service/vault NodePort 10.96.131.159 <none> 8200:30000/TCP,8201:31414/TCP 8m42s
service/vault-agent-injector-svc ClusterIP 10.96.138.201 <none> 443/TCP 8m42s
service/vault-internal ClusterIP None <none> 8200/TCP,8201/TCP 8m42s
service/vault-ui NodePort 10.96.88.15 <none> 8200:30367/TCP 8m42s
NAME STATUS VOLUME CAPACITY ACCESS MODES STORAGECLASS VOLUMEATTRIBUTESCLASS AGE
persistentvolumeclaim/data-vault-0 Bound pvc-786c0621-e83c-4249-b11d-97ff827dea76 10Gi RWO standard <unset> 8m41s
|
8. Vault Status 명령으로 Sealed 여부 확인
1
| kubectl exec -ti vault-0 -- vault status
|
✅ 출력
1
2
3
4
5
6
7
8
9
10
11
12
13
14
15
| Key Value
--- -----
Seal Type shamir
Initialized false
Sealed true
Total Shares 0
Threshold 0
Unseal Progress 0/0
Unseal Nonce n/a
Version 1.19.0
Build Date 2025-03-04T12:36:40Z
Storage Type raft
Removed From Cluster false
HA Enabled true
command terminated with exit code 2
|
9. Vault 셸 진입 후 상태 확인
1
2
| kubectl exec -ti vault-0 -- sh
/ $ vault status
|
✅ 출력
1
2
3
4
5
6
7
8
9
10
11
12
13
14
| Key Value
--- -----
Seal Type shamir
Initialized false
Sealed true
Total Shares 0
Threshold 0
Unseal Progress 0/0
Unseal Nonce n/a
Version 1.19.0
Build Date 2025-03-04T12:36:40Z
Storage Type raft
Removed From Cluster false
HA Enabled true
|
10. Vault 초기화
1
| / $ vault operator init
|
✅ 출력
1
2
3
4
5
6
7
8
9
10
11
12
13
14
15
16
17
18
| Unseal Key 1: xxxxxxxxxxxxxxxxxxxxxxxxxxxxxxxxxxxxxxxxxxxx
Unseal Key 2: xxxxxxxxxxxxxxxxxxxxxxxxxxxxxxxxxxxxxxxxxxxx
Unseal Key 3: xxxxxxxxxxxxxxxxxxxxxxxxxxxxxxxxxxxxxxxxxxxx
Unseal Key 4: xxxxxxxxxxxxxxxxxxxxxxxxxxxxxxxxxxxxxxxxxxxx
Unseal Key 5: xxxxxxxxxxxxxxxxxxxxxxxxxxxxxxxxxxxxxxxxxxxx
Initial Root Token: hvs.pR8v5IYFj6AFVuRgA6x1qiB4
Vault initialized with 5 key shares and a key threshold of 3. Please securely
distribute the key shares printed above. When the Vault is re-sealed,
restarted, or stopped, you must supply at least 3 of these keys to unseal it
before it can start servicing requests.
Vault does not store the generated root key. Without at least 3 keys to
reconstruct the root key, Vault will remain permanently sealed!
It is possible to generate new unseal keys, provided you have a quorum of
existing unseal keys shares. See "vault operator rekey" for more information.
|
Unseal Key 5개와 Root Token 1개 생성Threshold는 3 (3개의 키 입력 시 Unseal 가능)- 출력 내용을
test.txt 에 백업
11. Vault 잠금 해제 (Unseal)
1
2
3
4
5
6
7
8
9
10
11
12
13
14
15
16
17
18
19
20
21
| / $ vault operator unseal
Unseal Key (will be hidden):
Key Value
--- -----
Seal Type shamir
Initialized true
Sealed false
Total Shares 5
Threshold 3
Version 1.19.0
Build Date 2025-03-04T12:36:40Z
Storage Type raft
Cluster Name vault-local
Cluster ID d2f14a0a-7599-5013-56ee-a8fd901d7347
Removed From Cluster false
HA Enabled true
HA Cluster n/a
HA Mode standby
Active Node Address <none>
Raft Committed Index 32
Raft Applied Index 32
|
- 3개의 Unseal Key 순차 입력
Sealed: false 상태로 전환됨
12. Vault 재설치를 위한 초기화 작업
(1) Helm으로 Vault 제거
1
2
3
4
| helm uninstall vault
# 결과
release "vault" uninstalled
|
(2) PVC 확인 및 삭제
1
2
| k get pvc
k delete pvc data-vault-0
|
✅ 출력
1
2
3
4
5
| NAME STATUS VOLUME CAPACITY ACCESS MODES STORAGECLASS VOLUMEATTRIBUTESCLASS AGE
data-vault-0 Bound pvc-786c0621-e83c-4249-b11d-97ff827dea76 10Gi RWO standard <unset> 26m
# 결과
persistentvolumeclaim "data-vault-0" deleted
|
- Unseal 정보는 PVC에 저장되므로, 완전 초기화를 위해 삭제 필요
13. Vault 재설치
1
| helm upgrade vault hashicorp/vault -n vault -f override-values.yaml --install
|
✅ 출력
1
2
3
4
5
6
7
8
9
10
11
12
13
14
15
16
17
18
| Release "vault" does not exist. Installing it now.
NAME: vault
LAST DEPLOYED: Sat Apr 12 10:07:46 2025
NAMESPACE: vault
STATUS: deployed
REVISION: 1
NOTES:
Thank you for installing HashiCorp Vault!
Now that you have deployed Vault, you should look over the docs on using
Vault with Kubernetes available here:
https://developer.hashicorp.com/vault/docs
Your release is named vault. To learn more about the release, try:
$ helm status vault
$ helm get manifest vault
|
14. Vault 초기화 & 자동 Unseal 스크립트
1
2
3
4
5
6
7
8
9
10
11
12
13
14
15
16
17
18
19
20
21
22
23
24
25
26
27
28
29
| cat <<EOF > init-unseal.sh
#!/bin/bash
# Vault Pod 이름
VAULT_POD="vault-0"
# Vault 명령 실행
VAULT_CMD="kubectl exec -ti \$VAULT_POD -- vault"
# 출력 저장 파일
VAULT_KEYS_FILE="./vault-keys.txt"
UNSEAL_KEY_FILE="./vault-unseal-key.txt"
ROOT_TOKEN_FILE="./vault-root-token.txt"
# Vault 초기화 (Unseal Key 1개만 생성되도록 설정)
\$VAULT_CMD operator init -key-shares=1 -key-threshold=1 | sed \$'s/\\x1b\\[[0-9;]*m//g' | tr -d '\r' > "\$VAULT_KEYS_FILE"
# Unseal Key / Root Token 추출
grep 'Unseal Key 1:' "\$VAULT_KEYS_FILE" | awk -F': ' '{print \$2}' > "\$UNSEAL_KEY_FILE"
grep 'Initial Root Token:' "\$VAULT_KEYS_FILE" | awk -F': ' '{print \$2}' > "\$ROOT_TOKEN_FILE"
# Unseal 수행
UNSEAL_KEY=\$(cat "\$UNSEAL_KEY_FILE")
\$VAULT_CMD operator unseal "\$UNSEAL_KEY"
# 결과 출력
echo "[🔓] Vault Unsealed!"
echo "[🔐] Root Token: \$(cat \$ROOT_TOKEN_FILE)"
EOF
|
15. 권한 부여 및 실행
1
2
| chmod +x init-unseal.sh
./init-unseal.sh
|
✅ 출력
1
2
3
4
5
6
7
8
9
10
11
12
13
14
15
16
17
18
19
20
21
| Key Value
--- -----
Seal Type shamir
Initialized true
Sealed false
Total Shares 1
Threshold 1
Version 1.19.0
Build Date 2025-03-04T12:36:40Z
Storage Type raft
Cluster Name vault-local
Cluster ID 77026db4-001f-f2dc-a6ef-5f8ddae4593e
Removed From Cluster false
HA Enabled true
HA Cluster n/a
HA Mode standby
Active Node Address <none>
Raft Committed Index 32
Raft Applied Index 32
[🔓] Vault Unsealed!
[🔐] Root Token: xxx.xxxxxxxxxxxxxxxxxxxxxxxx
|
16. Vault 초기화 결과 파일
(1) vault-keys.txt
1
2
3
4
5
6
7
8
9
10
11
12
13
14
| Unseal Key 1: xxxxxxxxxxxxxxxxxxxxxxxxxxxxxxxxxxxxxxxxxxxx
Initial Root Token: xxx.xxxxxxxxxxxxxxxxxxxxxxxx
Vault initialized with 1 key shares and a key threshold of 1. Please securely
distribute the key shares printed above. When the Vault is re-sealed,
restarted, or stopped, you must supply at least 1 of these keys to unseal it
before it can start servicing requests.
Vault does not store the generated root key. Without at least 1 keys to
reconstruct the root key, Vault will remain permanently sealed!
It is possible to generate new unseal keys, provided you have a quorum of
existing unseal keys shares. See "vault operator rekey" for more information.
|
(2) vault-root-token.txt
1
| xxx.xxxxxxxxxxxxxxxxxxxxxxxx
|
(3) vault-unseal-key.txt
1
| xxxxxxxxxxxxxxxxxxxxxxxxxxxxxxxxxxxxxxxxxxxx
|
17. Vault 현재 상태 확인
1
| kubectl exec -ti vault-0 -- vault status
|
✅ 출력
1
2
3
4
5
6
7
8
9
10
11
12
13
14
15
16
17
18
19
| Key Value
--- -----
Seal Type shamir
Initialized true
Sealed false
Total Shares 1
Threshold 1
Version 1.19.0
Build Date 2025-03-04T12:36:40Z
Storage Type raft
Cluster Name vault-local
Cluster ID 79933d95-99a1-819d-4d5d-0b0a385371fa
Removed From Cluster false
HA Enabled true
HA Cluster https://vault-0.vault-internal:8201
HA Mode active
Active Since 2025-04-12T04:05:44.351612642Z
Raft Committed Index 37
Raft Applied Index 37
|
Initialized: true → Vault가 초기화됨Sealed: false → 현재 Unseal된 상태Total Shares: 1 / Threshold: 1 → 1개의 키로 Unseal 가능
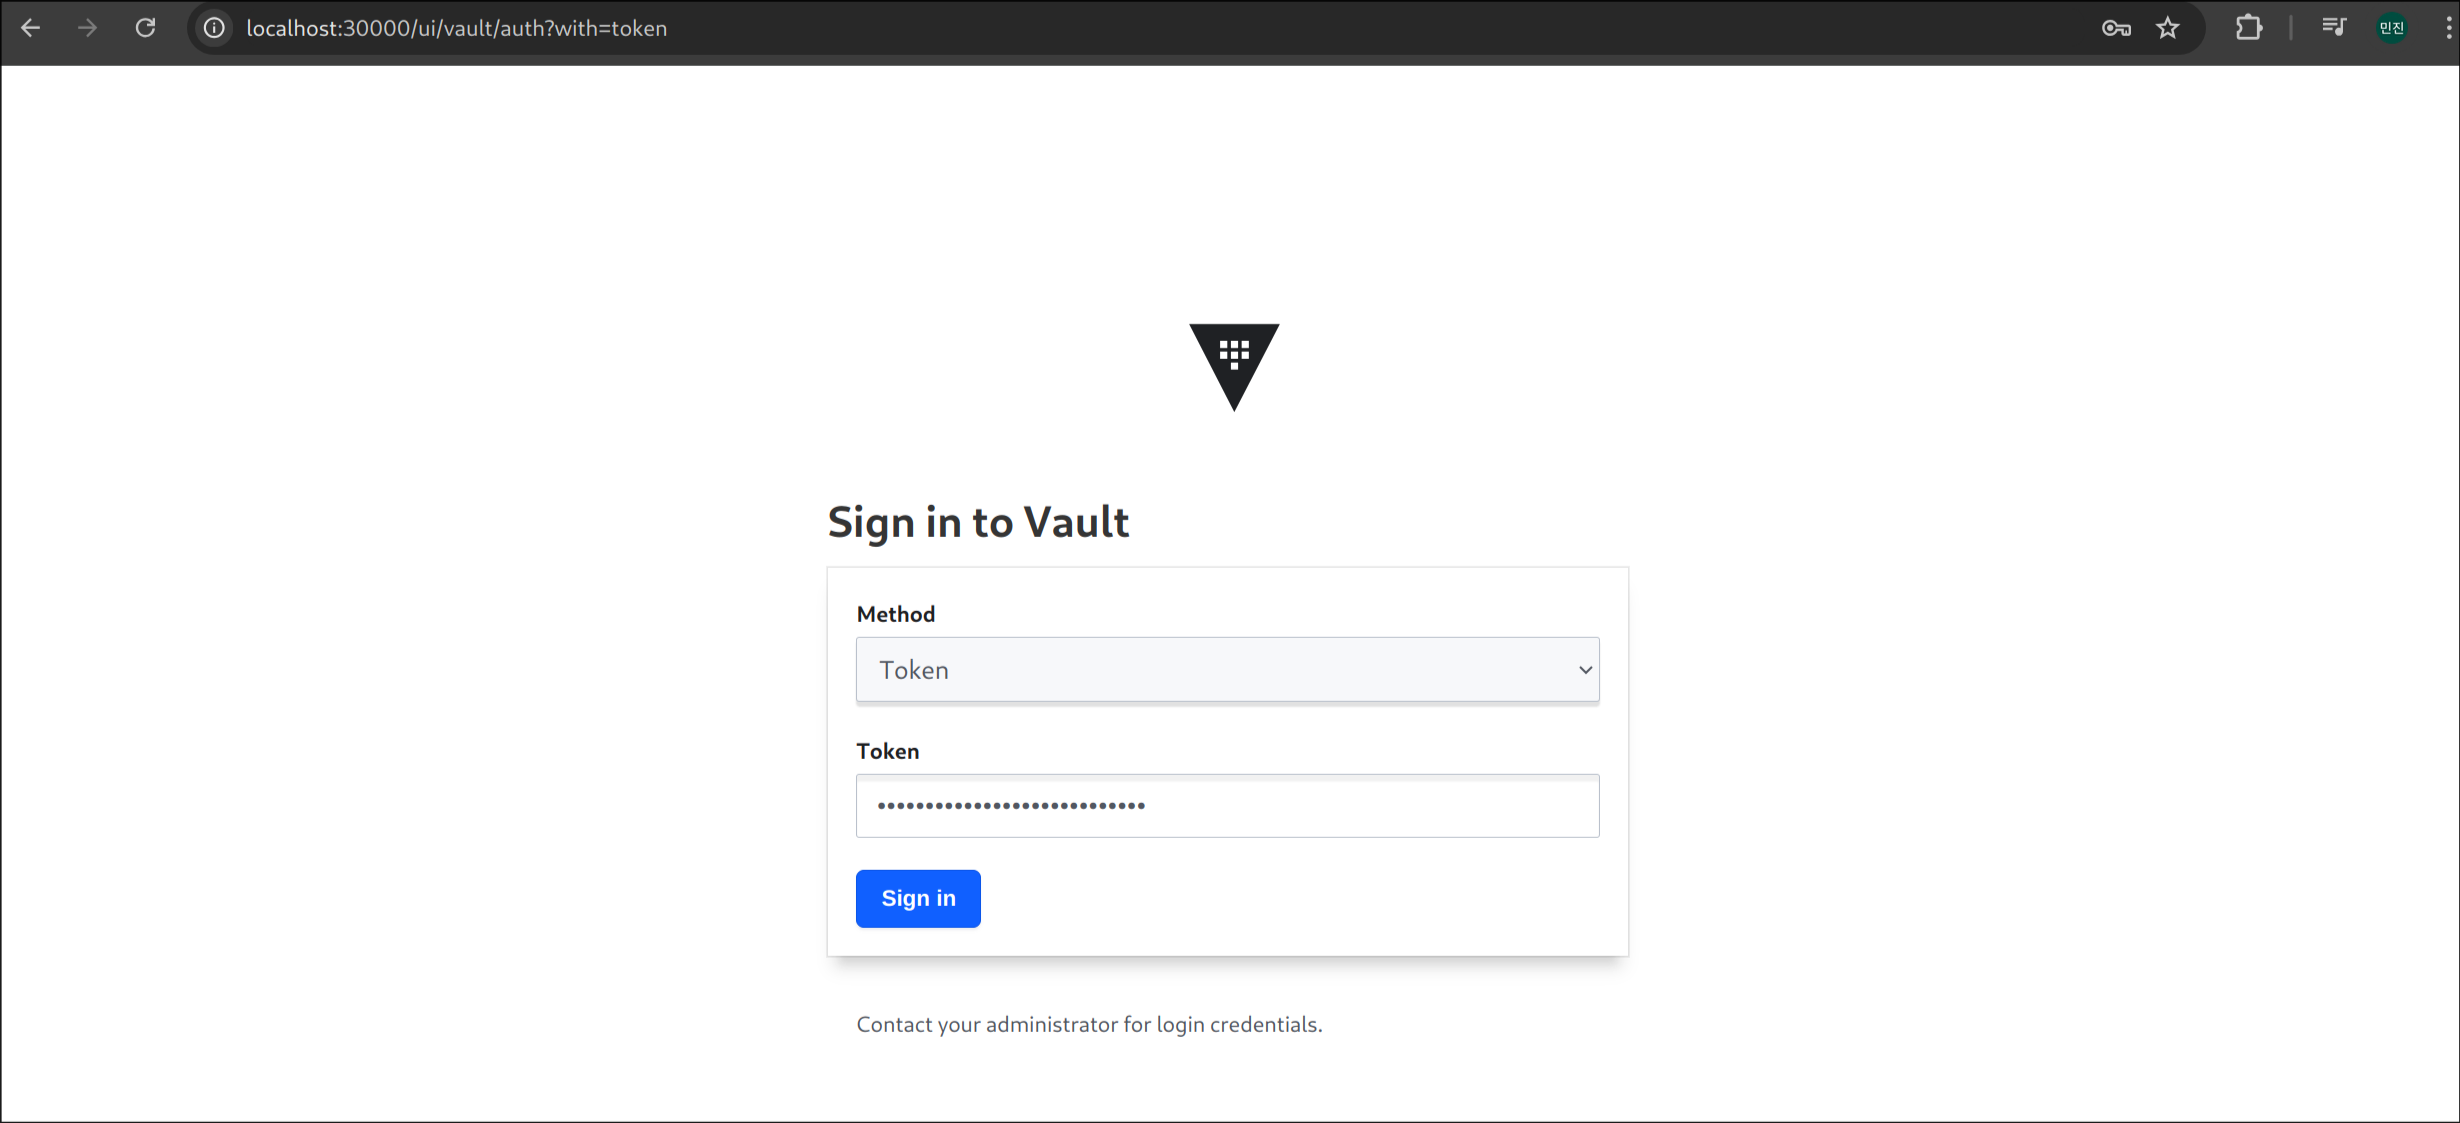
18. Vault 웹 접속
- 접속주소:
http://localhost:30000 - 인증방식: Token | 입력할값:
vault-root-token.txt에 저장된 루트 토큰
19. CLI 설정 - Arch Linux
(1) Vault 설치
(2) NodePort로 공개한 30000 Port로 설정
1
| export VAULT_ADDR='http://localhost:30000'
|
(3) vault 상태확인
✅ 출력
1
2
3
4
5
6
7
8
9
10
11
12
13
14
15
16
17
18
19
| Key Value
--- -----
Seal Type shamir
Initialized true
Sealed false
Total Shares 1
Threshold 1
Version 1.19.0
Build Date 2025-03-04T12:36:40Z
Storage Type raft
Cluster Name vault-local
Cluster ID 79933d95-99a1-819d-4d5d-0b0a385371fa
Removed From Cluster false
HA Enabled true
HA Cluster https://vault-0.vault-internal:8201
HA Mode active
Active Since 2025-04-12T04:05:44.351612642Z
Raft Committed Index 39
Raft Applied Index 39
|
(4) Root Token으로 로그인
✅ 출력
1
2
3
4
5
6
7
8
9
10
11
12
13
14
| Token (will be hidden):
Success! You are now authenticated. The token information displayed below
is already stored in the token helper. You do NOT need to run "vault login"
again. Future Vault requests will automatically use this token.
Key Value
--- -----
token xxx.xxxxxxxxxxxxxxxxxxxxxxxx
token_accessor xxxxxxxxxxxxxxxxxx
token_duration ∞
token_renewable false
token_policies ["root"]
identity_policies []
policies ["root"]
|
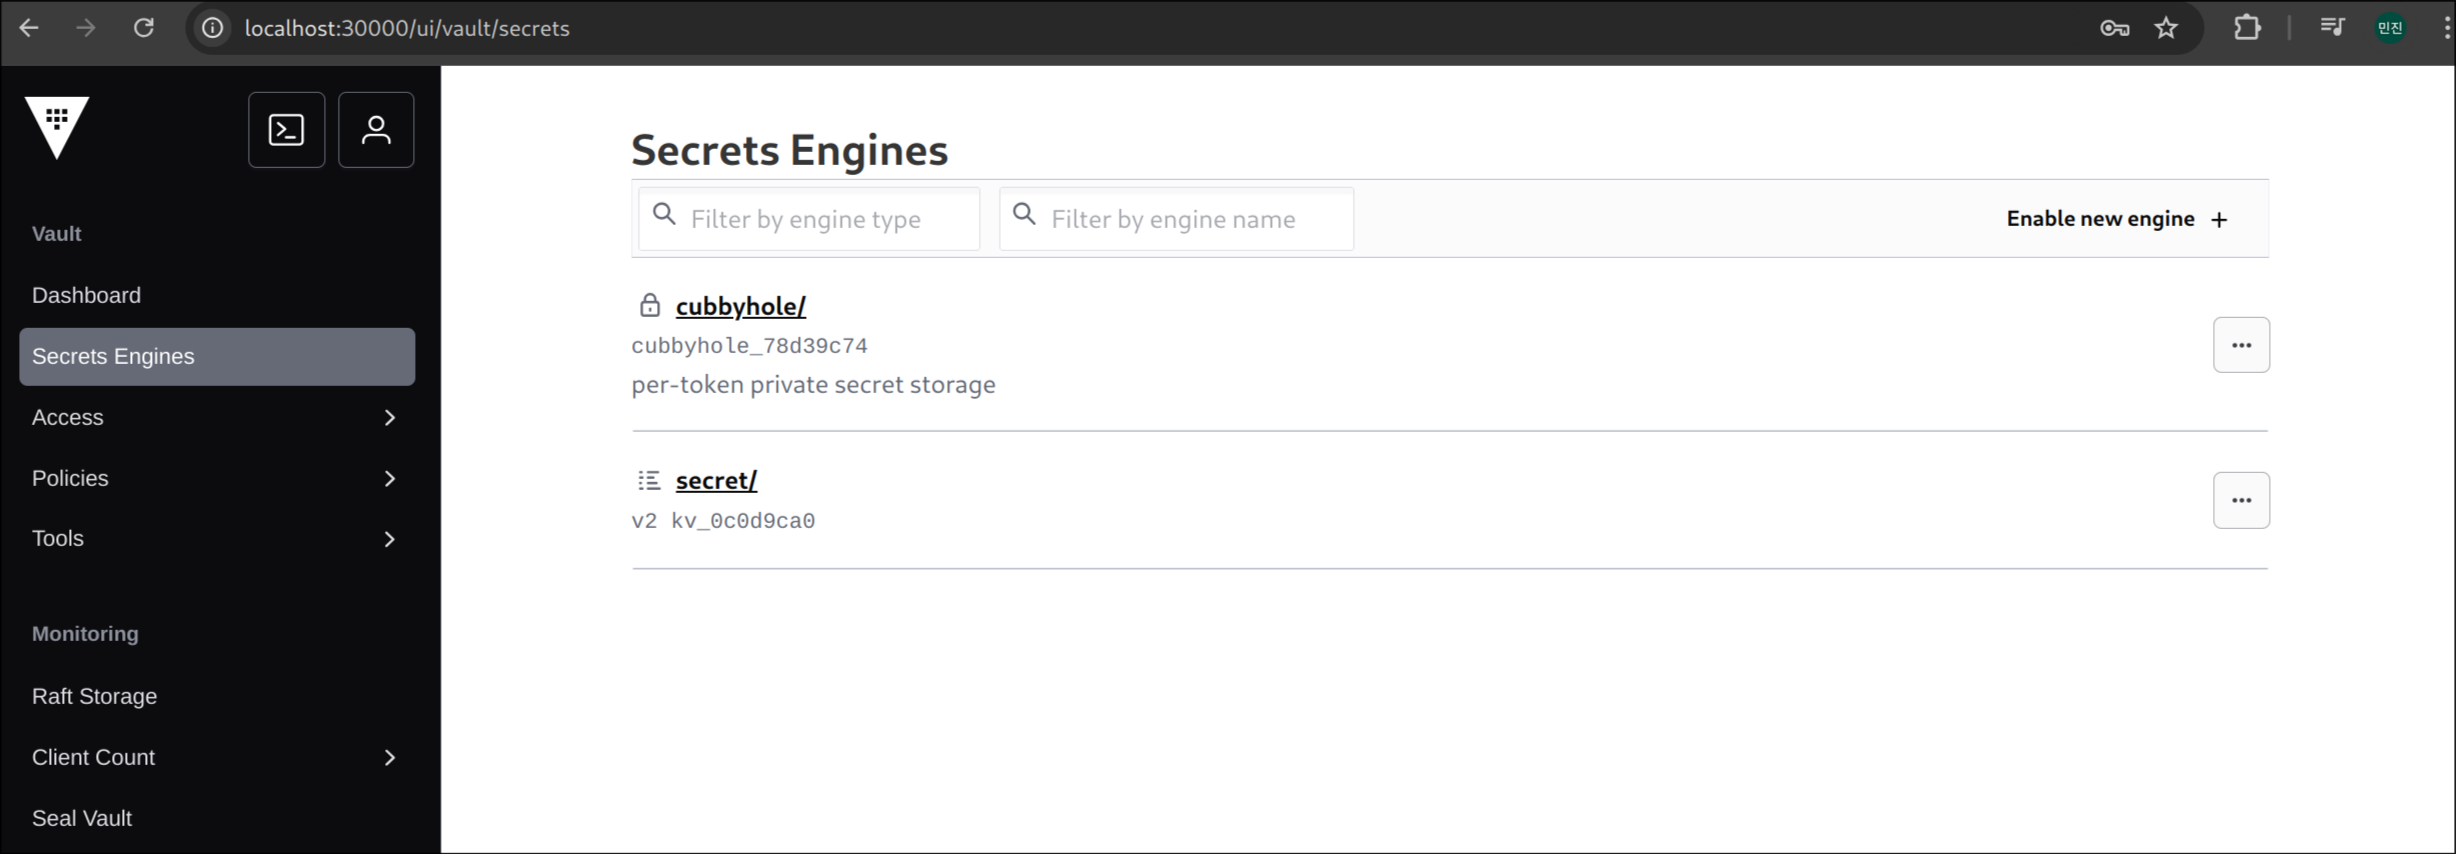
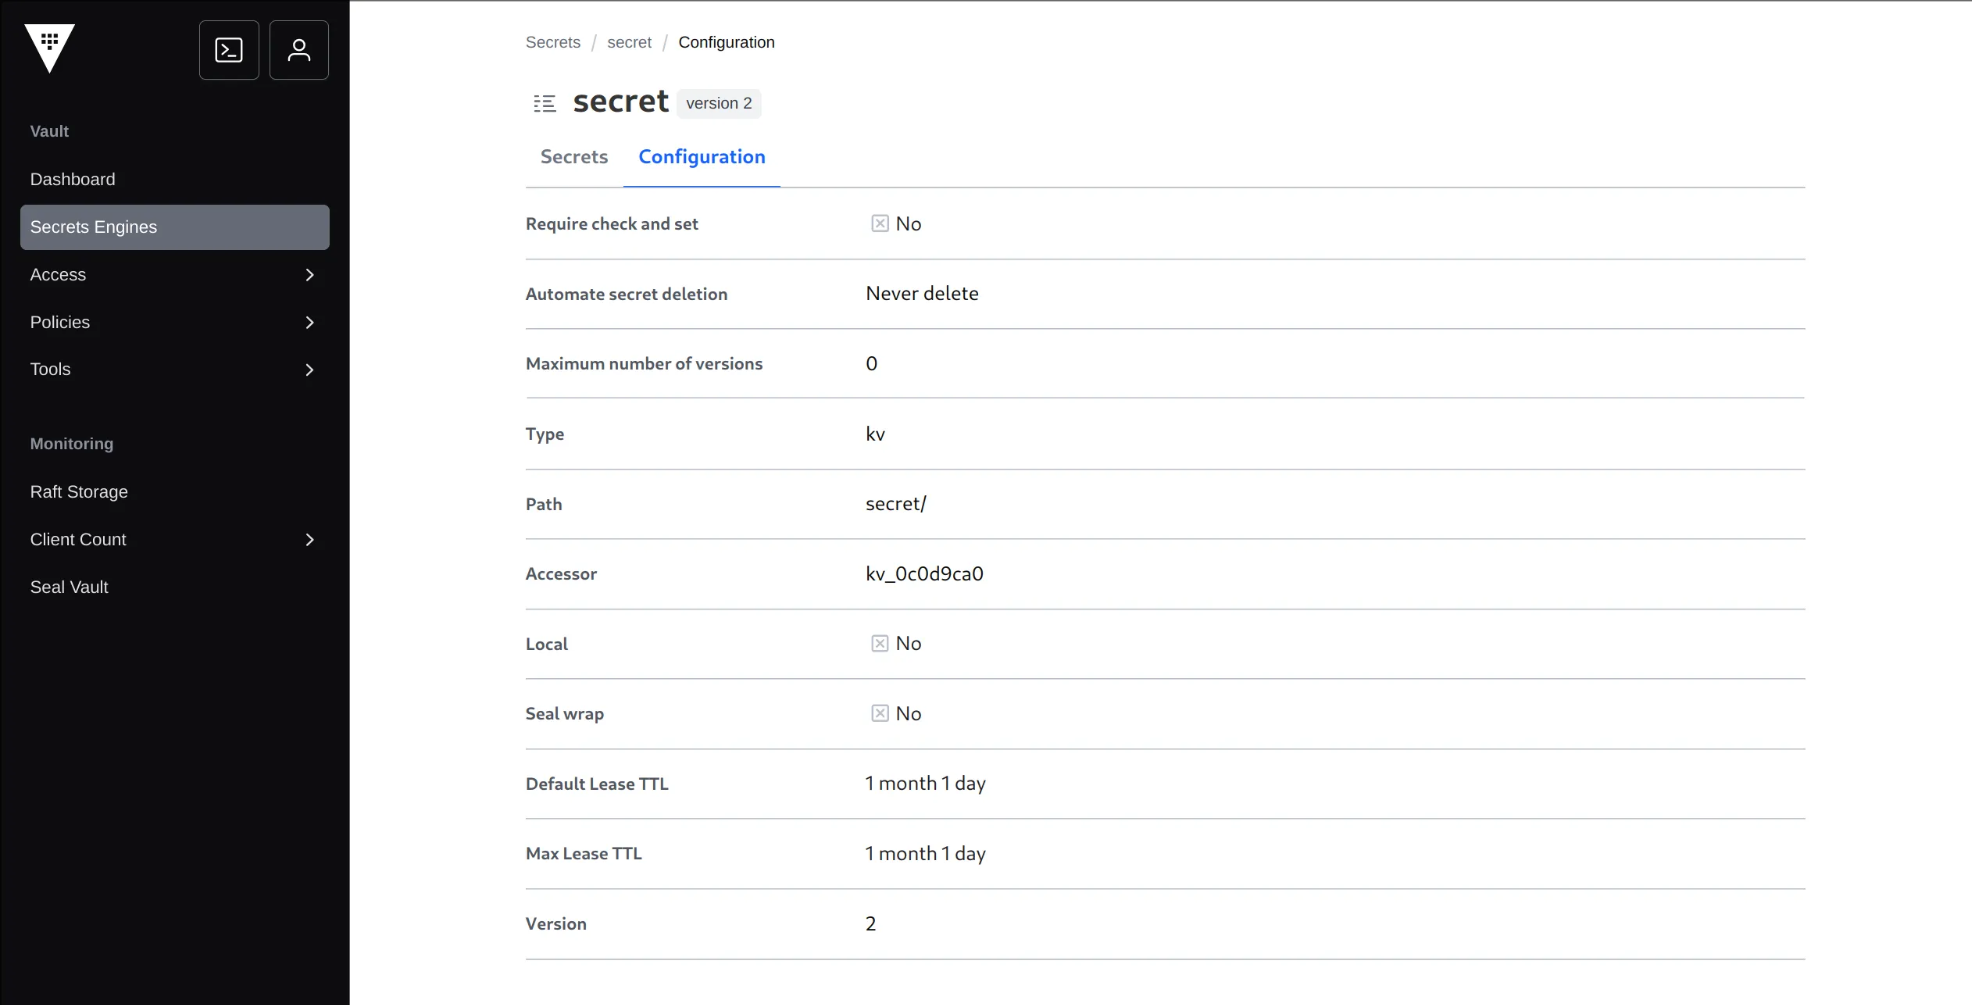
📂 KV 시크릿 엔진 활성화 및 샘플 구성
1. KV v2 형태로 엔진 활성화
1
| vault secrets enable -path=secret kv-v2
|
✅ 출력
1
| Success! Enabled the kv-v2 secrets engine at: secret/
|
secret/ 이라는 경로의 엔진 활성화됨
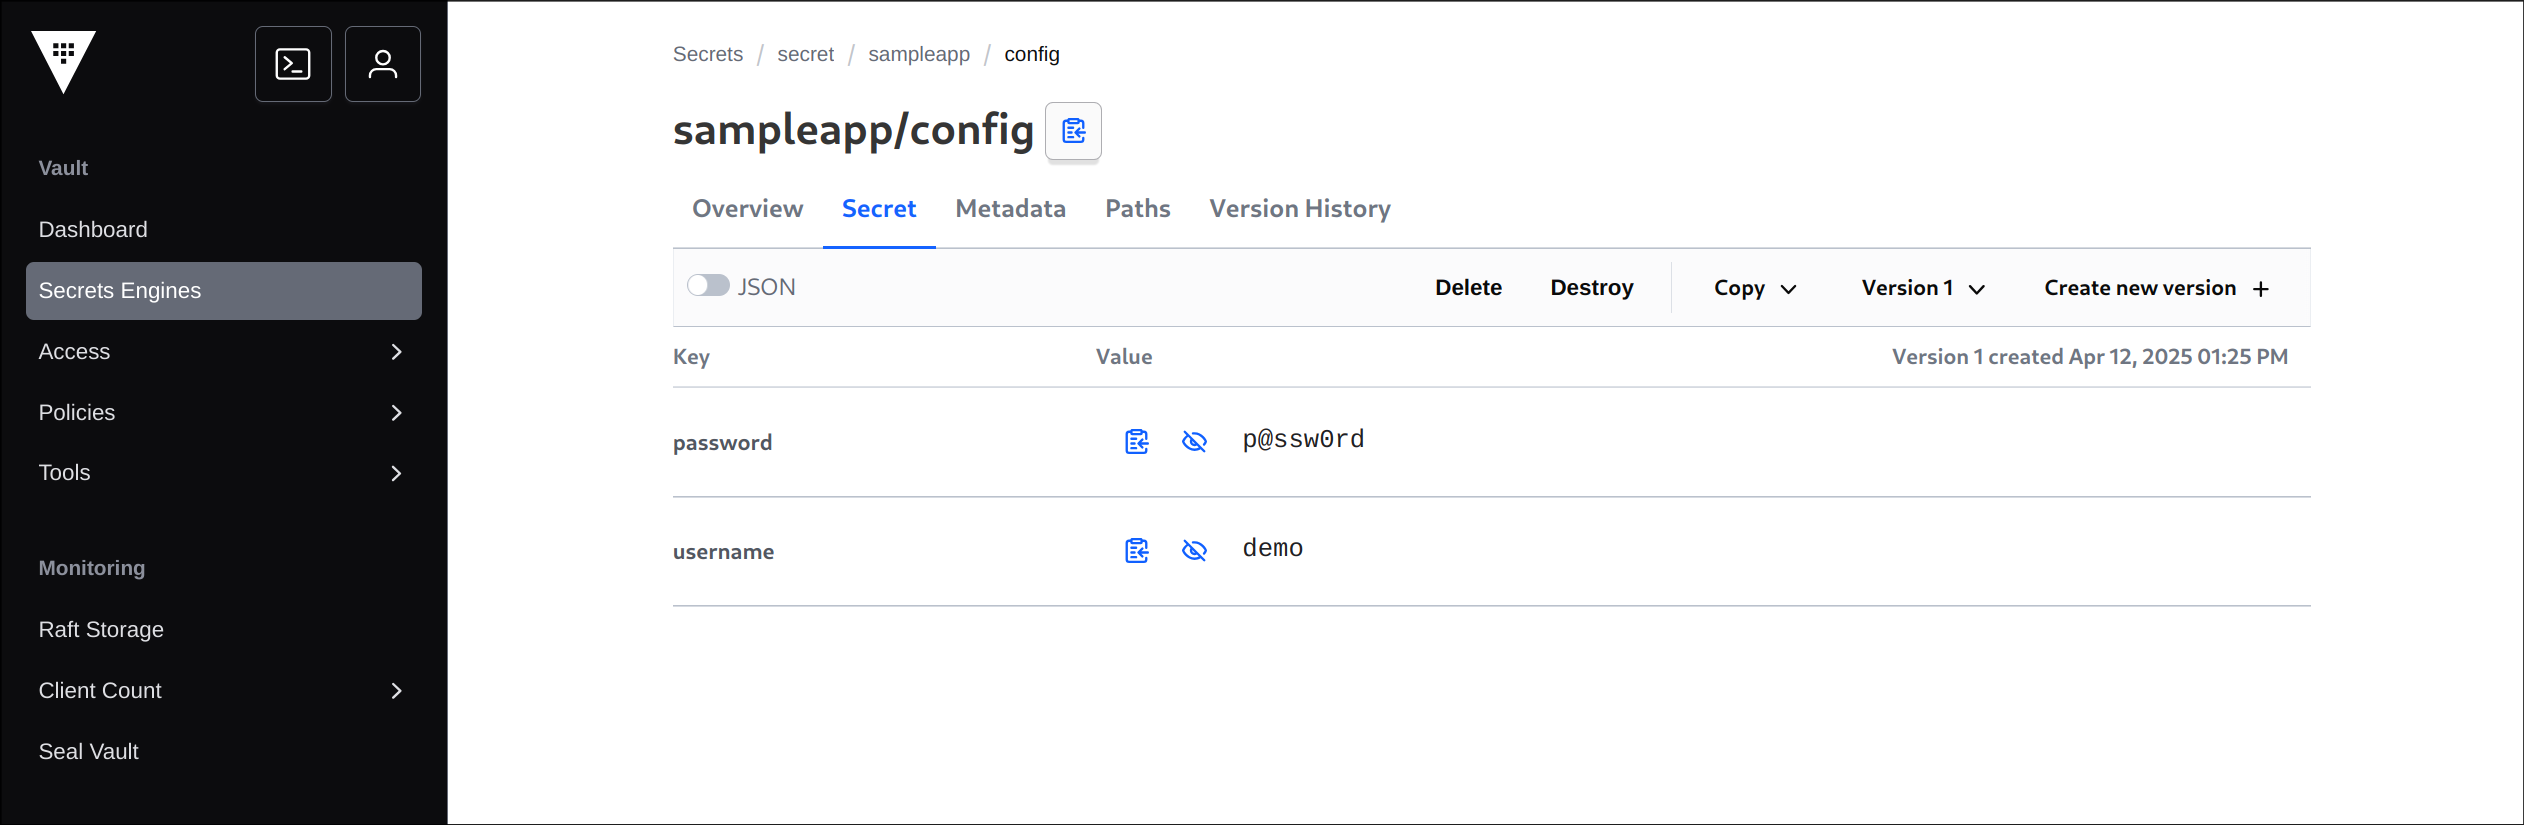
2. 샘플 시크릿 저장
1
2
3
| vault kv put secret/sampleapp/config \
username="demo" \
password="p@ssw0rd"
|
✅ 출력
1
2
3
4
5
6
7
8
9
10
11
| ======== Secret Path ========
secret/data/sampleapp/config
======= Metadata =======
Key Value
--- -----
created_time 2025-04-12T04:25:34.411259907Z
custom_metadata <nil>
deletion_time n/a
destroyed false
version 1
|
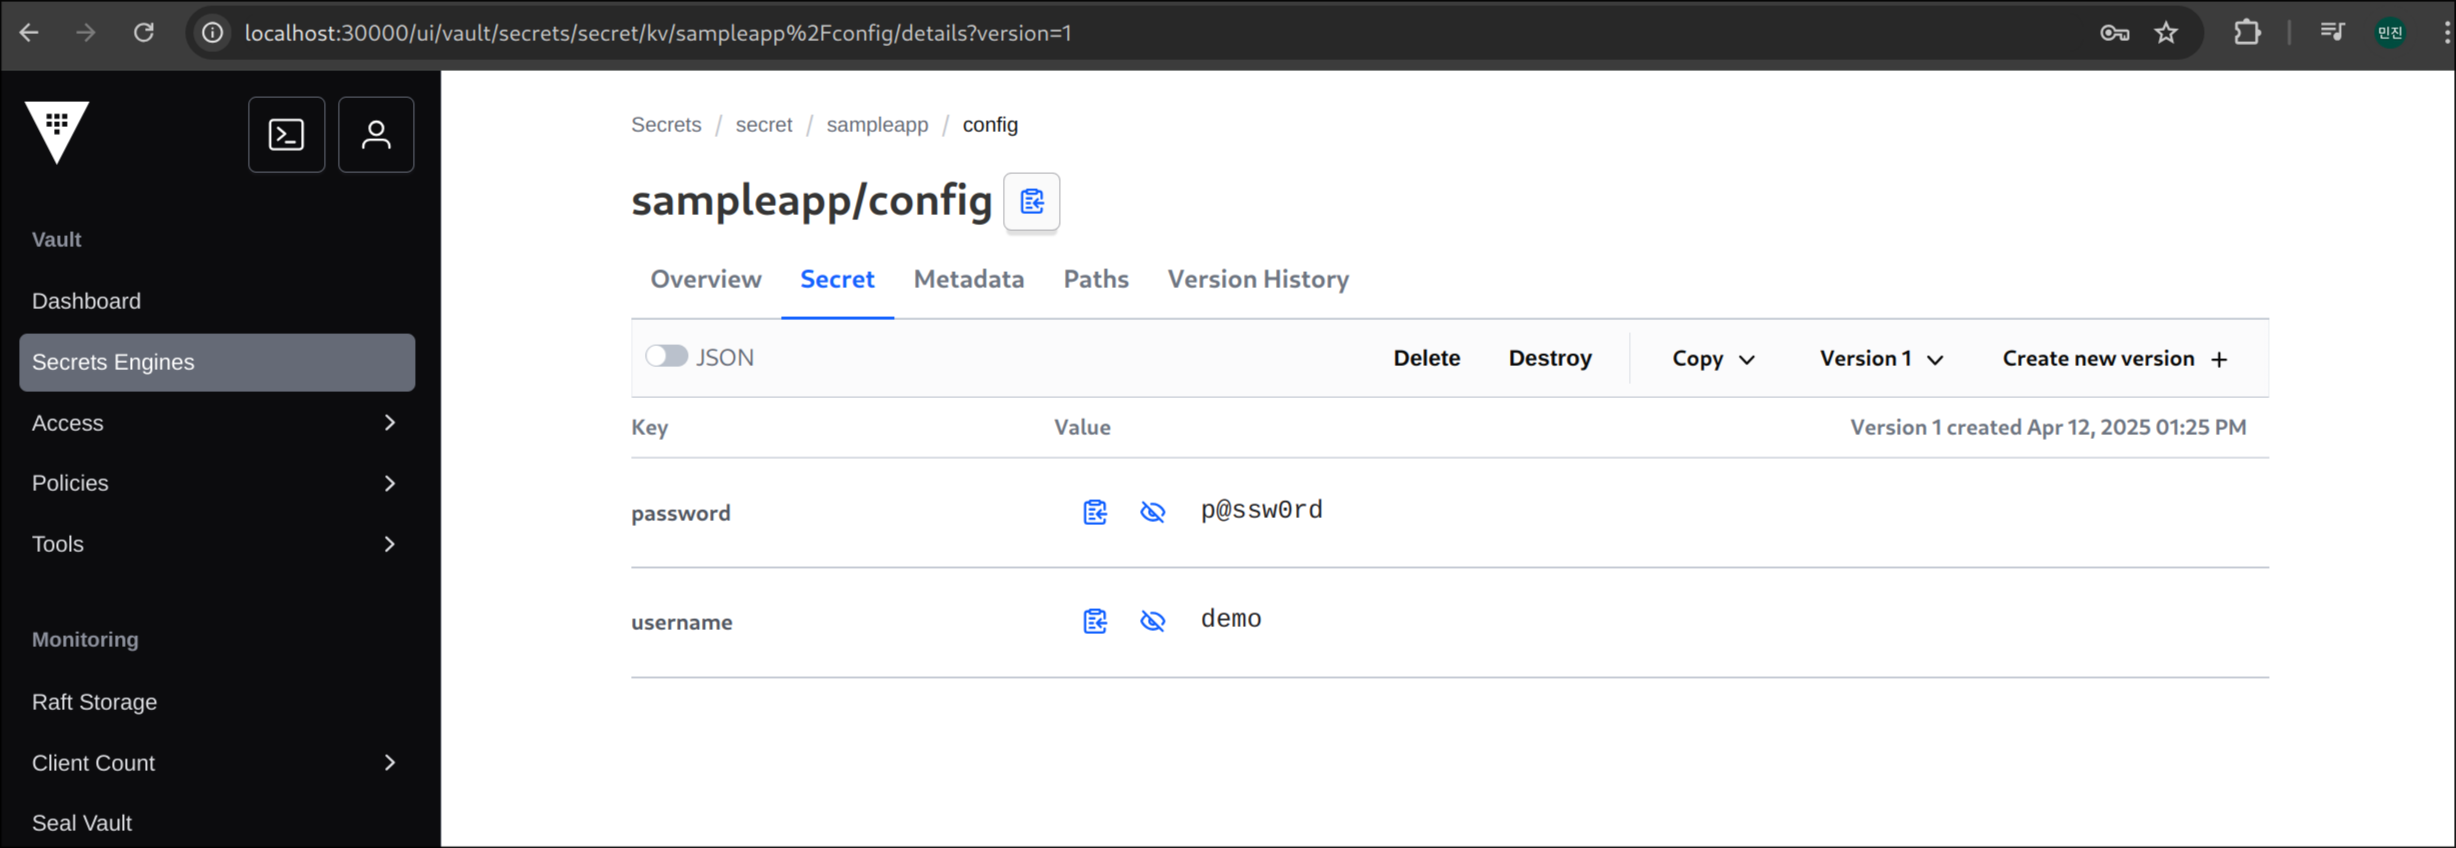
3. 입력된 데이터 확인
1
| vault kv get secret/sampleapp/config
|
✅ 출력
1
2
3
4
5
6
7
8
9
10
11
12
13
14
15
16
17
| ======== Secret Path ========
secret/data/sampleapp/config
======= Metadata =======
Key Value
--- -----
created_time 2025-04-12T04:25:34.411259907Z
custom_metadata <nil>
deletion_time n/a
destroyed false
version 1
====== Data ======
Key Value
--- -----
password p@ssw0rd
username demo
|
🚗 Vault SideCar 연동
1. AppRole 인증 방식 활성화
1
2
3
4
| vault auth enable approle || echo "AppRole already enabled"
# 결과
Success! Enabled approle auth method at: approle/
|
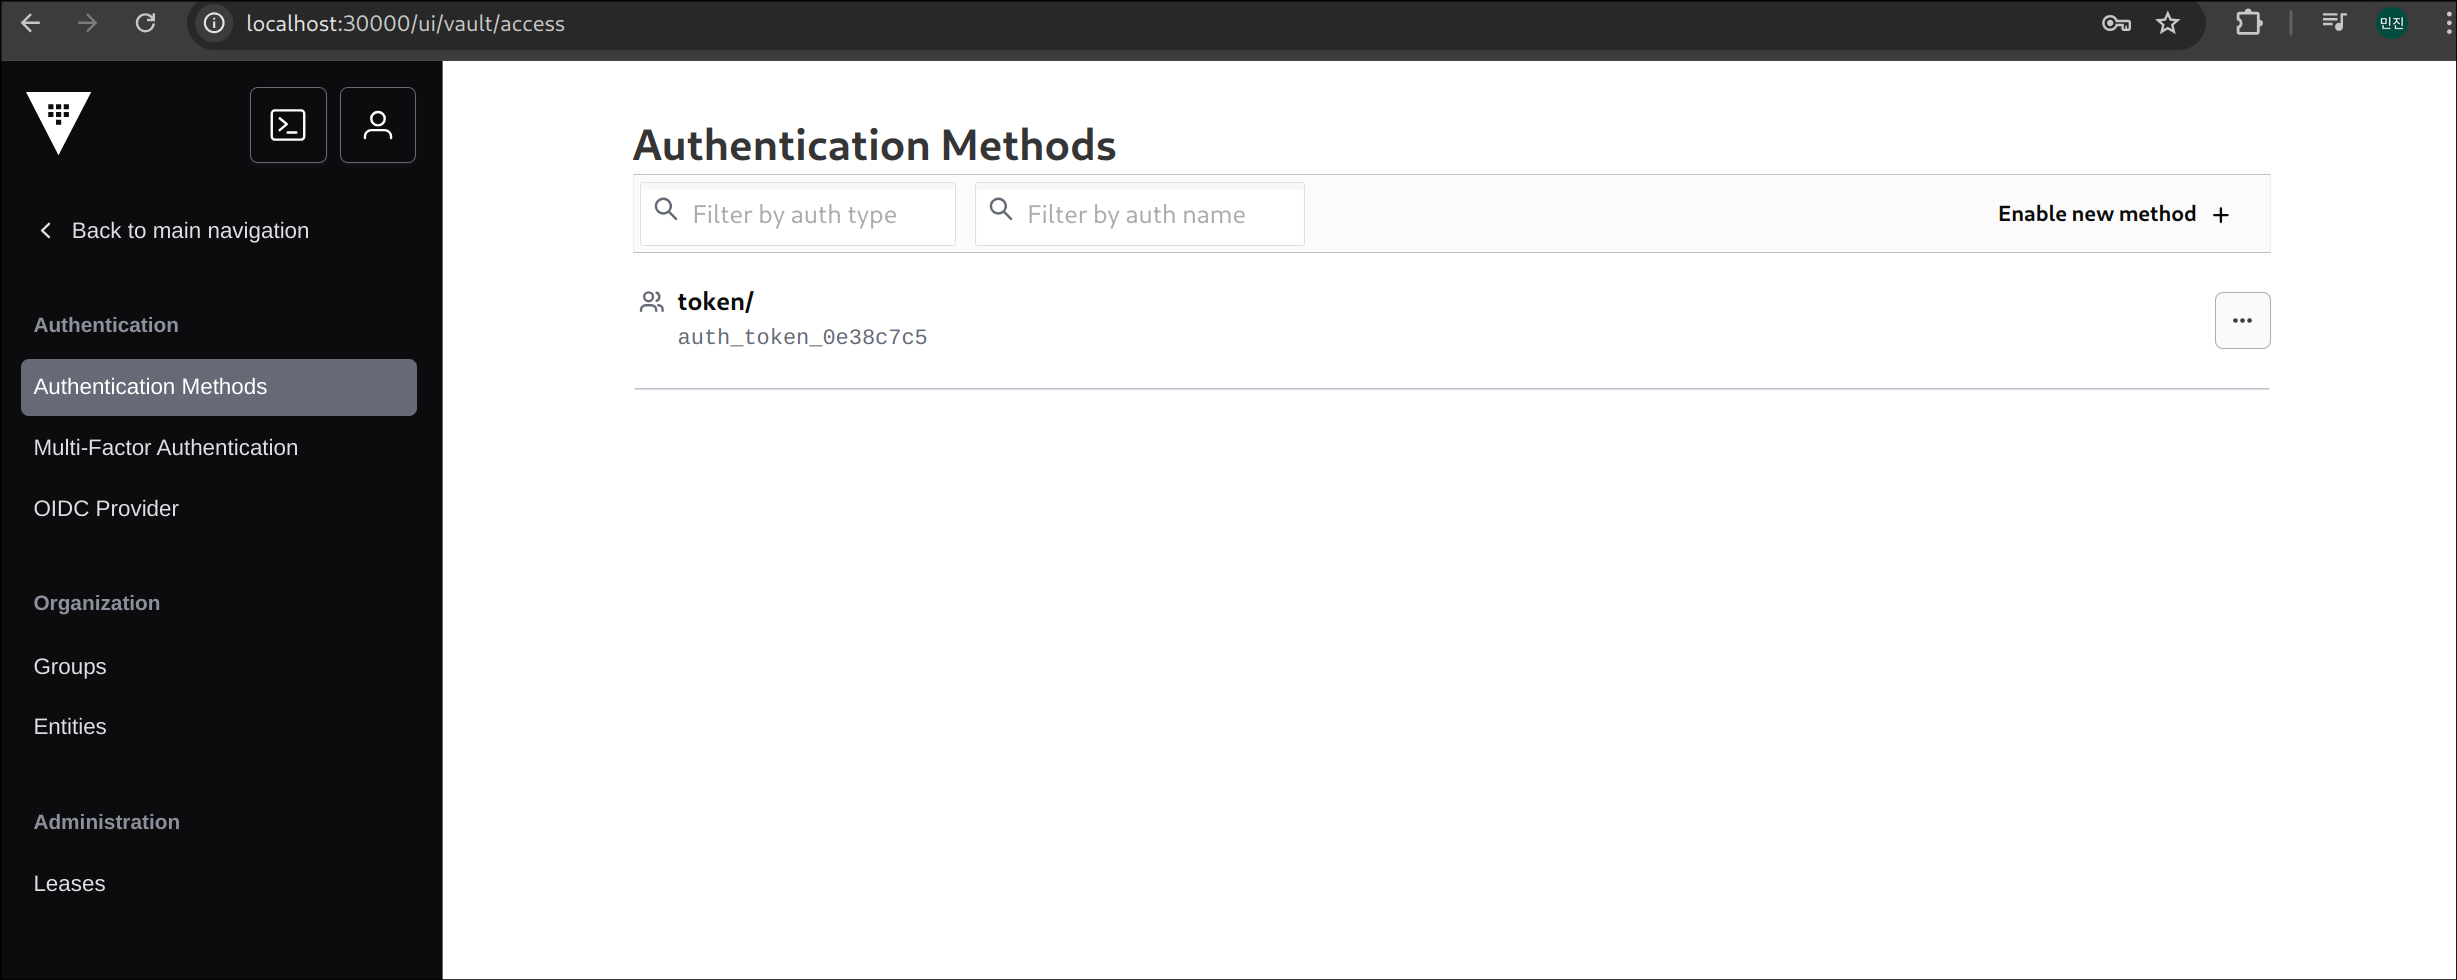
2. Vault 인증 방식 목록 확인
✅ 출력
1
2
3
4
| Path Type Accessor Description Version
---- ---- -------- ----------- -------
approle/ approle auth_approle_92272f5e n/a n/a
token/ token auth_token_0e38c7c5 token based cred
|
3. 정책 생성
1
2
3
4
5
6
7
8
| vault policy write sampleapp-policy - <<EOF
path "secret/data/sampleapp/*" {
capabilities = ["read"]
}
EOF
# 결과
Success! Uploaded policy: sampleapp-policy
|
4. AppRole Role 생성
1
2
3
4
5
6
7
8
| vault write auth/approle/role/sampleapp-role \
token_policies="sampleapp-policy" \
secret_id_ttl="1h" \
token_ttl="1h" \
token_max_ttl="4h"
# 결과
Success! Data written to: auth/approle/role/sample
|
5. Role ID 및 Secret ID 추출 및 저장
1
2
3
4
5
| ROLE_ID=$(vault read -field=role_id auth/approle/role/sampleapp-role/role-id)
SECRET_ID=$(vault write -f -field=secret_id auth/approle/role/sampleapp-role/secret-id)
echo "ROLE_ID: $ROLE_ID"
echo "SECRET_ID: $SECRET_ID"
|
✅ 출력
1
2
| ROLE_ID: bdff9f53-ec1e-eb9b-db47-268b29f3e9b7
SECRET_ID: cbcf1705-4c45-50fa-010e-bf7dbdc58134
|
6. 파일로 저장
1
2
3
| mkdir -p approle-creds
echo "$ROLE_ID" > approle-creds/role_id.txt
echo "$SECRET_ID" > approle-creds/secret_id.txt
|
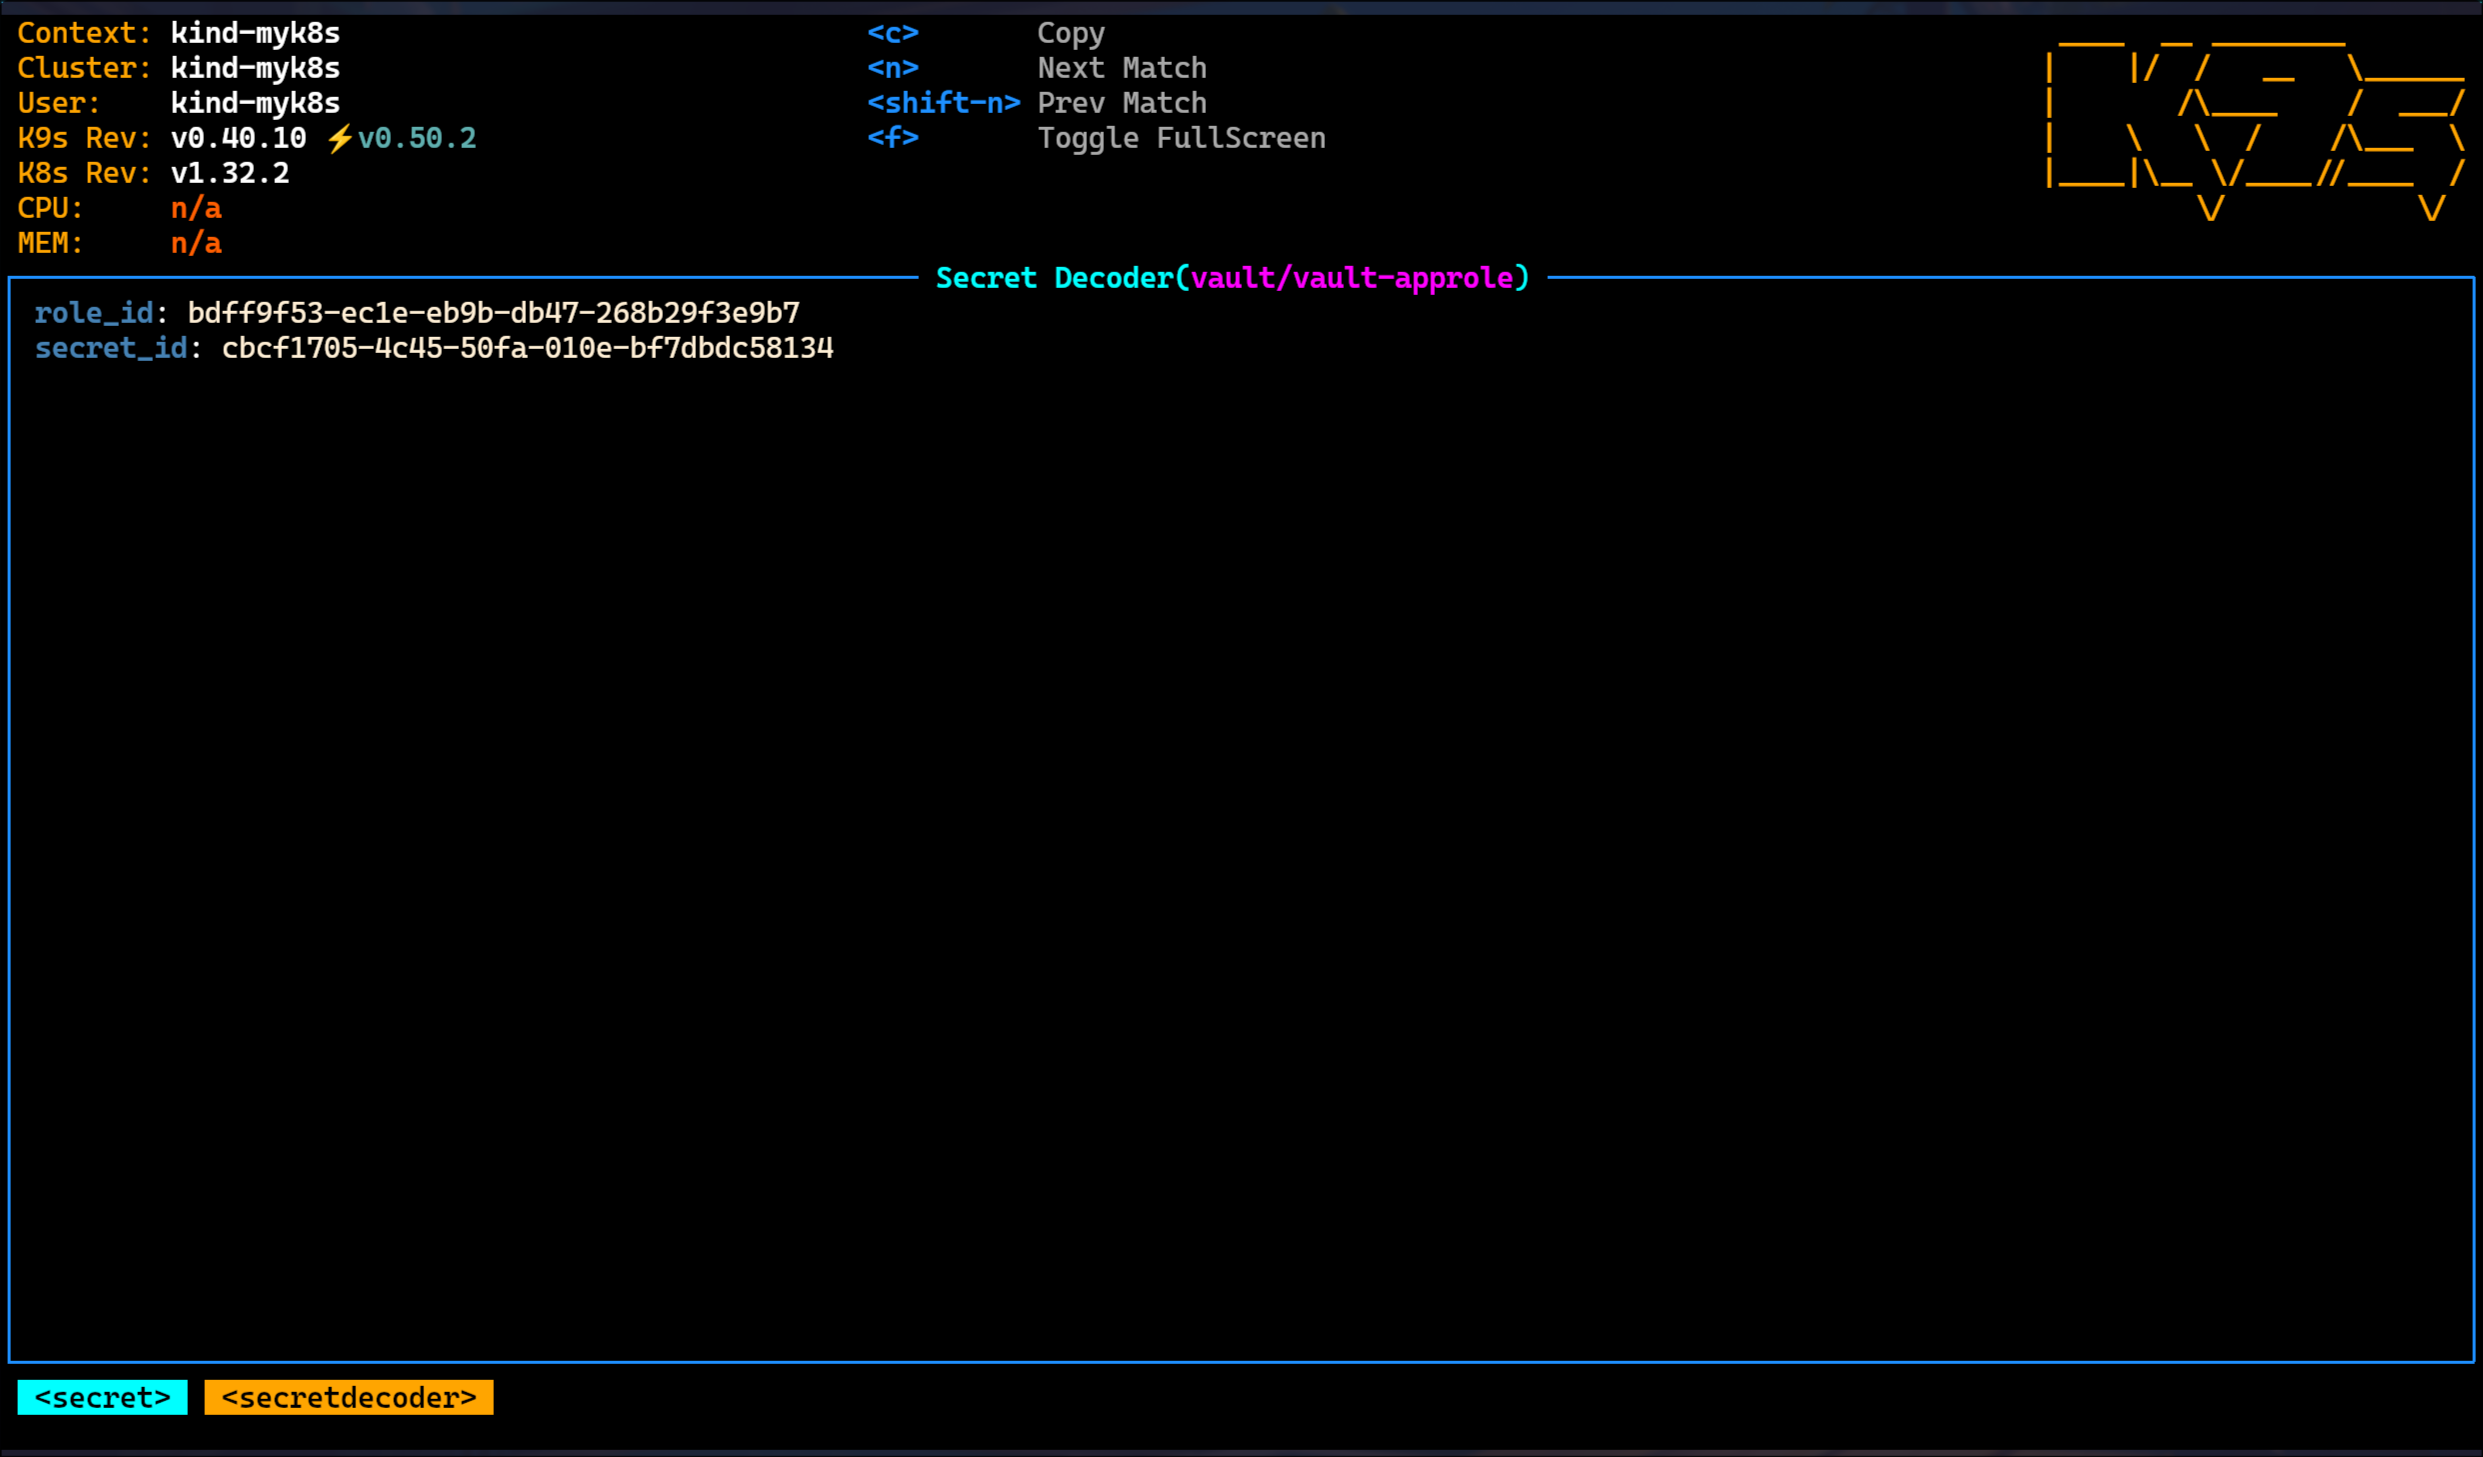
7. 쿠버네티스 Secret으로 저장
1
2
3
4
5
6
7
8
| kubectl create secret generic vault-approle -n vault \
--from-literal=role_id="${ROLE_ID}" \
--from-literal=secret_id="${SECRET_ID}" \
--save-config \
--dry-run=client -o yaml | kubectl apply -f -
# 결과
secret/vault-approle created
|
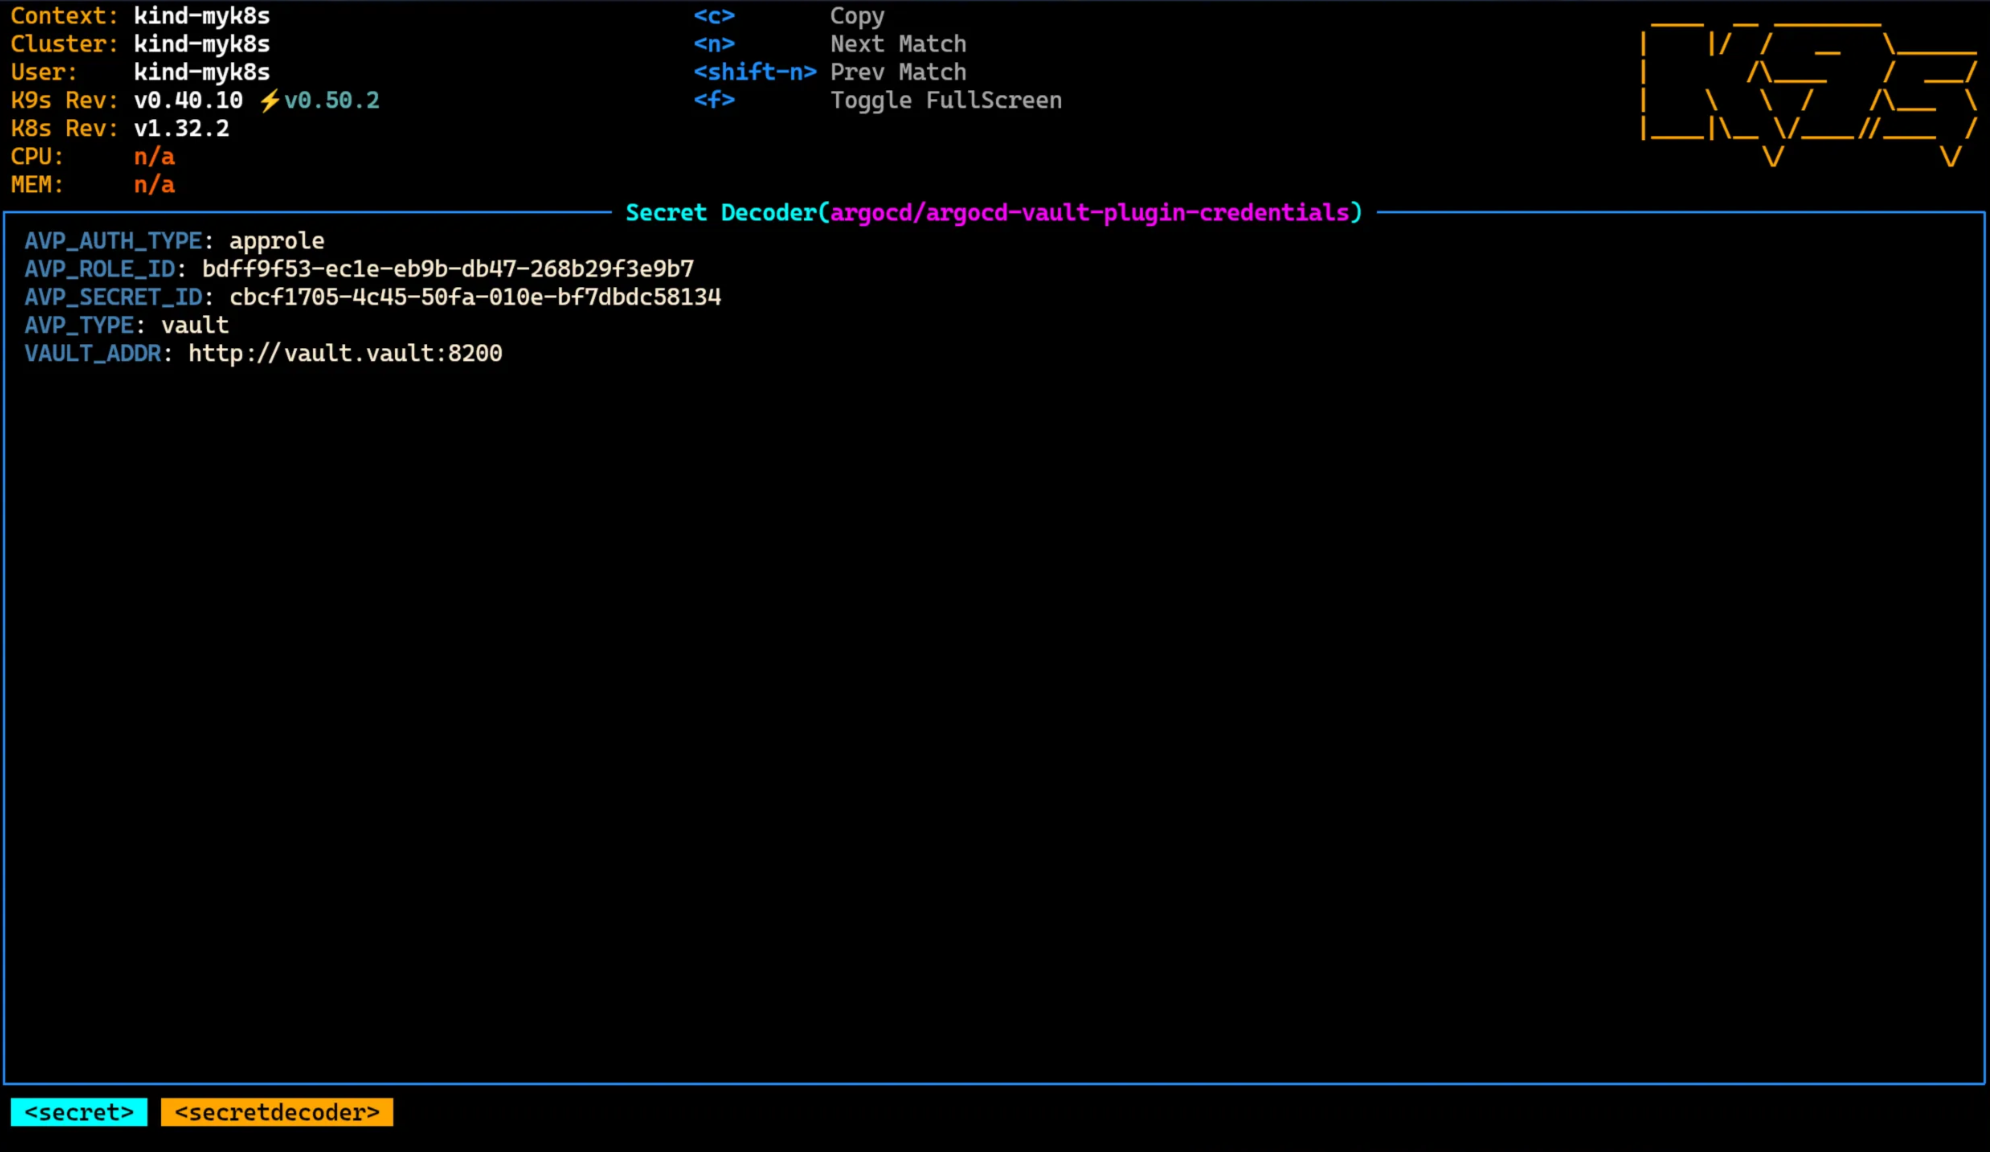
k9s - x 단축키 실행 시, base64로 디코딩된 정보 획득
8. Vault Agent Sidecar 연동
(1) Vault Agent 설정 파일 작성 및 생성 (vault-agent-config.hcl)
1
2
3
4
5
6
7
8
9
10
11
12
13
14
15
16
17
18
19
20
21
22
23
24
25
26
27
28
29
30
31
32
33
34
35
36
37
38
39
40
| cat <<EOF | kubectl create configmap vault-agent-config -n vault --from-file=agent-config.hcl=/dev/stdin --dry-run=client -o yaml | kubectl apply -f -
vault {
address = "http://vault.vault.svc:8200"
}
auto_auth {
method "approle" {
config = {
role_id_file_path = "/etc/vault/approle/role_id"
secret_id_file_path = "/etc/vault/approle/secret_id"
remove_secret_id_file_after_reading = false
}
}
sink "file" {
config = {
path = "/etc/vault-agent-token/token"
}
}
}
template_config {
static_secret_render_interval = "20s"
}
template {
destination = "/etc/secrets/index.html"
contents = <<EOH
<html>
<body>
<p>username: </p>
<p>password: </p>
</body>
</html>
EOH
}
EOF
# 결과
configmap/vault-agent-config created
|
(2) 샘플 애플리케이션 + Sidecar 배포(수동방식)
Nginx + Vault Agent 생성
1
2
3
4
5
6
7
8
9
10
11
12
13
14
15
16
17
18
19
20
21
22
23
24
25
26
27
28
29
30
31
32
33
34
35
36
37
38
39
40
41
42
43
44
45
46
47
48
49
50
51
52
| kubectl apply -n vault -f - <<EOF
apiVersion: apps/v1
kind: Deployment
metadata:
name: nginx-vault-demo
spec:
replicas: 1
selector:
matchLabels:
app: nginx-vault-demo
template:
metadata:
labels:
app: nginx-vault-demo
spec:
containers:
- name: nginx
image: nginx:latest
ports:
- containerPort: 80
volumeMounts:
- name: html-volume
mountPath: /usr/share/nginx/html
- name: vault-agent-sidecar
image: hashicorp/vault:latest
args:
- "agent"
- "-config=/etc/vault/agent-config.hcl"
volumeMounts:
- name: vault-agent-config
mountPath: /etc/vault
- name: vault-approle
mountPath: /etc/vault/approle
- name: vault-token
mountPath: /etc/vault-agent-token
- name: html-volume
mountPath: /etc/secrets
volumes:
- name: vault-agent-config
configMap:
name: vault-agent-config
- name: vault-approle
secret:
secretName: vault-approle
- name: vault-token
emptyDir: {}
- name: html-volume
emptyDir: {}
EOF
# 결과
deployment.apps/nginx-vault-demo created
|
(3) SVC 생성
1
2
3
4
5
6
7
8
9
10
11
12
13
14
15
16
17
18
| kubectl apply -f - <<EOF
apiVersion: v1
kind: Service
metadata:
name: nginx-service
spec:
type: NodePort
selector:
app: nginx-vault-demo
ports:
- protocol: TCP
port: 80
targetPort: 80
nodePort: 30001 # Kind에서 설정한 Port
EOF
# 결과
service/nginx-service created
|
(4) 생성된 컨테이너 확인
1
| kubectl get pod -l app=nginx-vault-demo
|
✅ 출력
1
2
| NAME READY STATUS RESTARTS AGE
nginx-vault-demo-7776649597-cn69g 2/2 Running 0 94s
|
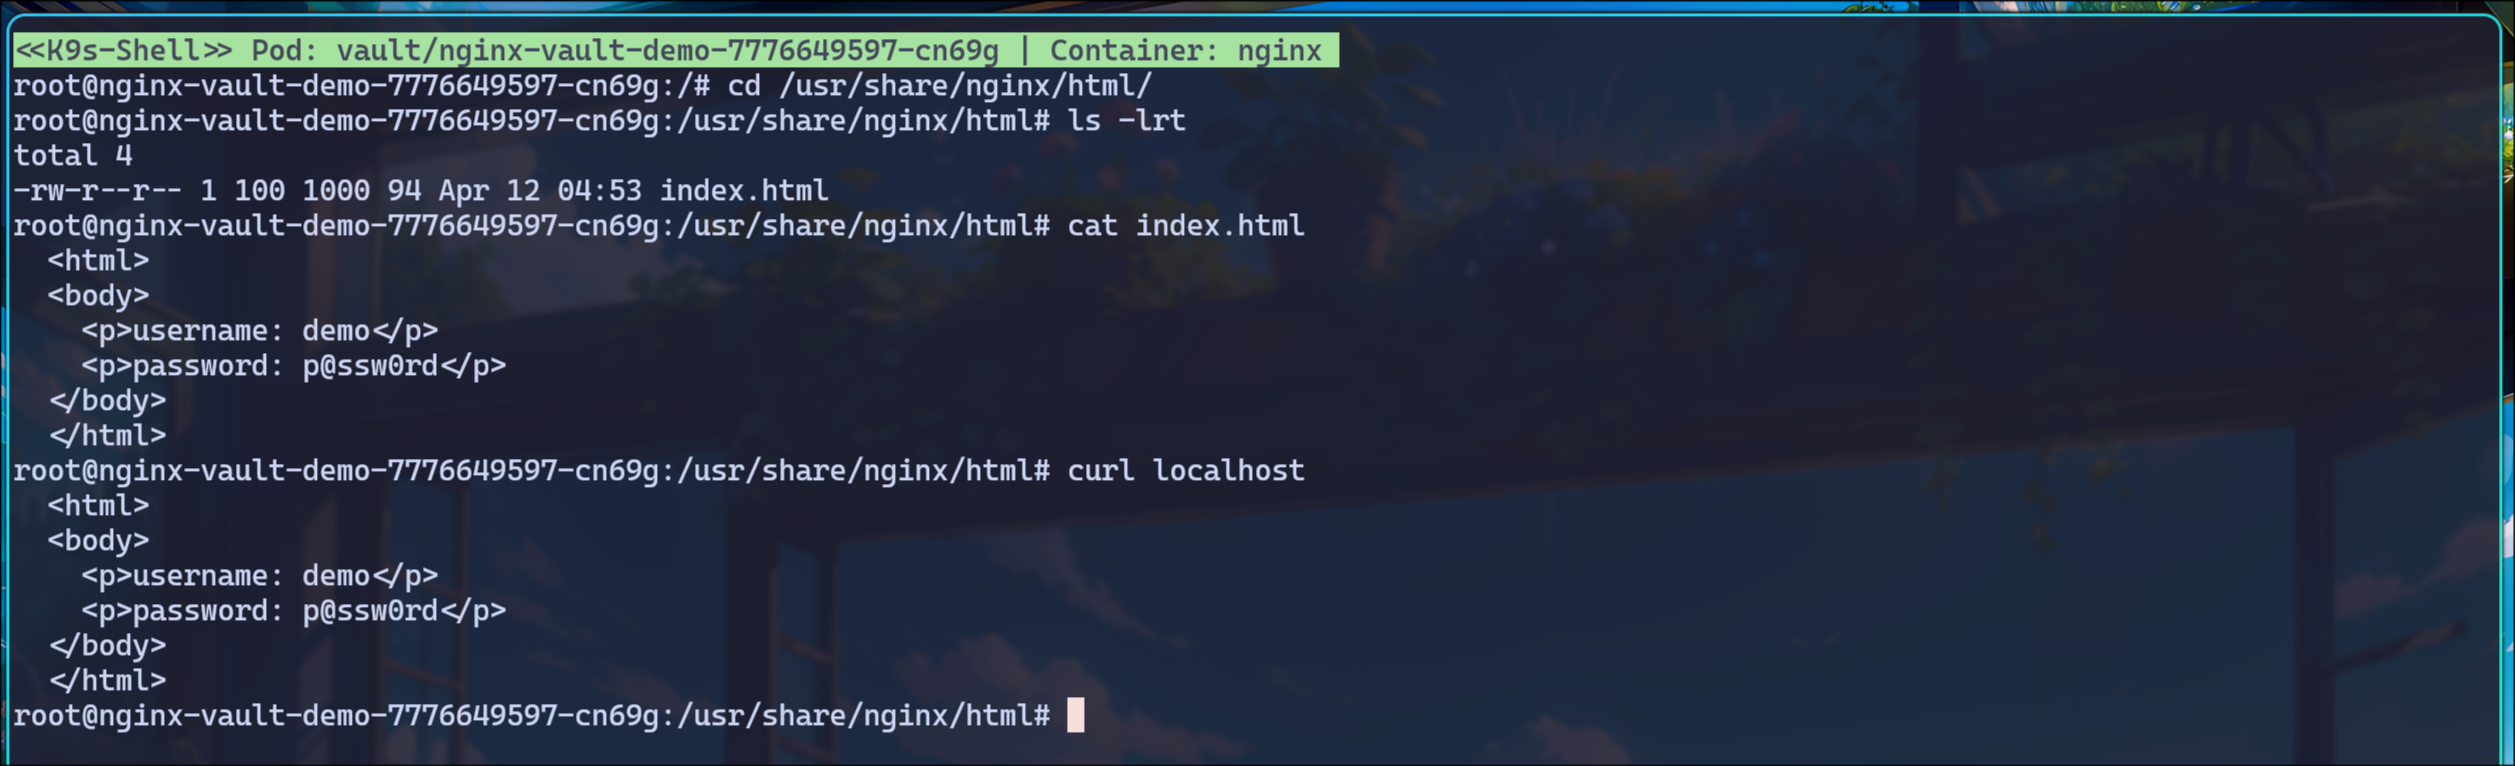
(5) vault-agent-sidecar 셸로 진입
(6) nginx 셸로 진입
(7) localhost:30001 진입
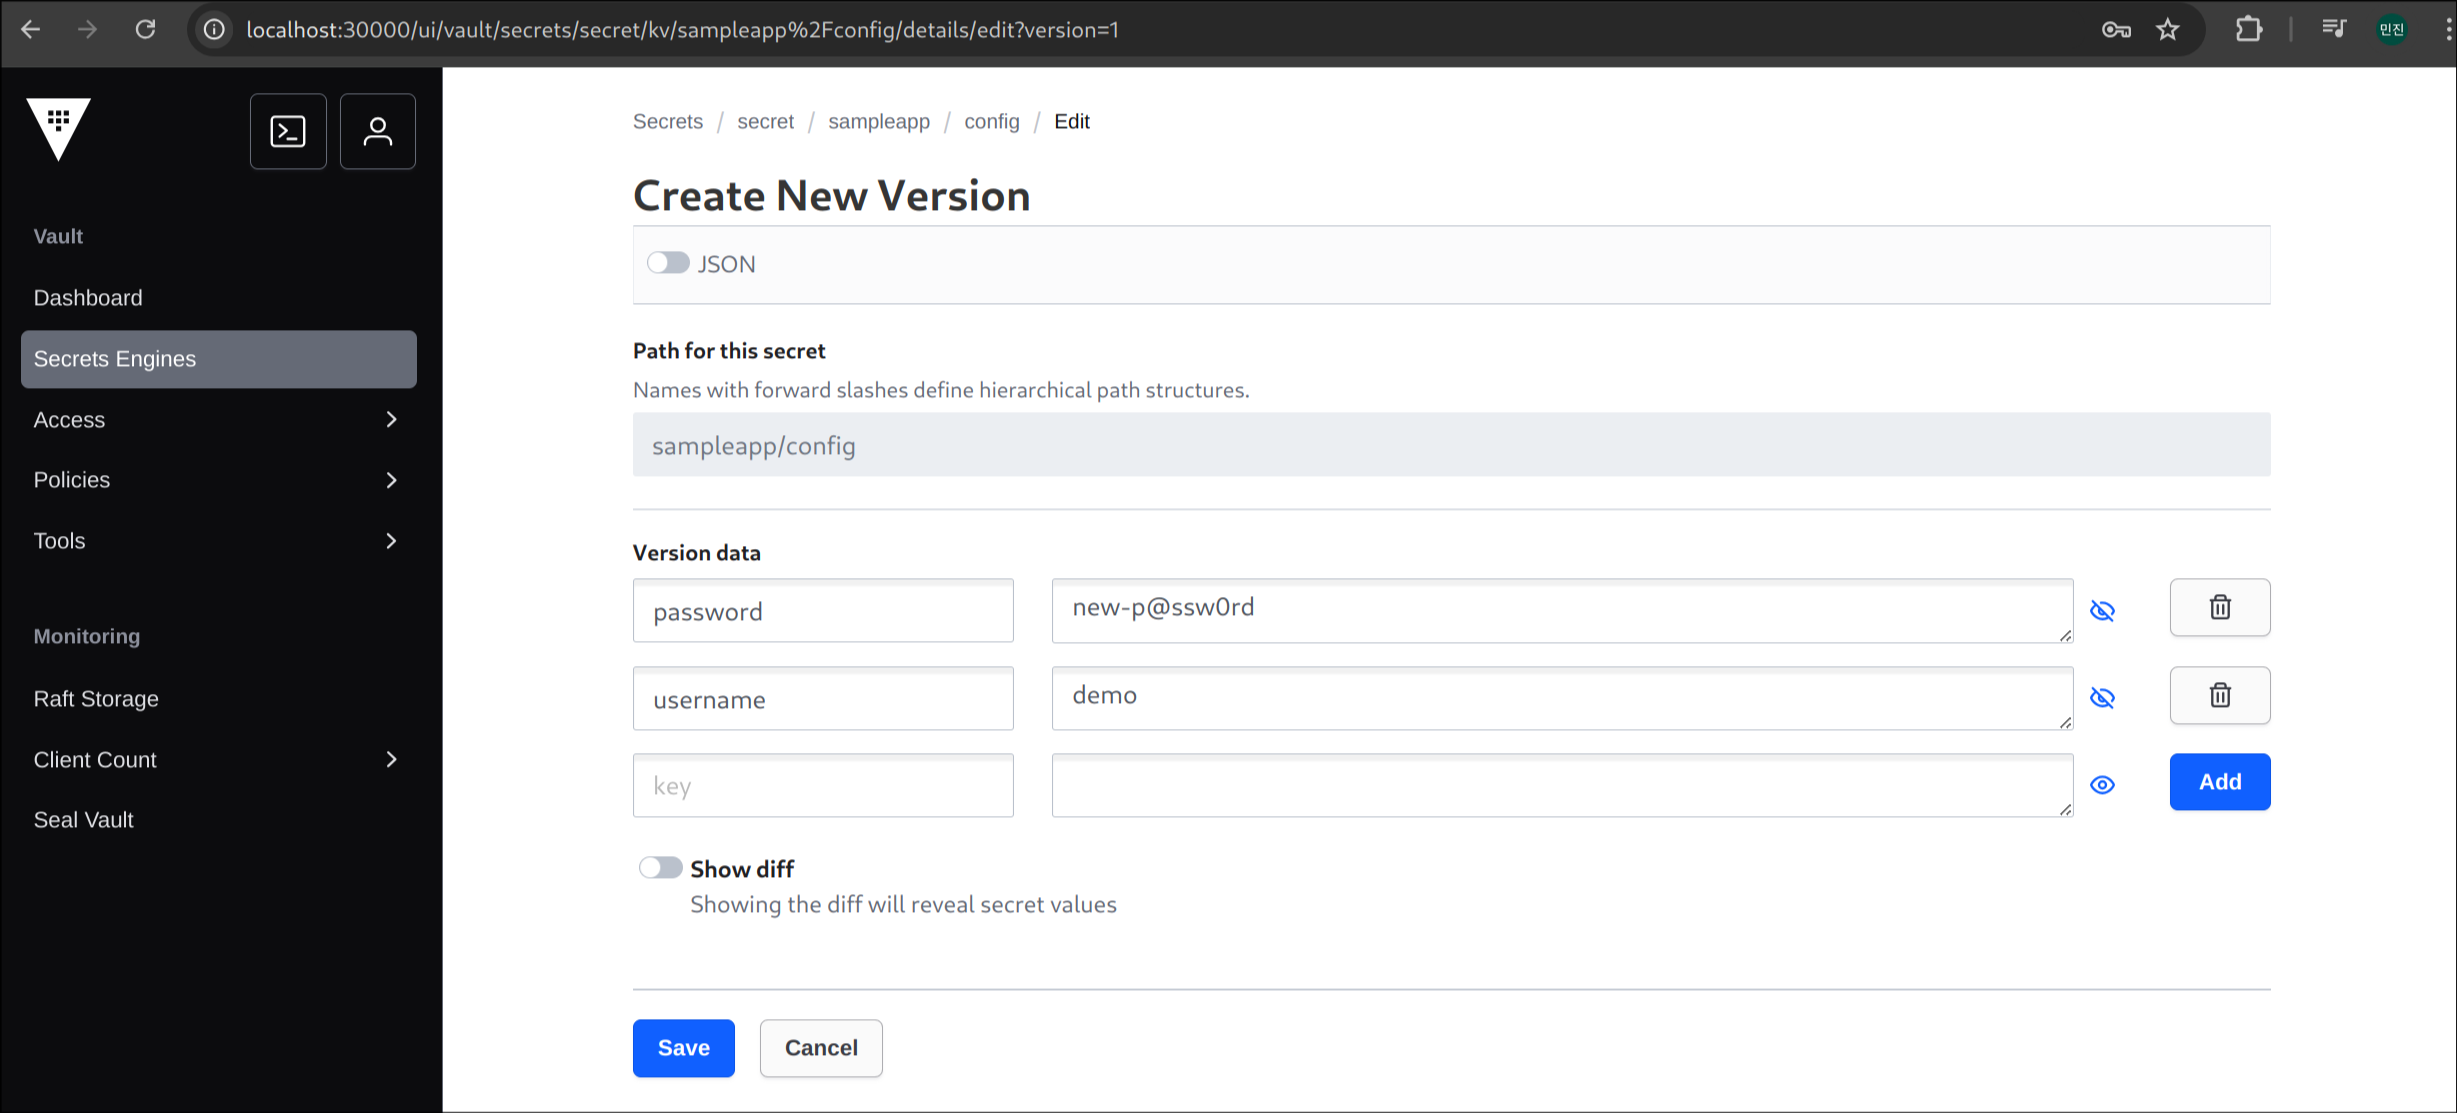
(8) create new version + 클릭
(9) new-p@ssw0rd로 비밀번호 변경 후, save 버튼 클릭
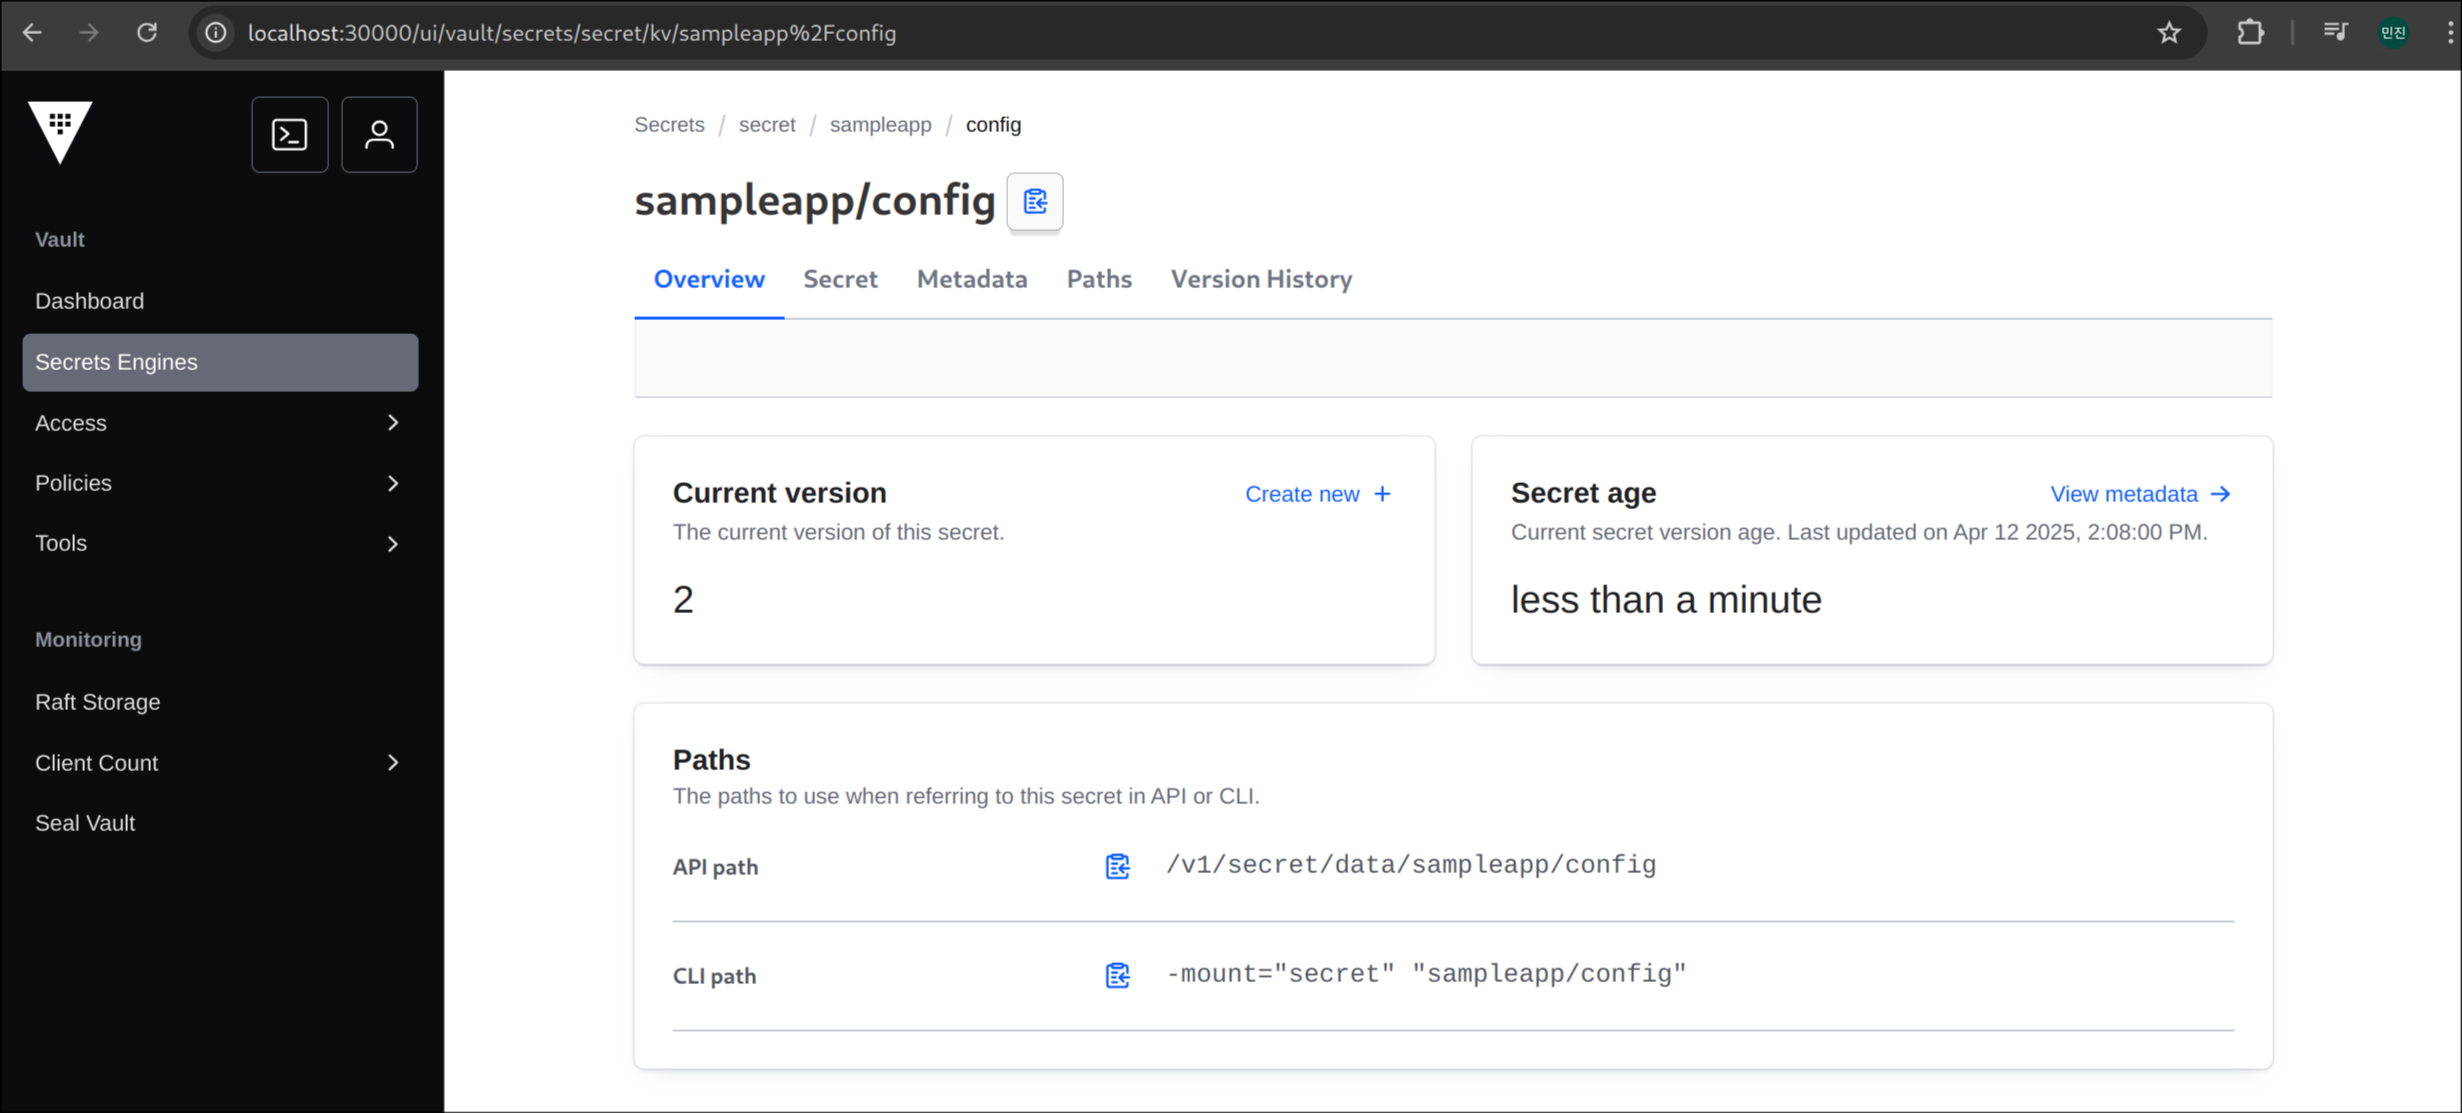
(10) version2 생성 완료
(11) version2 반영 확인
1
| root@nginx-vault-demo-7776649597-cn69g:/usr/share/nginx/html# curl localhost
|
✅ 출력
1
2
3
4
5
6
| <html>
<body>
<p>username: demo</p>
<p>password: new-p@ssw0rd</p>
</body>
</html>
|
(12) Mutating Admission Webhook 설정 목록 조회
1
| kubectl get mutatingwebhookconfigurations.admissionregistration.k8s.io
|
✅ 출력
1
2
| NAME WEBHOOKS AGE
vault-agent-injector-cfg 1 65
|
🔐 Jenkins + Vault (AppRole) - CI
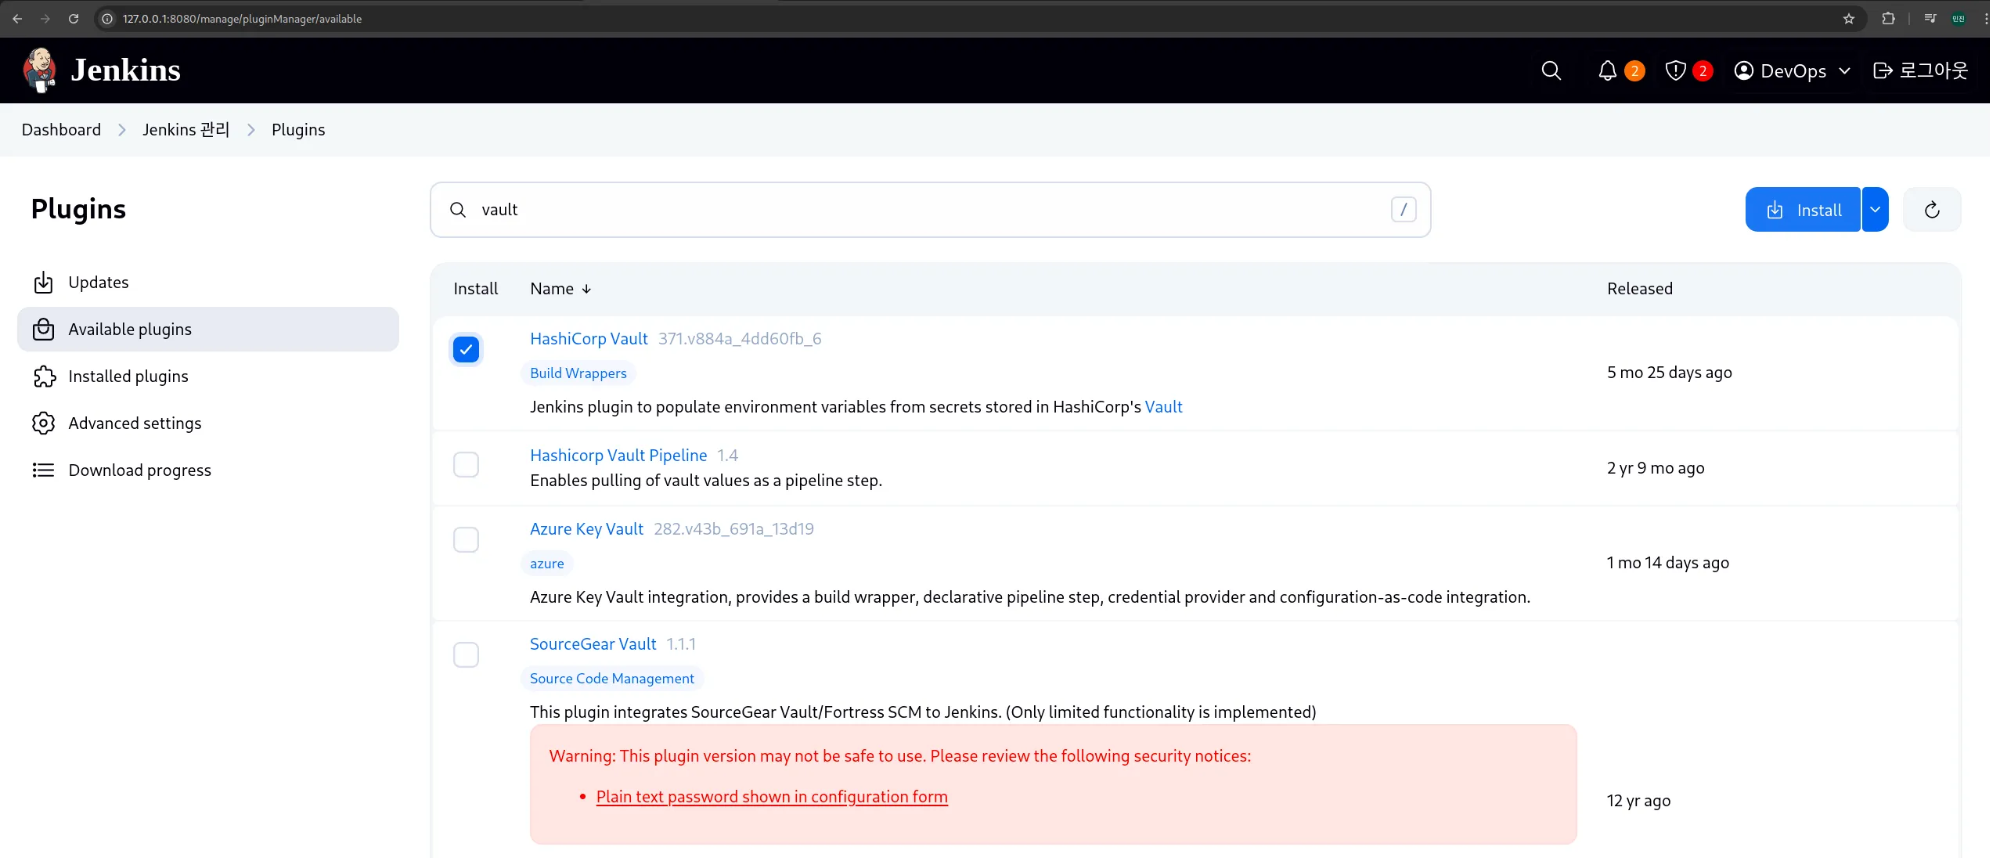
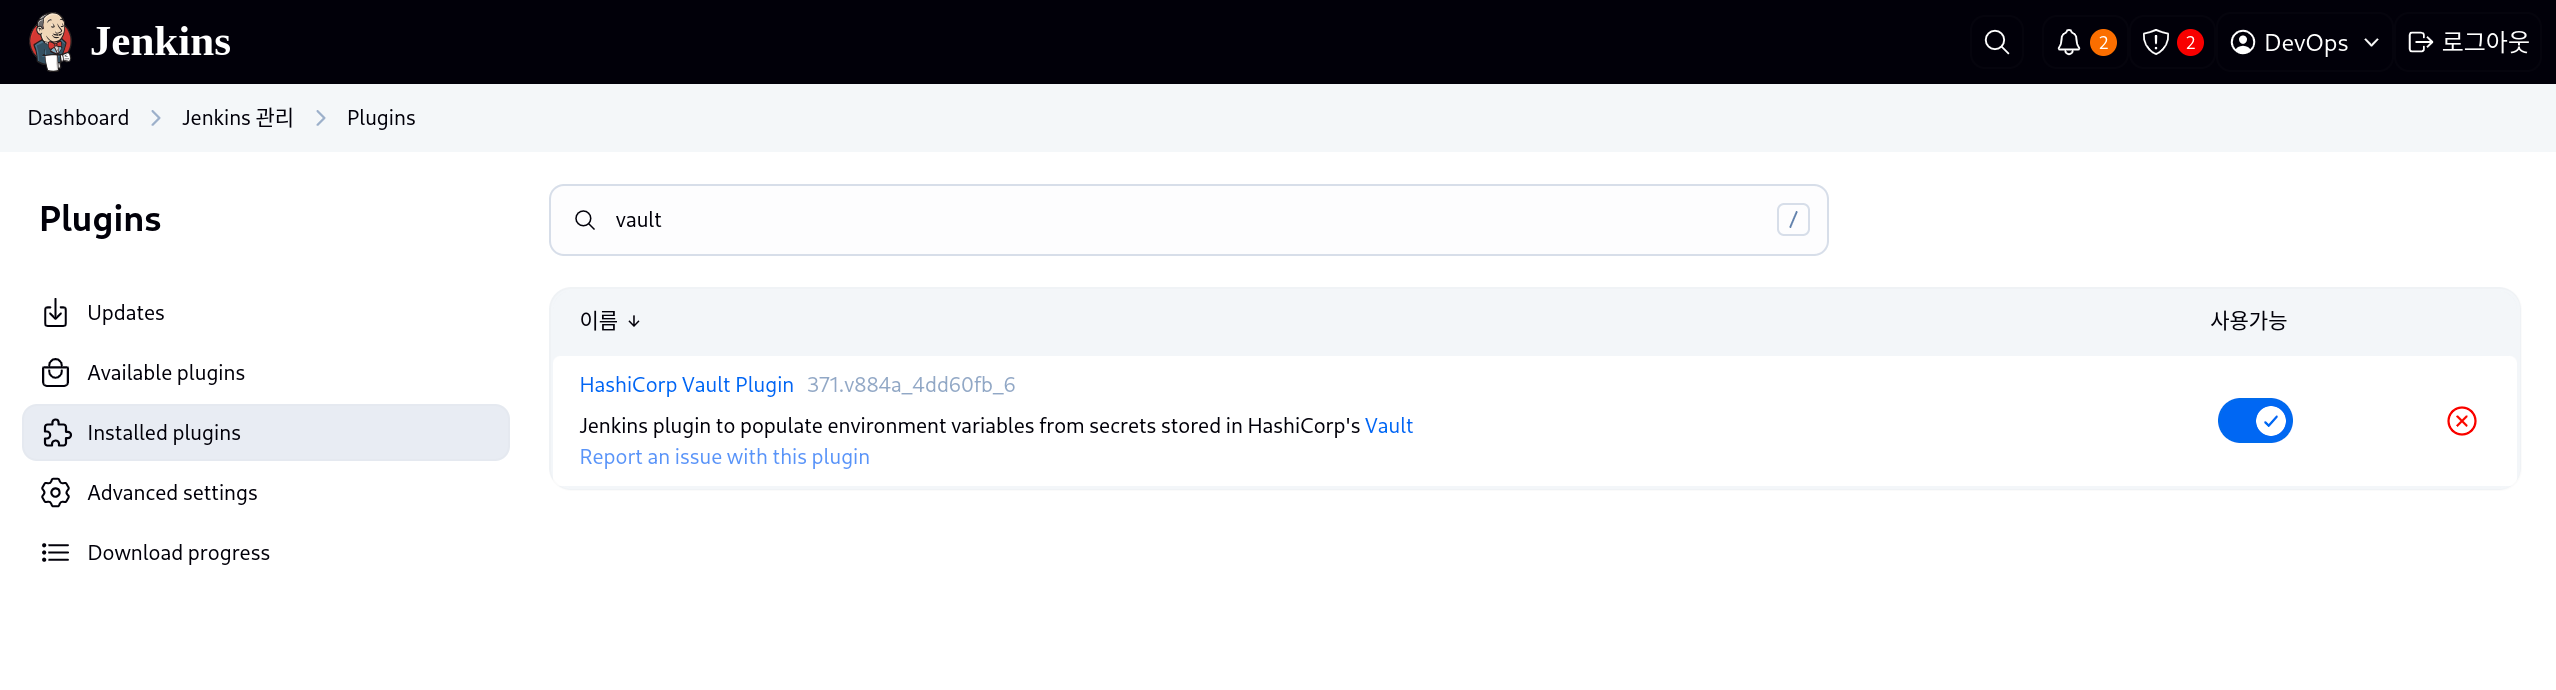
1. 젠킨스에서 Vault 플러그인 설치
(1) Manage Jenkins → Plugins → Available plugins에서 Vault 검색
(2) HashiCorp Vault Plugin 설치 후 젠킨스 재시작
2. Role ID 및 Secret ID 추출
1
2
3
4
5
| ROLE_ID=$(vault read -field=role_id auth/approle/role/sampleapp-role/role-id)
SECRET_ID=$(vault write -f -field=secret_id auth/approle/role/sampleapp-role/secret-id)
echo "ROLE_ID: $ROLE_ID"
echo "SECRET_ID: $SECRET_ID"
|
✅ 출력
1
2
| ROLE_ID: xxxxxxxxxxxxxxxxxxxxxxxxxxxxxxxxxxxx
SECRET_ID: cbcf1705-4c45-50fa-010e-bf7dbdc58134
|
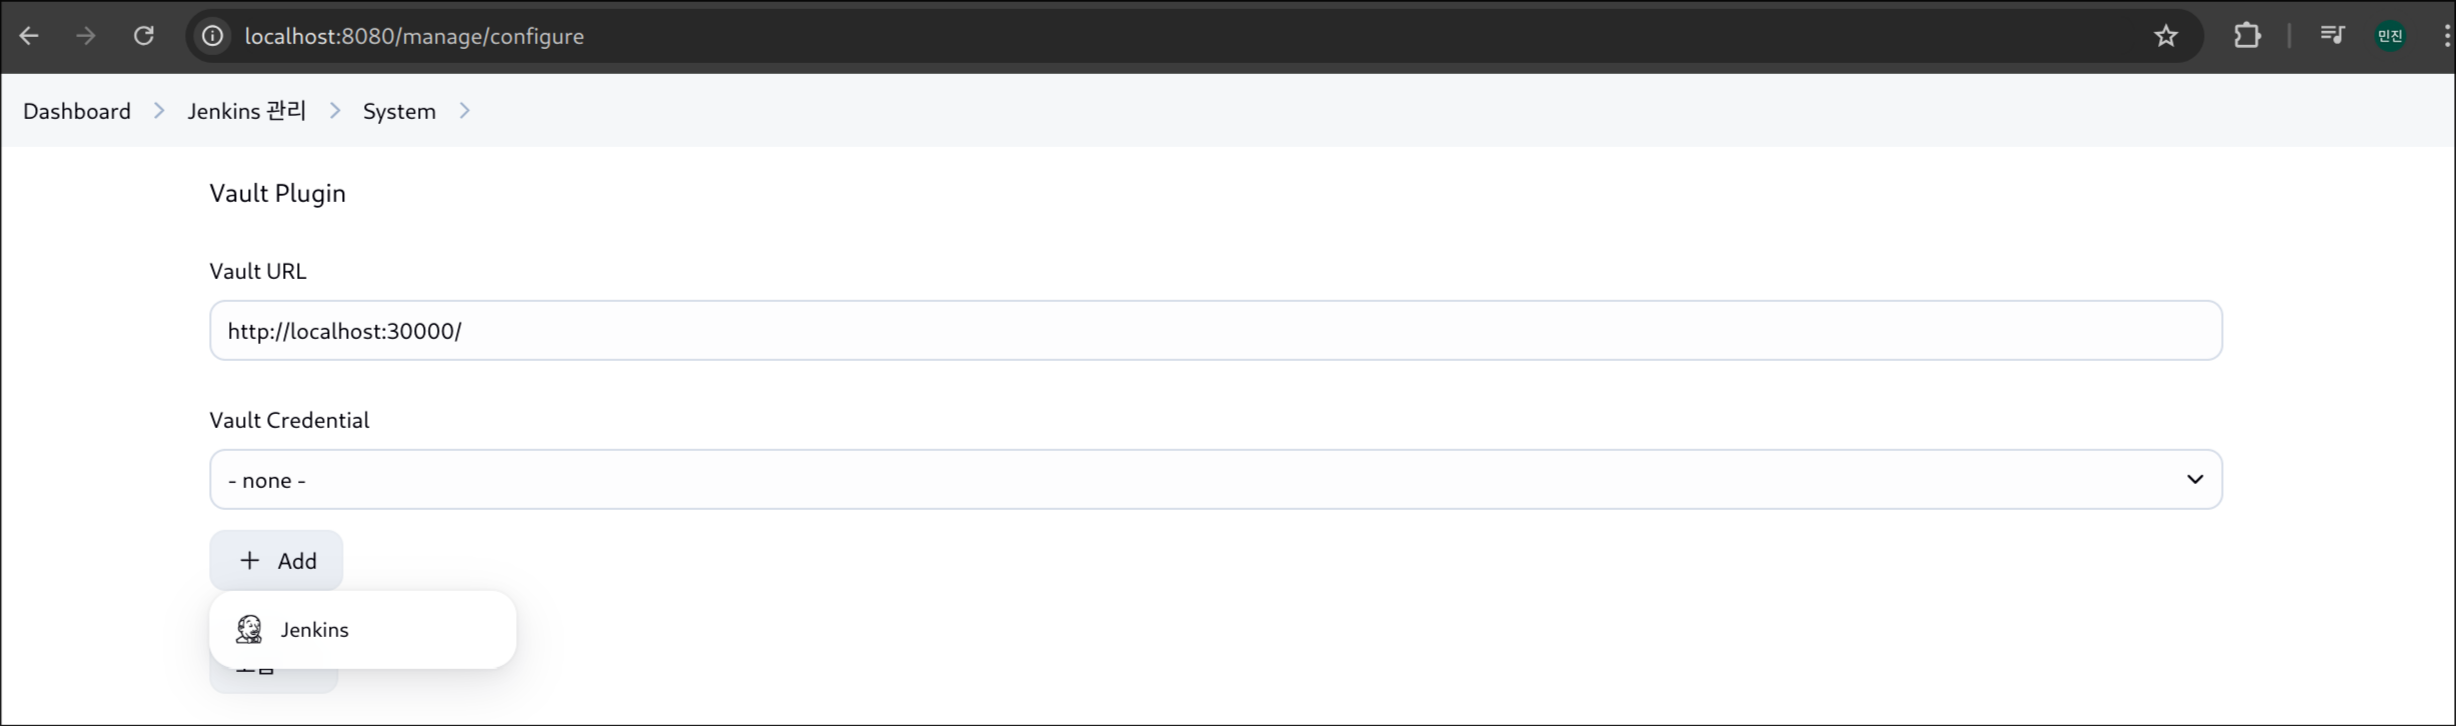
3. Vault 플러그인 설정
(1) Vault URL 입력 후 [Add] 버튼 클릭
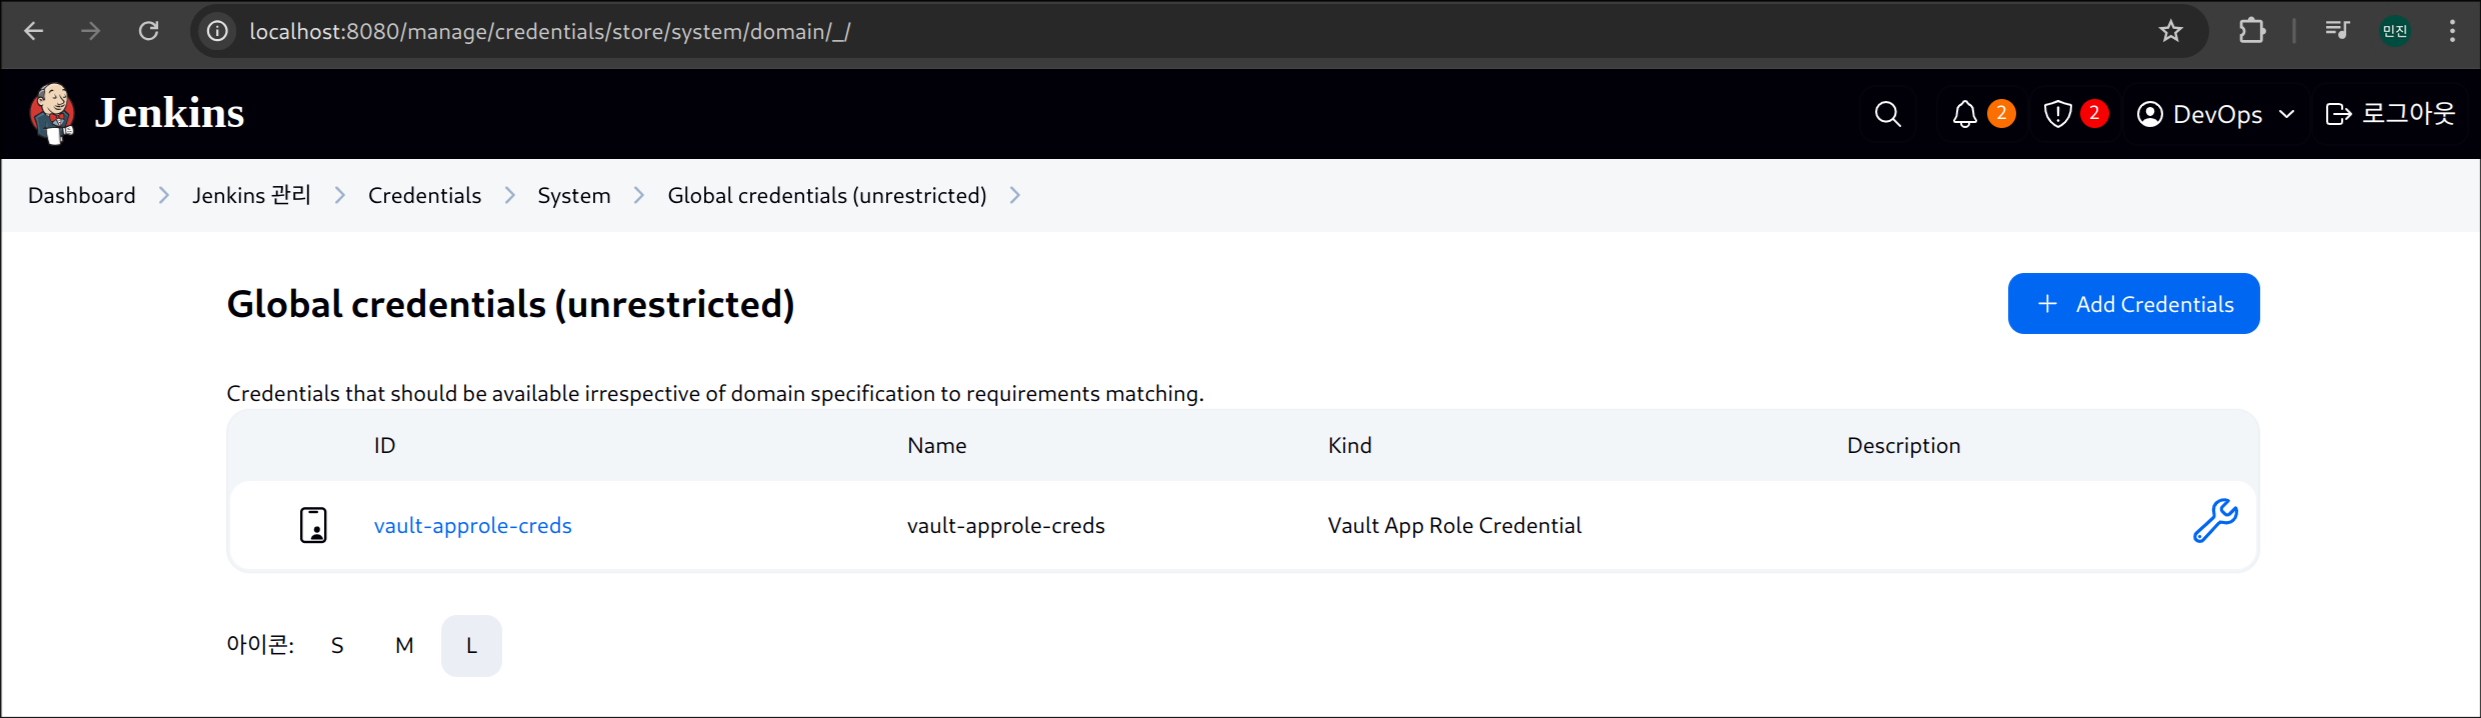
(2) Vault Credentials
- 종류: Vault AppRole Credential
- Role ID & Secret ID 입력
- ID는 기억하기 쉬운 이름으로 지정 (ex.
vault-approle-creds)
(3) 설정 완료
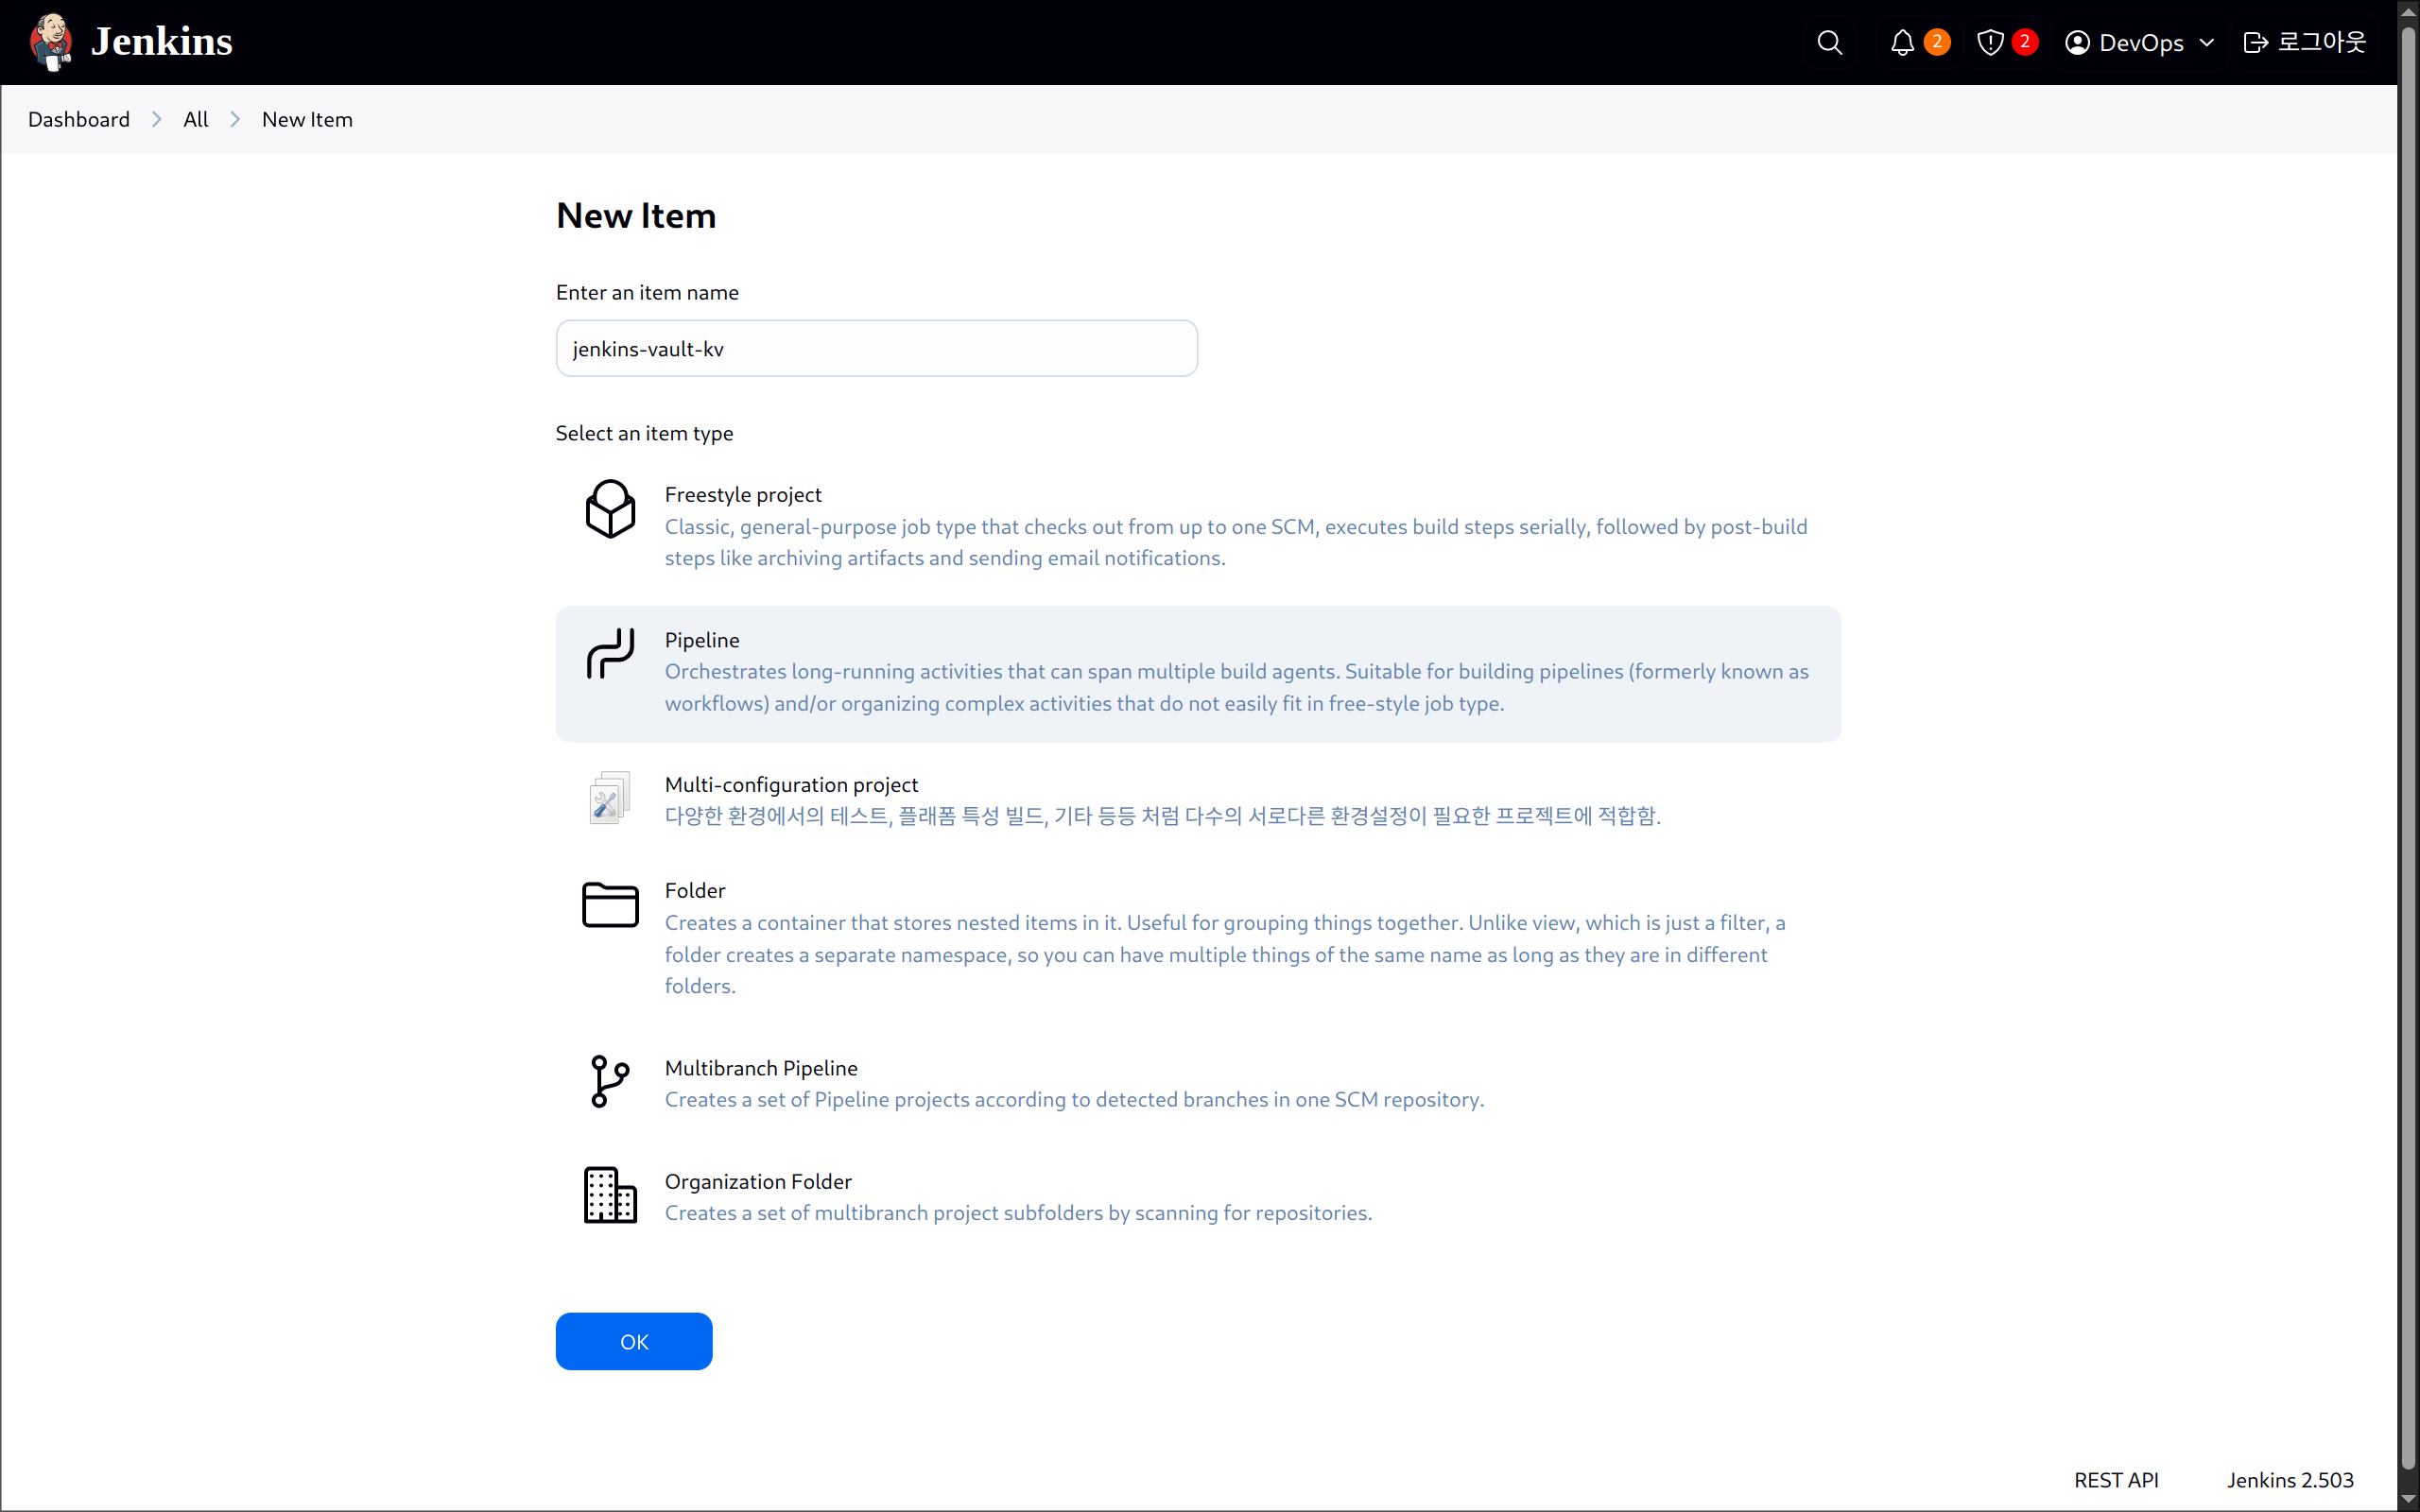
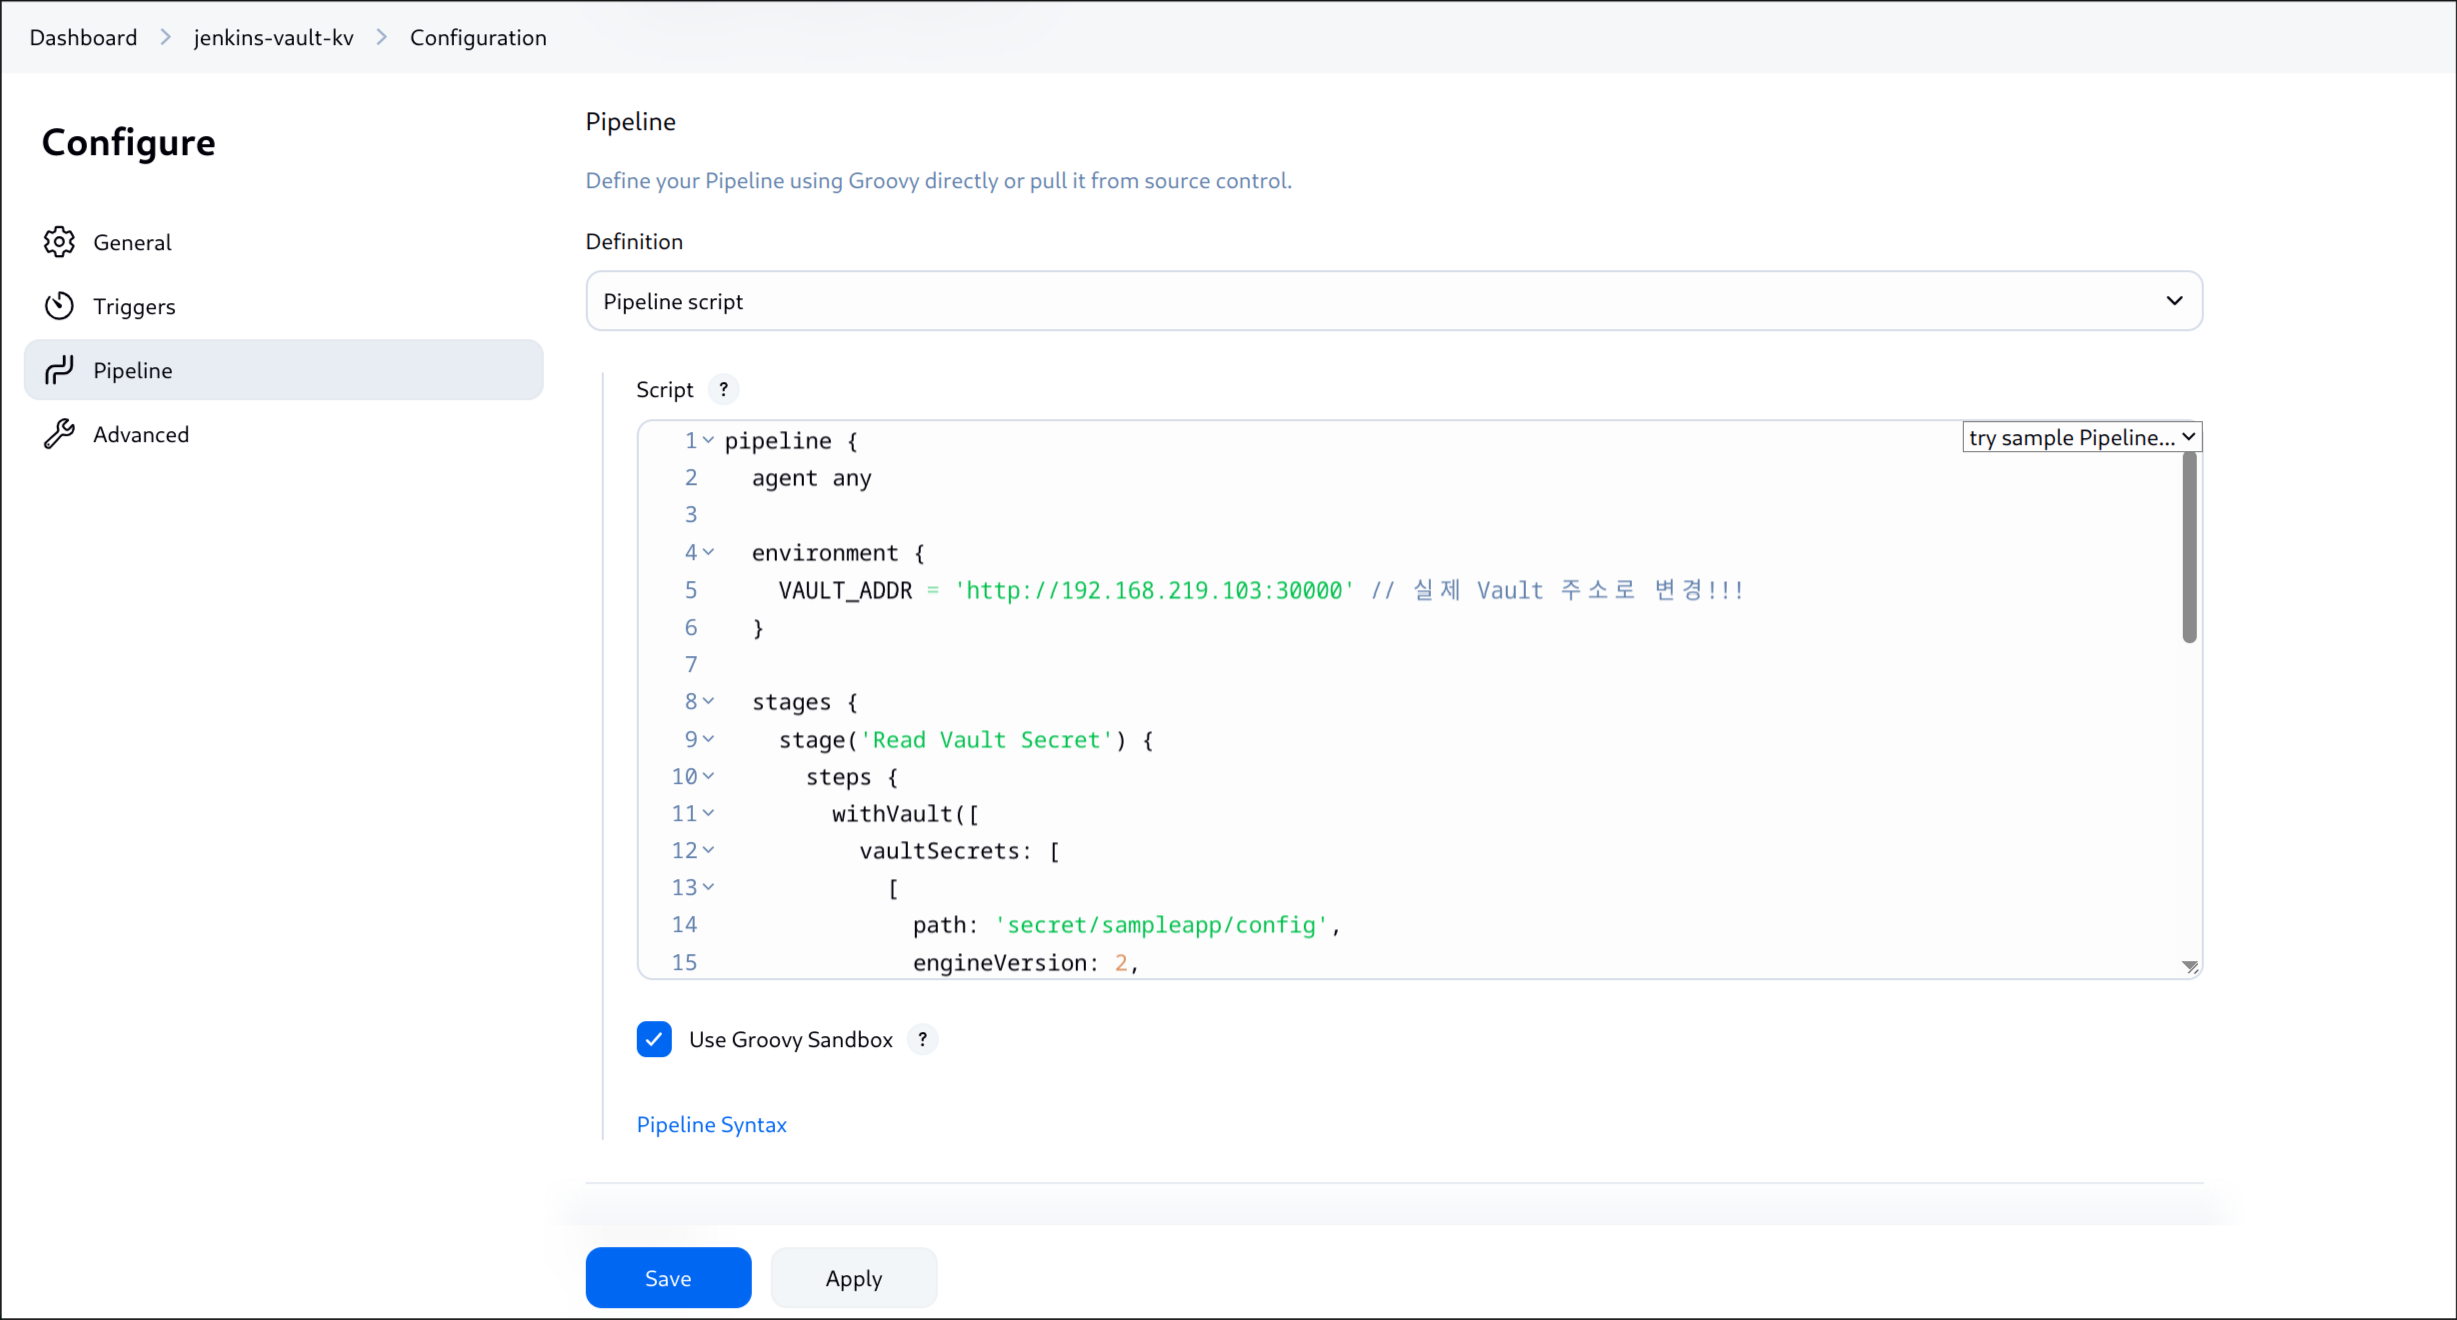
4. 젠킨스 파이프라인 생성
(1) New Item → Pipeline 선택
(2) jenkins-vault-kv 입력 후 생성
(3) Jenkinsfile 작성
1
2
| ifconfig | grep -n 192
79: inet 192.168.219.103 netmask 255.255.255.0 broadcast 192.168.219.255
|
1
2
3
4
5
6
7
8
9
10
11
12
13
14
15
16
17
18
19
20
21
22
23
24
25
26
27
28
29
30
31
32
33
34
35
36
37
38
39
| pipeline {
agent any
environment {
VAULT_ADDR = 'http://192.168.219.103:30000' // 실제 Vault 주소로 변경!!!
}
stages {
stage('Read Vault Secret') {
steps {
withVault([
vaultSecrets: [
[
path: 'secret/sampleapp/config',
engineVersion: 2,
secretValues: [
[envVar: 'USERNAME', vaultKey: 'username'],
[envVar: 'PASSWORD', vaultKey: 'password']
]
]
],
configuration: [
vaultUrl: "${VAULT_ADDR}",
vaultCredentialId: 'vault-approle-creds'
]
]) {
sh '''
echo "Username from Vault: $USERNAME"
echo "Password from Vault: $PASSWORD"
'''
script {
echo "Username (env): ${env.USERNAME}"
echo "Password (env): ${env.PASSWORD}"
}
}
}
}
}
}
|
(4) 저장
(5) Vault URL 주소 → IP 주소로 변경: 빌드 에러 원인
(6) 젠킨스 실행 결과
🔐 ArgoCD + Vault Plugin (Kubernetes Auth/AppRole) - CD
1. AppRole 기반 Vault 인증 정보 등록
1
2
3
4
5
6
7
8
9
10
11
12
13
14
15
16
17
| kubectl apply -f - <<EOF
kind: Secret
apiVersion: v1
metadata:
name: argocd-vault-plugin-credentials
namespace: argocd
type: Opaque
stringData:
VAULT_ADDR: "http://vault.vault:8200"
AVP_TYPE: "vault"
AVP_AUTH_TYPE: "approle"
AVP_ROLE_ID: bdff9f53-ec1e-eb9b-db47-268b29f3e9b7 # Role_ID
AVP_SECRET_ID: cbcf1705-4c45-50fa-010e-bf7dbdc58134 # Secret_ID
EOF
# 결과
secret/argocd-vault-plugin-credentials created
|
argocd-vault-plugin-credentials 확인
2. argocd로 네임스페이스 변경
1
2
3
| kubens argocd
# 결과
✔ Active namespace is "argocd"
|
3. ArgoCD Vault 플러그인 설치 및 구성
(1) 플러그인 메니페스트 준비
1
2
3
4
5
6
7
8
9
10
11
| git clone https://github.com/hyungwook0221/argocd-vault-plugin.git
cd argocd-vault-plugin/manifests/cmp-sidecar
# 결과
Cloning into 'argocd-vault-plugin'...
remote: Enumerating objects: 2610, done.
remote: Counting objects: 100% (256/256), done.
remote: Compressing objects: 100% (128/128), done.
remote: Total 2610 (delta 191), reused 128 (delta 128), pack-reused 2354 (from 2)
Receiving objects: 100% (2610/2610), 1.72 MiB | 10.33 MiB/s, done.
Resolving deltas: 100% (1539/1539), done.
|
(2) 생성될 메니페스트 확인
✅ 출력
1
2
3
4
5
6
7
8
9
10
11
12
13
14
15
16
17
18
19
20
21
22
23
24
25
26
27
28
29
30
31
32
33
34
35
36
37
38
39
40
41
42
43
44
45
46
47
48
49
50
51
52
53
54
55
56
57
58
59
60
61
62
63
64
65
66
67
68
69
70
71
72
73
74
75
76
77
78
79
80
81
82
83
84
85
86
87
88
89
90
91
92
93
94
95
96
97
98
99
100
101
102
103
104
105
106
107
108
109
110
111
112
113
114
115
116
117
118
119
120
121
122
123
124
125
126
127
128
129
130
131
132
133
134
135
136
137
138
139
140
141
142
143
144
145
146
147
148
149
150
151
152
153
154
155
156
157
158
159
160
161
162
163
164
| apiVersion: v1
data:
avp-helm.yaml: "---\napiVersion: argoproj.io/v1alpha1\nkind: ConfigManagementPlugin\nmetadata:\n
\ name: argocd-vault-plugin-helm\nspec:\n allowConcurrency: true\n\n # Note:
this command is run _before_ any Helm templating is done, therefore the logic
is to check\n # if this looks like a Helm chart\n discover:\n find:\n command:\n
\ - sh\n - \"-c\"\n - \"find . -name 'Chart.yaml' && find
. -name 'values.yaml'\"\n generate:\n # **IMPORTANT**: passing `${ARGOCD_ENV_HELM_ARGS}`
effectively allows users to run arbitrary code in the Argo CD \n # repo-server
(or, if using a sidecar, in the plugin sidecar). Only use this when the users
are completely trusted. If\n # possible, determine which Helm arguments are
needed by your users and explicitly pass only those arguments.\n command:\n
\ - sh\n - \"-c\"\n - |\n helm template $ARGOCD_APP_NAME
-n $ARGOCD_APP_NAMESPACE ${ARGOCD_ENV_HELM_ARGS} . |\n argocd-vault-plugin
generate -\n lockRepo: false\n"
avp-kustomize.yaml: |
---
apiVersion: argoproj.io/v1alpha1
kind: ConfigManagementPlugin
metadata:
name: argocd-vault-plugin-kustomize
spec:
allowConcurrency: true
# Note: this command is run _before_ anything is done, therefore the logic is to check
# if this looks like a Kustomize bundle
discover:
find:
command:
- find
- "."
- -name
- kustomization.yaml
generate:
command:
- sh
- "-c"
- "kustomize build . | argocd-vault-plugin generate -"
lockRepo: false
avp.yaml: |
apiVersion: argoproj.io/v1alpha1
kind: ConfigManagementPlugin
metadata:
name: argocd-vault-plugin
spec:
allowConcurrency: true
discover:
find:
command:
- sh
- "-c"
- "find . -name '*.yaml' | xargs -I {} grep \"<path\\|avp\\.kubernetes\\.io\" {} | grep ."
generate:
command:
- argocd-vault-plugin
- generate
- "."
lockRepo: false
kind: ConfigMap
metadata:
name: cmp-plugin
---
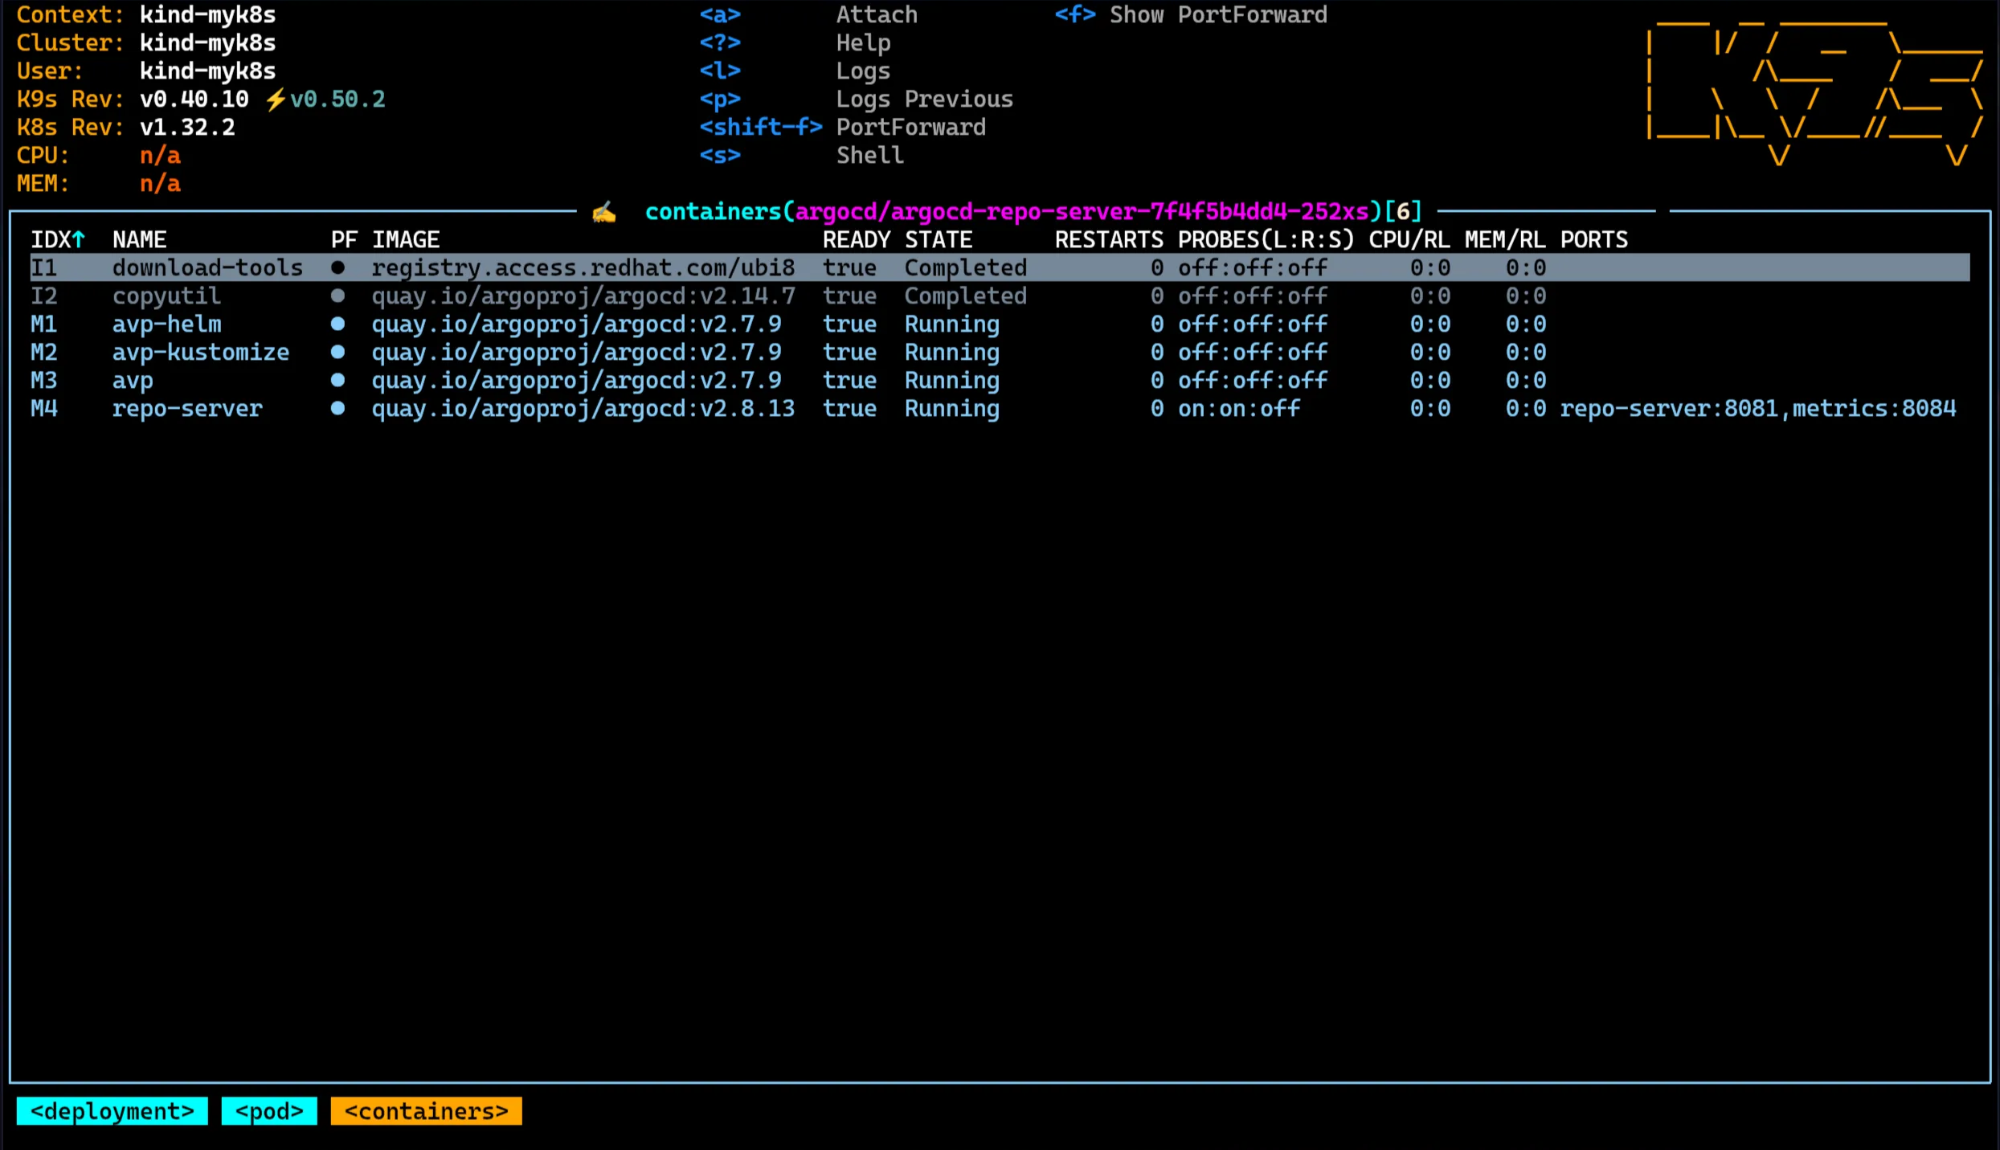
apiVersion: apps/v1
kind: Deployment
metadata:
name: argocd-repo-server
spec:
selector:
matchLabels:
app.kubernetes.io/name: argocd-repo-server
template:
metadata:
labels:
app.kubernetes.io/name: argocd-repo-server
spec:
automountServiceAccountToken: true
containers:
- command:
- /var/run/argocd/argocd-cmp-server
envFrom:
- secretRef:
name: argocd-vault-plugin-credentials
image: quay.io/argoproj/argocd:v2.7.9
name: avp-helm
securityContext:
runAsNonRoot: true
runAsUser: 999
volumeMounts:
- mountPath: /var/run/argocd
name: var-files
- mountPath: /home/argocd/cmp-server/plugins
name: plugins
- mountPath: /tmp
name: tmp
- mountPath: /home/argocd/cmp-server/config/plugin.yaml
name: cmp-plugin
subPath: avp-helm.yaml
- mountPath: /usr/local/bin/argocd-vault-plugin
name: custom-tools
subPath: argocd-vault-plugin
- command:
- /var/run/argocd/argocd-cmp-server
image: quay.io/argoproj/argocd:v2.7.9
name: avp-kustomize
securityContext:
runAsNonRoot: true
runAsUser: 999
volumeMounts:
- mountPath: /var/run/argocd
name: var-files
- mountPath: /home/argocd/cmp-server/plugins
name: plugins
- mountPath: /tmp
name: tmp
- mountPath: /home/argocd/cmp-server/config/plugin.yaml
name: cmp-plugin
subPath: avp-kustomize.yaml
- mountPath: /usr/local/bin/argocd-vault-plugin
name: custom-tools
subPath: argocd-vault-plugin
- command:
- /var/run/argocd/argocd-cmp-server
image: quay.io/argoproj/argocd:v2.7.9
name: avp
securityContext:
runAsNonRoot: true
runAsUser: 999
volumeMounts:
- mountPath: /var/run/argocd
name: var-files
- mountPath: /home/argocd/cmp-server/plugins
name: plugins
- mountPath: /tmp
name: tmp
- mountPath: /home/argocd/cmp-server/config/plugin.yaml
name: cmp-plugin
subPath: avp.yaml
- mountPath: /usr/local/bin/argocd-vault-plugin
name: custom-tools
subPath: argocd-vault-plugin
- image: quay.io/argoproj/argocd:v2.8.13
name: repo-server
initContainers:
- args:
- curl -L https://github.com/argoproj-labs/argocd-vault-plugin/releases/download/v$(AVP_VERSION)/argocd-vault-plugin_$(AVP_VERSION)_linux_amd64
-o argocd-vault-plugin && chmod +x argocd-vault-plugin && mv argocd-vault-plugin
/custom-tools/
command:
- sh
- -c
env:
- name: AVP_VERSION
value: 1.18.0
image: registry.access.redhat.com/ubi8
name: download-tools
volumeMounts:
- mountPath: /custom-tools
name: custom-tools
volumes:
- configMap:
name: cmp-plugin
name: cmp-plugin
- emptyDir: {}
name: custom-tools
|
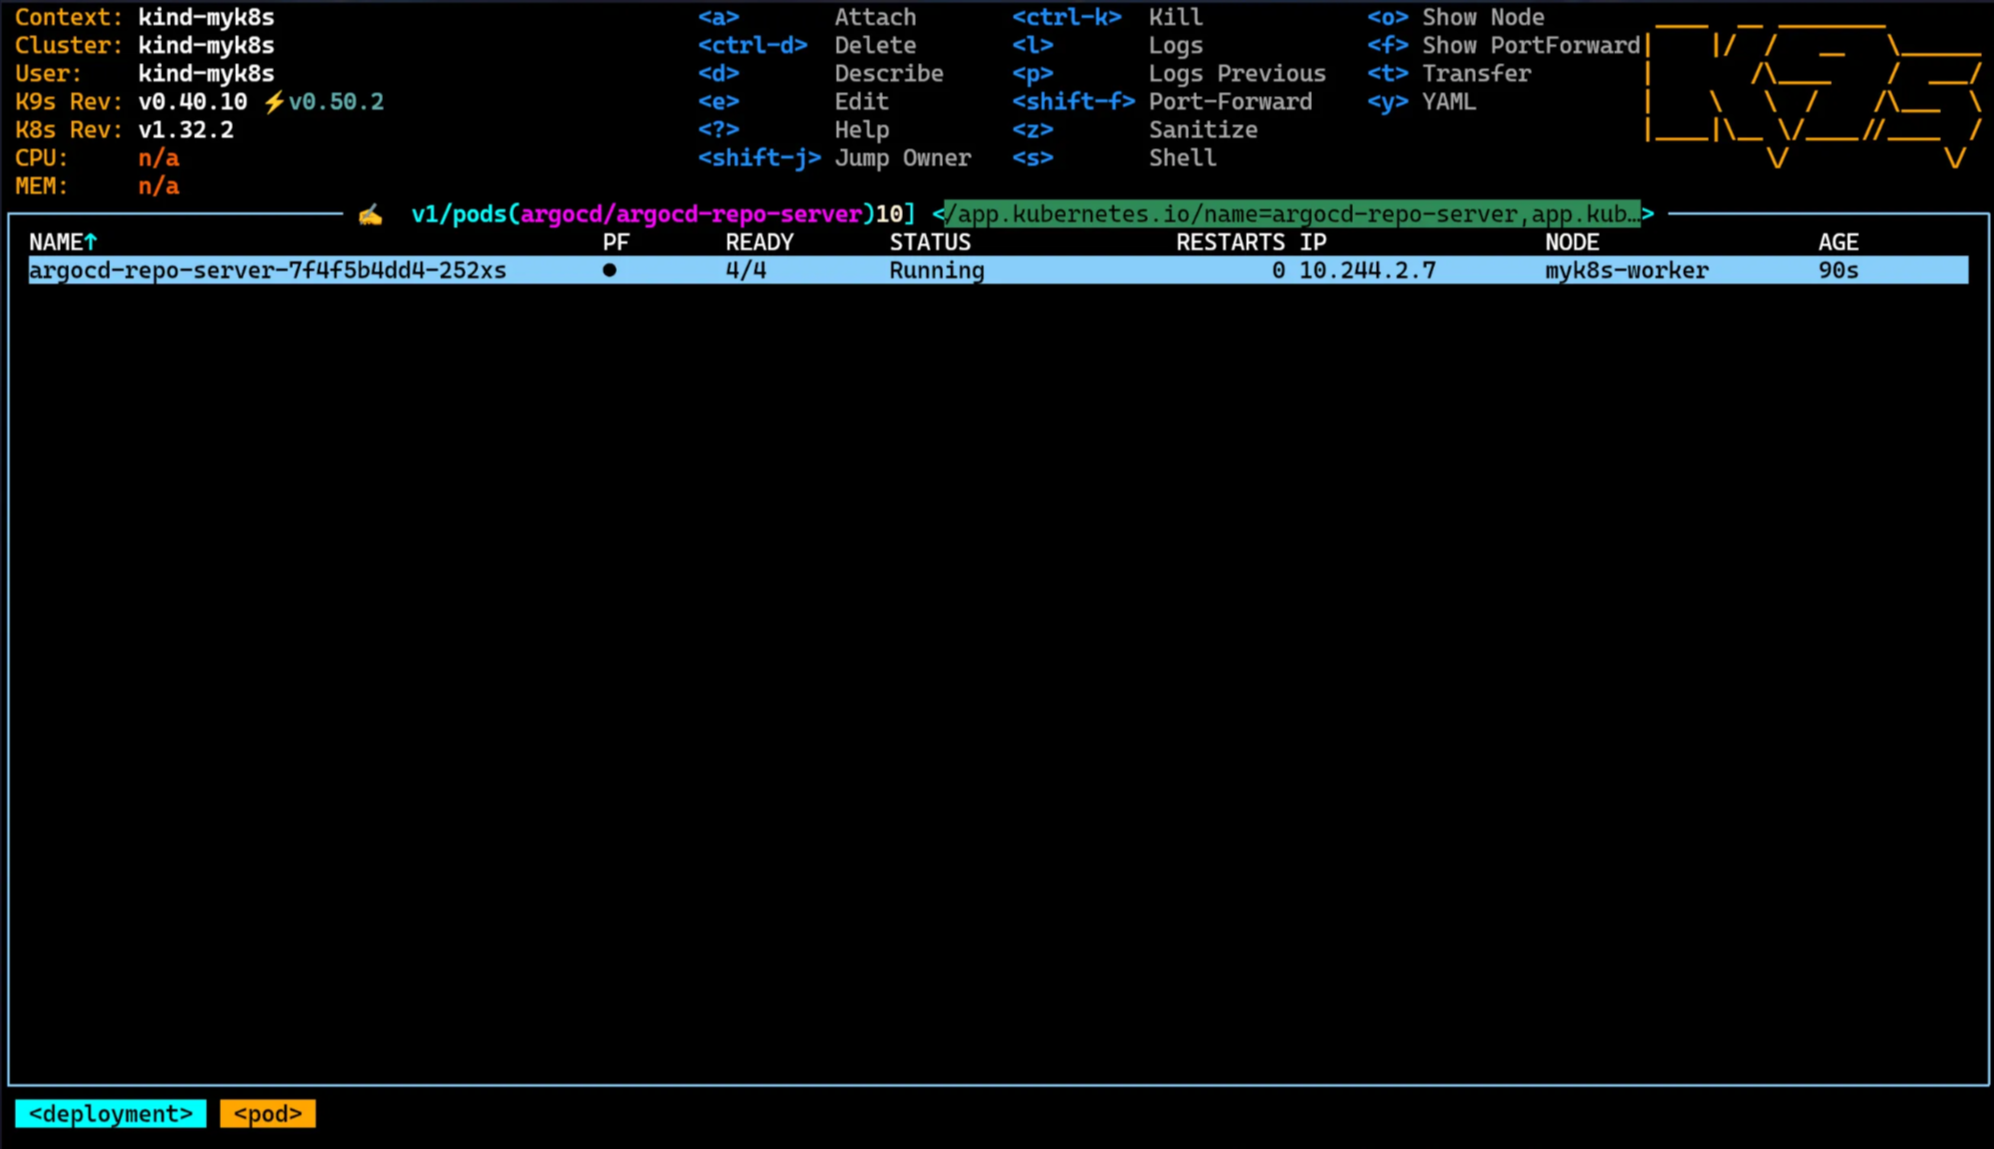
(3) -k 옵션으로 kusomize 실행
1
2
3
4
5
6
| kubectl apply -n argocd -k .
# 결과
configmap/cmp-plugin created
Warning: resource deployments/argocd-repo-server is missing the kubectl.kubernetes.io/last-applied-configuration annotation which is required by kubectl apply. kubectl apply should only be used on resources created declaratively by either kubectl create --save-config or kubectl apply. The missing annotation will be patched automatically.
deployment.apps/argocd-repo-server configured
|
4. Helm 기반 Application 배포 with Vault Plugin
- GitHub에 저장된 Helm Repo을 배포하며, Helm 메니페스트 내에 변수로 치환된 값(username/password)을 CD 단계에서 Vault 통해서 읽고 렌더링하여 배포
1
2
3
4
5
6
7
8
9
10
11
12
13
14
15
16
17
18
19
20
21
22
23
24
25
26
27
28
29
30
| kubectl apply -n argocd -f - <<EOF
apiVersion: argoproj.io/v1alpha1
kind: Application
metadata:
name: demo
namespace: argocd
finalizers:
- resources-finalizer.argocd.argoproj.io
spec:
destination:
namespace: argocd
server: https://kubernetes.default.svc
project: default
source:
path: infra/helm
repoURL: https://github.com/hyungwook0221/spring-boot-debug-app
targetRevision: main
plugin:
name: argocd-vault-plugin-helm
env:
- name: HELM_ARGS
value: -f new-values.yaml
syncPolicy:
automated:
prune: true
selfHeal: true
EOF
# 결과
application.argoproj.io/demo created
|